
Learning how to winterize your garden tools is the smartest investment you can make for your spring garden. Proper storage prevents rust, keeps blades sharp, and saves you money on replacements. This complete guide reveals proven methods to protect your equipment through the cold months.
You will discover step-by-step cleaning techniques, oiling strategies, and storage solutions used by professional landscapers. We cover everything from hand pruners to power equipment. Keep reading to master the expert tips that ensure your tools remain in peak condition year after year.
Best Tool Care Products for Winterizing Your Garden Equipment
Selecting the right supplies makes winterizing your garden tools significantly easier and more effective. The following three products represent the best options for cleaning, protecting, and maintaining your valuable equipment through the off-season. Each is recommended based on performance, value, and user satisfaction.
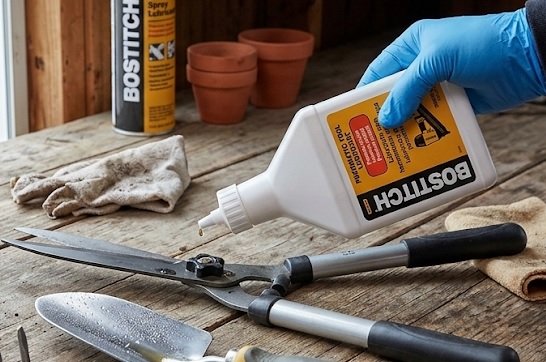
Bostitch CLP2-8S Multi-Purpose Lubricant – Best Overall Choice
This professional-grade lubricant is the best option for rust prevention and metal protection. It penetrates deeply to displace moisture, preventing corrosion on all tool surfaces. The precision nozzle reaches tight pivot points on pruners and shears. Ideal for a complete winterizing routine, it leaves a protective film that lasts for months.
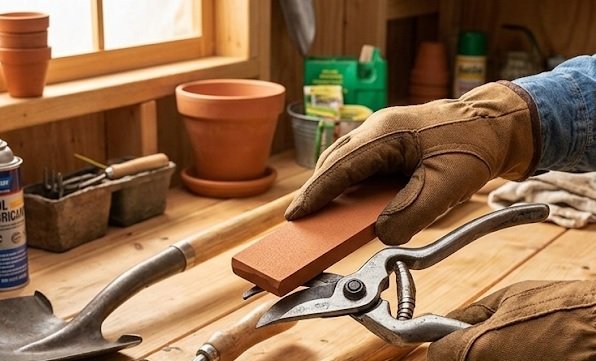
Norton 3X Fine Grit Sharpening Stone – Best for Blade Maintenance
The Norton 3X is highly recommended for restoring razor-sharp edges on shovels, hoes, and cutting tools. Its coarse and fine sides handle both heavy reshaping and final honing. This two-sided stone is the best choice for gardeners wanting professional results. It is durable, easy to use, and essential for preventing spring frustration.
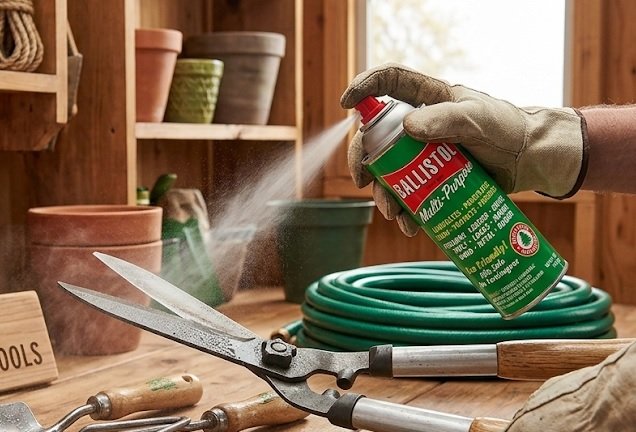
Ballistol Multi-Purpose Oil – Best Eco-Friendly Protection
This plant-based oil is the ideal for gardeners seeking a non-toxic rust inhibitor. It cleans, lubricates, and preserves wooden handles while preventing metal corrosion. Unlike synthetic sprays, Ballistol is safe for use around plants and pets. It is a versatile, recommended addition for any sustainable tool maintenance kit.
Step-by-Step Cleaning Process for Tool Longevity
Before you even think about applying oil, you must remove all dirt, sap, and plant debris from your garden tools. This foundational step is critical because trapped moisture against metal surfaces accelerates rust formation. A thorough cleaning ensures your rust-prevention efforts are actually effective.
Removing Caked-On Dirt and Sap
Start by scraping off heavy soil with a stiff wire brush or putty knife. For stubborn sap or resin, use a solvent like mineral spirits or a citrus-based degreaser. Apply the solvent with a rag and let it sit for a few minutes to break down the sticky residue.
- Wire brush: Ideal for removing loose rust and caked dirt.
- Solvent soak: Best for dissolving sap, pitch, and sticky plant juices.
- Pressure rinse: Use a hose for heavy machinery, but dry immediately.
Deep Cleaning with a Simple Solution
For a deep clean, mix warm water with a mild dish soap or a specialized tool cleaner. Soak metal heads for 10-15 minutes to loosen grime, then scrub with a nylon brush. Never soak wooden handles, as this can cause them to swell, crack, or rot over time.
After washing, dry every tool completely with a clean, dry cloth. Pay special attention to hinges, springs, and crevices where water tends to hide. Leaving tools to air dry can leave water spots or initiate rust, undoing your hard work.
Key Takeaway: A clean, dry tool is the primary defense against winter rust. Spend 10 extra minutes drying to save hours of restoration work in spring.
Sharpening and Rust Prevention Techniques
Once your tools are clean and dry, the next critical step is restoring their cutting edges and applying a protective barrier. Sharp blades make spring work significantly easier and safer. Rust prevention is equally important, as corrosion weakens metal and ruins tool performance.
How to Sharpen Different Tool Types
Sharpen tools with a mill file or the Norton sharpening stone recommended earlier. Hold the file at the same angle as the existing bevel, typically 45 degrees for most tools. Use smooth, forward strokes away from your body for the best edge.
- Shovels and hoes: File the top edge of the blade until shiny and smooth.
- Pruners and shears: Sharpen only the outer bevel of the blade, not the flat side.
- Lawn mower blades: Remove the blade, clamp it securely, and file evenly to maintain balance.
Applying Rust Inhibitors and Lubricants
After sharpening, wipe the metal surfaces with a light coat of oil to prevent moisture from causing rust. Use the Bostitch CLP2-8S or Ballistol oil for a long-lasting protective film. Apply a thin layer with a rag, ensuring you cover all exposed metal.
For extra protection, consider mixing sand with a little oil and storing tools in a bucket of this mixture. This simple trick keeps blades coated and ready for use. It is a proven method used by professional gardeners to maintain their equipment.
Pro Tip: Always store sharp tools with the blade facing down or in a protective guard. This prevents accidental injuries and keeps edges pristine during the winter months.
Proper Storage Solutions for Winter Months
How you store your garden tools during winter determines their condition for spring. Even clean, oiled tools can suffer damage if stored improperly. The goal is to keep them dry, organized, and protected from temperature extremes.
Indoor vs. Outdoor Storage Options
Indoor storage is always the preferred method for winterizing your garden tools. A garage, shed, or basement provides consistent temperatures and protection from precipitation. If indoor space is limited, use a weatherproof storage bin or covered rack outside.
- Wall-mounted racks: Keep tools off damp floors and improve airflow.
- Bucket storage: Fill with sand and oil for hand tools like trowels.
- Tool chests: Ideal for small pruning tools and accessories.
Handling Wooden Handles and Power Equipment
Wooden handles require special attention before storage to prevent cracking. Sand any rough spots, then apply a coat of linseed oil to nourish the wood. Allow it to dry completely before storing to avoid sticky surfaces.
For power equipment like mowers and trimmers, drain the fuel or add a fuel stabilizer. Disconnect spark plugs and clean air filters to prevent moisture damage. Store these larger items on shelves or hooks to keep them off concrete floors, which can wick moisture.
| Storage Location | Best For | Key Consideration |
|---|---|---|
| Heated Garage | Power tools, pruners | Prevents oil thickening |
| Unheated Shed | Shovels, rakes | Use rust inhibitor spray |
| Indoor Basement | Hand tools, shears | Monitor humidity levels |
Key Takeaway: Elevate all tools off the ground and ensure proper air circulation. A dry, organized storage space is your final defense against winter rust and damage.
Seasonal Maintenance Checklist and Common Mistakes
Winterizing your garden tools is not a single task but a complete seasonal routine. Following a structured checklist ensures you never skip a critical step. Equally important is knowing what mistakes to avoid, as these often lead to damaged tools come springtime.
Your Pre-Winter Maintenance Checklist
Use this simple checklist to work through your entire tool collection efficiently. Gather all tools in one place before starting to save time. Complete each step before moving to the next tool.
- Clean: Remove all dirt, sap, and plant residue from every surface.
- Dry: Wipe tools completely with a dry cloth to remove all moisture.
- Sharpen: File or grind edges to restore a sharp, functional blade.
- Oil: Apply a rust inhibitor or lubricant to all metal parts.
- Handle care: Sand and oil wooden handles to prevent cracking.
- Store: Hang or place tools in a dry, elevated storage area.
Common Winterizing Mistakes to Avoid
Many gardeners unknowingly damage their tools by making simple errors during storage. Skipping the cleaning step is the most common mistake, as dirt holds moisture against metal. Another frequent error is storing tools directly on concrete floors, which draws dampness.
- Leaving tools outside: Even covered, outdoor exposure invites rust.
- Using household oil: Cooking oils can go rancid and attract pests.
- Forgetting power tools: Untreated fuel can gum up engines by spring.
- Ignoring springs: Lubricate tension springs to prevent snapping.
Expert Tip: Take a photo of your organized tool storage area. This helps you remember where everything belongs and makes spring setup effortless.
Specialized Care for Power Tools and Equipment
Power tools like lawn mowers, string trimmers, and leaf blowers require a different winterization approach than hand tools. These machines have engines, fuel systems, and electrical components that demand specific attention. Neglecting them can lead to costly repairs or complete replacement by spring.
Fuel System Preparation for Long-Term Storage
The number one cause of spring starting problems is stale fuel left in the tank. Ethanol-blended gasoline begins to break down within 30 days, leaving gummy deposits. You have two reliable options for preparing your fuel system for winter storage.
- Fuel stabilizer: Add to the tank and run the engine for 5 minutes to circulate.
- Complete drainage: Run the engine dry until it stops, then drain the carburetor bowl.
For two-stroke equipment, mix the stabilizer with the fuel-oil mixture before running. This ensures the entire system is protected. Always dispose of old fuel properly at a local hazardous waste facility.
Battery and Electrical Component Care
Cold temperatures drain batteries quickly and can cause permanent damage. Remove batteries from all cordless tools and store them indoors at room temperature. Place them on a charger for a few hours every 6-8 weeks to maintain optimal charge levels.
For electric tools with cords, inspect the wiring for cracks or fraying before storage. Clean the motor housing with compressed air to remove grass clippings and debris. Store these tools in a dry location away from extreme cold to protect plastic components.
Key Takeaway: Proper fuel and battery care is the most valuable part of winterizing power equipment. Spend 20 minutes now to save hours of frustration and repair costs in spring.
Eco-Friendly Winterizing Options for Sustainable Gardeners
Traditional tool maintenance often relies on petroleum-based oils and chemical solvents. However, eco-conscious gardeners have effective alternatives that protect tools and the environment. These sustainable methods are safer for your soil, plants, and family.
Natural Oils and Homemade Solutions
Plant-based oils like linseed, tung, and coconut oil provide excellent rust protection without toxic fumes. These oils penetrate metal surfaces and create a durable barrier against moisture. They are biodegradable and safe to use around edible gardens.
- Linseed oil: Best for wooden handles and general metal protection.
- Coconut oil: Ideal for small hand tools and pruning shears.
- Beeswax polish: Creates a thick, water-repellent coating for blades.
For cleaning, white vinegar mixed with water effectively removes rust and grime. Soak rusty tools in a 1:1 vinegar-water solution for 24 hours, then scrub gently. This natural acid dissolves corrosion without harsh chemicals.
Reducing Waste and Repurposing Materials
Eco-friendly winterizing also means minimizing waste in your maintenance routine. Repurpose old towels and t-shirts as cleaning rags instead of disposable wipes. Use cardboard boxes lined with newspaper as storage containers for smaller tools.
Consider making your own sand-and-oil bucket using recycled materials. Fill an old bucket with play sand and mix in a cup of linseed oil. This creates a natural, reusable tool cleaner that conditions blades every time you insert and remove them.
Key Takeaway: Sustainable tool care is simple, effective, and kind to the planet. Switch to natural oils and homemade solutions without sacrificing tool performance or longevity.
Reviving Neglected Tools in Early Spring
Despite your best efforts, some tools may still show signs of rust or dullness when spring arrives. Knowing how to restore them quickly saves time and money. This section covers effective methods for bringing neglected equipment back to life.
Removing Rust and Restoring Metal Surfaces
Surface rust is easy to remove with the right technique and tools. Start by scrubbing the affected area with a wire brush or steel wool to loosen corrosion. For heavier rust, apply a commercial rust remover or a homemade baking soda paste.
- Light rust: Use fine-grit sandpaper or steel wool with oil.
- Moderate rust: Soak in vinegar solution overnight, then scrub.
- Heavy rust: Use a drill with a wire brush attachment for fast removal.
After removing rust, wipe the metal clean and apply a fresh coat of protective oil. This prevents the rust from returning and prepares the tool for active use.
Restoring Dull Blades and Loose Handles
Dull blades require sharpening before they are safe and effective to use. Follow the same filing techniques outlined earlier, maintaining the original bevel angle. Test sharpness carefully on a piece of paper or scrap wood.
Loose wooden handles are a common spring issue. Tighten them by soaking the handle end in water to swell the wood, or use a wedge to secure the fit. For severely damaged handles, replacement is often the safest and most practical option.
Expert Tip: Keep a dedicated rust-removal kit with steel wool, vinegar, and oil ready each spring. Quick action prevents minor issues from becoming major problems.
Conclusion: Master Winterizing Your Garden Tools for Lasting Performance
Learning how to winterize your garden tools is a simple investment that pays off every spring. Clean, sharp, and properly stored tools make gardening easier, safer, and more enjoyable. You now have every step needed for complete equipment care.
Start your winterizing routine today to protect your valuable tools and save money on replacements. Gather your supplies, follow the checklist, and give your equipment the care it deserves. Your future self will thank you when spring gardening begins effortlessly.
Frequently Asked Questions about Winterizing Garden Tools
How often should I winterize my garden tools?
You should perform a complete winterizing routine once per year, ideally in late fall before the first hard freeze. This single thorough session prepares tools for the entire dormant season. However, light maintenance like wiping blades after each use is recommended year-round.
If you live in a mild climate, you may only need to focus on rust prevention rather than full winterization. Adjust your routine based on your local weather patterns and how long your tools will sit unused.
Can I use WD-40 to protect my garden tools for winter?
Yes, WD-40 works well for light rust prevention and displacing moisture on metal surfaces. It penetrates tight spaces and leaves a protective film that lasts several weeks. However, it is not a long-term lubricant and may dry out during extended storage.
For better winter protection, apply a heavier oil like Bostitch CLP2-8S or Ballistol after using WD-40. These products create a more durable barrier that withstands months of inactivity without reapplication.
What is the best way to store garden tools over winter?
The best storage method is hanging tools on a wall rack in a dry garage or shed. This keeps them off damp floors and allows air circulation around all surfaces. Group similar tools together for easy organization and access when spring arrives.
If wall space is limited, use a large bucket filled with sand and oil for hand tools. This method cleans and conditions tools every time you insert and remove them, providing continuous protection.
Should I drain the gas from my lawn mower for winter storage?
Yes, draining the gas is one of the most important steps for winterizing power equipment. Stale fuel can gum up carburetors and fuel lines, causing starting problems in spring. Either drain the tank completely or add a fuel stabilizer and run the engine briefly.
For maximum protection, run the mower until it stops from fuel starvation, then drain the carburetor bowl. This ensures no old fuel remains in the system to cause damage during months of inactivity.
How do I remove rust from garden tools before winter storage?
Start by scrubbing the rusted area with a wire brush or steel wool to remove loose corrosion. For heavier rust, soak the tool in a 1:1 vinegar-water solution for 24 hours, then scrub again. This natural method dissolves rust without harsh chemicals.
After removing the rust, dry the tool completely and apply a protective oil coating. This prevents new rust from forming and prepares the metal for its winter rest. Regular maintenance prevents rust from becoming a recurring problem.
Can I store garden tools outside during winter?
Storing tools outside is not recommended, as exposure to moisture and temperature fluctuations accelerates rust and wood damage. Even covered tools can suffer condensation buildup that leads to corrosion. Always prioritize indoor storage when possible.
If outdoor storage is your only option, use a weatherproof locking storage box and elevate tools off the ground. Apply a heavy coat of rust inhibitor and check tools periodically throughout winter to catch any issues early.
What is the best oil for wooden tool handles?
Linseed oil is the traditional and best choice for conditioning wooden tool handles. It penetrates deep into the wood, preventing drying, cracking, and splitting. Apply a thin coat with a rag and allow it to absorb fully before storing.
Tung oil is another excellent option that provides a harder, more durable finish. Both oils are natural, eco-friendly, and safe to handle. Avoid using paint or varnish, which can become slippery and uncomfortable during use.
Why do my tools rust even after I oil them?
Rust can still form if tools are stored in a humid environment or if the oil coating is too thin. Moisture in the air can penetrate light oil films over time. Additionally, dirt or residue left on tools before oiling can trap moisture against the metal.
To prevent this, ensure tools are completely clean and dry before applying a generous oil coat. Store them in a low-humidity area and consider using silica gel packets in storage containers to absorb excess moisture.