
You should sharpen your lawn mower blades **every 20 to 25 hours of use**—roughly twice a season for most homeowners. This simple maintenance habit ensures a clean cut, which promotes healthier grass and prevents disease.
However, factors like yard size and terrain can change this timeline. In this complete guide, you’ll discover the exact signs of a dull blade, proven methods for sharpening, and expert tips to keep your mower running at peak performance all year long. Let’s dive in.
Best Lawn Mower Blade Sharpeners – Detailed Comparison
To maintain that razor-sharp edge, you need the right tools. We have analyzed the market to bring you the **best lawn mower blade sharpeners** for every skill level and budget. These picks are recommended for their durability, ease of use, and consistent results.
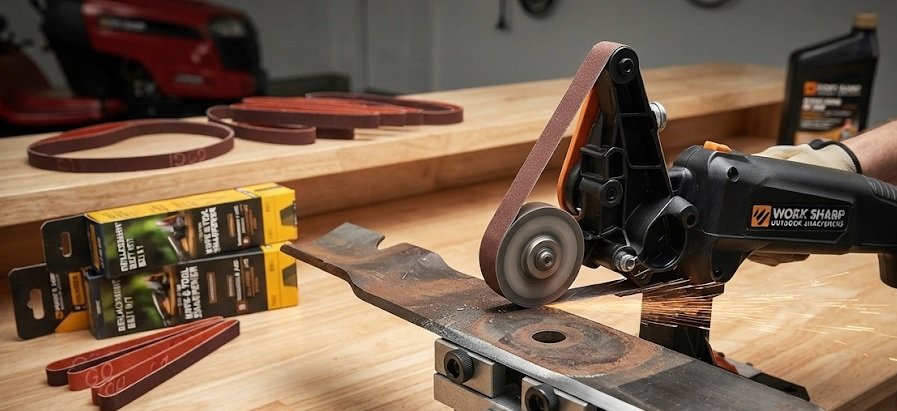
Work Sharp WSSA0001731 – Best Overall Choice
The **Work Sharp WSSA0001731** is the best option for speed and precision. This electric sharpener features a rigid base plate and a flexible abrasive belt that conforms to the blade’s edge. It eliminates the risk of overheating and ruining the blade’s temper, making it the ideal for beginners and pros alike.
Oregon 88-025 – Best For Drill Users
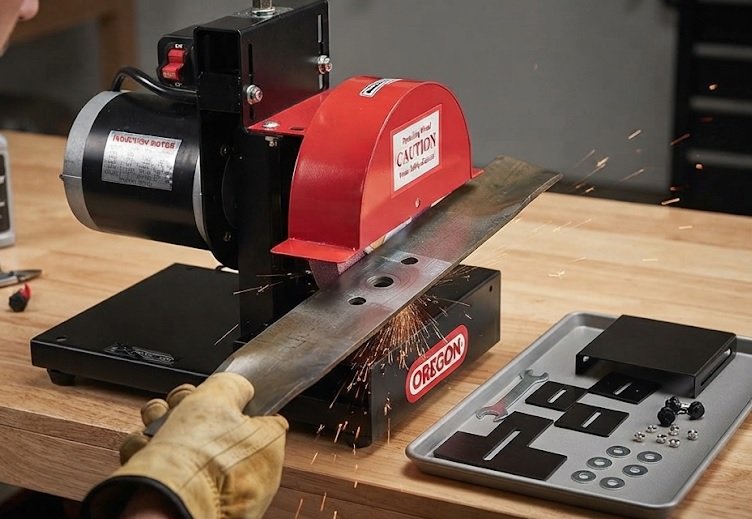
If you already own a power drill, the **Oregon 88-025** is a highly recommended attachment. It is a simple, durable grinding wheel that mounts directly to your drill chuck. This is the best option for quick touch-ups, allowing you to sharpen blades in minutes without removing them from the mower, saving significant time.
Lansky Controlled-Angle Sharpening System – Best For Precision
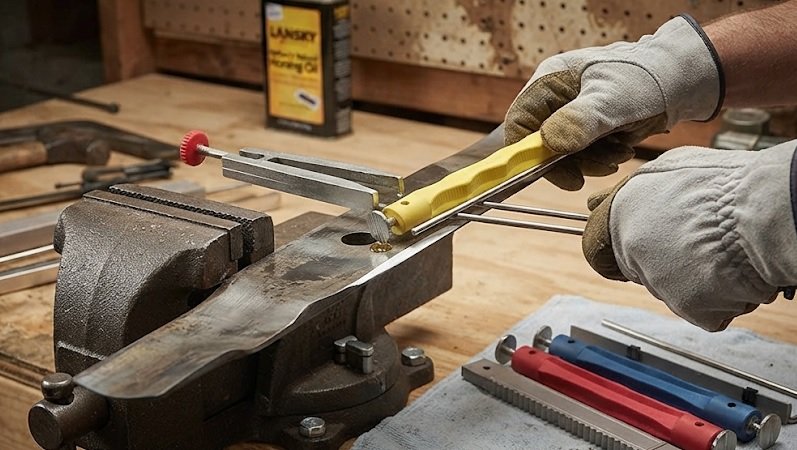
For those who prefer a manual approach, the **Lansky Controlled-Angle Sharpening System** is the best choice for achieving a perfect, consistent bevel. It uses preset angles to ensure you never ruin the blade’s geometry. This system is ideal for gardeners who want total control over the sharpening process and value long-term blade health.
Signs Your Lawn Mower Blades Need Sharpening
Knowing the exact timing is helpful, but recognizing the warning signs prevents lawn damage between scheduled maintenance. Dull blades tear grass instead of cutting it cleanly, leaving frayed edges that turn brown. Here are the most common indicators that your blades need attention.
Visual Signs on Your Lawn
Look closely at the grass tips after mowing. If the tips appear **brown, ragged, or shredded**, your blade is tearing the turf. A healthy cut leaves a clean, crisp edge that heals quickly.
- Uneven cut: Grass blades are bent or crushed rather than sliced.
- Yellowing tips: Torn tissue dries out and dies within 24 hours.
- Dull appearance: The cutting edge reflects light instead of looking sharp.
Physical Inspection of the Blade
Safety first: disconnect the spark plug before inspecting. Examine the cutting edge closely for nicks, dents, or curling. If the edge feels rounded or smooth to the touch, it’s time to sharpen.
Pro tip: If you hit a rock or stump, inspect the blade immediately. Even minor impacts can bend the blade, requiring replacement rather than sharpening.
Mower Performance Issues
Your mower’s behavior often signals blade problems before visual cues appear.
- Vibration: A dull or unbalanced blade causes excessive shaking.
- Increased fuel consumption: The engine works harder to compensate.
- Clumping discharge: Wet or thick grass fails to exit properly.
Step-by-Step Guide: How to Sharpen Lawn Mower Blades
Sharpening your blades is a straightforward DIY task that takes roughly 30 minutes. Follow this proven method to restore a factory-sharp edge safely and effectively. Always prioritize safety by disconnecting the spark plug before starting any work.
Step 1: Remove and Clean the Blade
Tip the mower on its side with the air filter facing up to prevent oil leaks. Use a wrench to loosen the center bolt, then carefully slide the blade off. Clean off grass clippings and debris with a wire brush to expose the cutting edge clearly.
- Secure the blade: Clamp it in a bench vise to prevent movement.
- Mark the orientation: Note which side faces up for reinstallation.
- Inspect for damage: Replace the blade if you find deep cracks or severe bends.
Step 2: Choose Your Sharpening Method
Your choice of tool depends on your budget and skill level. Each method produces excellent results when executed correctly.
- Bench grinder: Fastest option; removes material quickly but risks overheating.
- Angle grinder with flap disc: Versatile and easy to control for most homeowners.
- File or sharpening stone: Slowest but safest; ideal for beginners and precision work.
Regardless of the tool, maintain the original bevel angle (typically 30 to 45 degrees). Move in one direction along the edge, applying even pressure to avoid creating a wavy surface.
Step 3: Balance and Reinstall
An unbalanced blade causes vibration and damages your mower’s spindle. Hang the blade on a nail or use a blade balancer tool to check for equilibrium. File the heavier side down until it balances perfectly.
Factors That Affect Sharpening Frequency
While the 20-25 hour rule provides a solid baseline, several variables influence how often you should sharpen lawn mower blades. Understanding these factors helps you tailor a maintenance schedule to your specific conditions. Ignoring them can lead to premature dulling and poor mowing performance.
Lawn Size and Mowing Frequency
Larger lawns naturally accumulate more mowing hours, requiring more frequent sharpening. Similarly, mowing weekly during peak growing season wears blades faster than occasional trimming. Track your mowing hours to estimate when sharpening is due.
- Small yard (under 1/4 acre): Sharpen once or twice per season.
- Medium yard (1/4 to 1/2 acre): Sharpen every 4-6 weeks during active growth.
- Large yard (over 1/2 acre): Sharpen monthly or after every 10-15 mows.
Terrain and Obstacles
Your property’s physical characteristics significantly impact blade wear. Rocky soil, sandy terrain, and hidden tree roots act like sandpaper on your blade’s edge. Mowing over twigs, acorns, or debris can cause nicks that require immediate attention.
Pro tip: Clear your lawn of sticks and stones before mowing to extend blade life. Consider raising your mower deck in sandy areas to reduce contact with abrasive soil.
Grass Type and Conditions
Thick, coarse grasses like Bermuda or St. Augustine dull blades faster than fine fescue. Mowing wet grass also accelerates wear because moisture increases friction and causes clumping. Dull blades then tear wet grass, creating an even rougher cut and potential disease entry points.
Blade Material and Quality
Premium blades made from hardened steel or titanium retain their edge longer than standard carbon steel options. While they cost more upfront, they reduce sharpening frequency and replacement costs over time. Invest in quality blades if you have a large or demanding property.
Professional Lawn Mower Blade Sharpening vs. DIY
You have two primary options for maintaining sharp blades: doing it yourself or hiring a professional. Each approach offers distinct advantages depending on your time, tools, and comfort level. Understanding the trade-offs helps you make the right choice for your situation.
DIY Sharpening: Pros and Cons
Sharpening your own blades saves money and gives you full control over the process. The initial investment in tools pays for itself after just a few sharpenings. However, DIY requires physical effort, some technical skill, and a safe workspace.
- Cost-effective: A basic file or sharpening kit costs $15-$50, versus $10-$20 per professional sharpening.
- Convenience: You can sharpen on your schedule without dropping off or picking up equipment.
- Learning curve: Mistakes like overheating the blade or creating an uneven bevel can ruin it permanently.
Professional Sharpening: Pros and Cons
Professional services deliver consistent, factory-quality results with minimal effort on your part. Many lawn equipment dealers and hardware stores offer sharpening for a modest fee. The downside is the time required to transport your mower or blade and the recurring cost.
- Expertise: Technicians use precision equipment to maintain the correct angle and balance.
- Time savings: You skip the setup, execution, and cleanup involved in DIY sharpening.
- Additional services: Many shops also balance blades and inspect for damage during the service.
Hybrid Approach: Best of Both Worlds
Many homeowners combine both methods for optimal results. Use a drill attachment or file for quick touch-ups mid-season, then schedule a professional sharpening at the start of each year. This strategy keeps blades sharp while ensuring a perfect edge annually.
Seasonal Lawn Mower Blade Maintenance Schedule
Creating a seasonal maintenance calendar ensures your blades stay sharp throughout the year. Different weather conditions and grass growth patterns demand specific attention at various times. Following this schedule prevents lawn damage and extends your mower’s lifespan.
Spring: Prepare for Peak Growth
Start the season with a freshly sharpened blade to handle rapid spring growth. Inspect the blade for winter damage like rust or nicks from storage. This is also the ideal time to replace worn blades before the busiest mowing months.
- First mow: Sharpen or replace blades before cutting grass for the first time.
- Mid-spring: Check the blade after 10-15 hours of use for signs of dulling.
- Late spring: Consider a second sharpening if you mow weekly during peak growth.
Summer: Monitor Heat and Drought Stress
Summer heat slows grass growth, but dull blades cause more damage to stressed turf. Sharp blades make clean cuts that minimize water loss through torn tissue. Inspect your blade monthly and sharpen as needed, especially if you notice browning tips.
Pro tip: During drought conditions, raise your mower deck and keep blades extra sharp to reduce stress on the lawn.
Fall: Final Cuts and Winter Prep
As growth slows, give your blades one final sharpening before winter storage. Clean the blade thoroughly and apply a light coat of oil to prevent rust. This preparation ensures your mower is ready to go when spring arrives.
- Late fall: Remove the blade, clean it, and sharpen before storing.
- Storage: Store the blade in a dry place or leave it installed with the mower protected.
- Documentation: Note your sharpening dates to track wear patterns for next season.
Winter: Off-Season Care
While your mower sits idle, take time to order replacement blades or sharpeners for next season. Consider having a spare blade ready so you can swap them quickly during busy spring weeks.
Common Mistakes to Avoid When Sharpening Lawn Mower Blades
Even experienced DIYers make errors that compromise blade performance and safety. Avoiding these common pitfalls saves you time, money, and frustration. Learn from others’ mistakes to achieve professional-quality results every time.
Overheating the Blade
Using a bench grinder or power tool at high speed generates excessive friction heat. This heat can alter the blade’s temper, making it soft and prone to dulling quickly. If the blade turns blue or discolors, you have overheated it and compromised its integrity.
- Solution: Use light pressure and take frequent breaks to let the blade cool.
- Alternative: Use a file or sharpening stone for slower, cooler sharpening.
- Warning: Severely discolored blades should be replaced rather than reused.
Sharpening at the Wrong Angle
Most mower blades have a factory bevel of 30 to 45 degrees. Sharpening at a steeper or shallower angle creates an ineffective edge that dulls quickly or chips easily. Always match the existing bevel angle rather than guessing.
Pro tip: Use a permanent marker to color the existing bevel before sharpening. This helps you see exactly where to remove material and maintain the correct angle.
Neglecting Blade Balance
Sharpening one side more than the other creates an unbalanced blade that causes vibration. This vibration damages your mower’s spindle, bearings, and engine over time. Always check balance after sharpening using a blade balancer or a nail in the wall.
- Test method: Hang the blade horizontally on a nail through the center hole.
- Correction: File the heavier side until it hangs level.
- Frequency: Check balance every time you sharpen, not just annually.
Ignoring Damage and Wear
Sharpening cannot fix bent, cracked, or severely worn blades. Attempting to sharpen a damaged blade wastes effort and creates safety hazards. Replace blades that show structural issues rather than trying to extend their life.
How to Extend the Life of Your Lawn Mower Blades
Sharpening frequency directly correlates with how well you maintain your blades between sessions. Implementing simple habits can significantly reduce wear and extend the time between sharpenings. These proven methods keep your blades cutting efficiently for longer periods.
Mowing Practices That Protect Blades
Your mowing technique has a direct impact on blade wear. Mowing dry grass reduces friction and prevents clumping that dulls edges faster. Additionally, avoid mowing over bare soil or sandy areas where abrasive particles accelerate wear.
- Mow when dry: Wet grass creates more resistance and causes rapid dulling.
- Clear debris: Remove sticks, stones, and pinecones before mowing.
- Maintain sharpness: A sharp blade cuts cleanly, requiring less engine power and reducing wear.
Proper Storage and Handling
How you store your mower and blades between uses affects their longevity. Moisture causes rust that dulls edges and weakens the metal structure. Store your mower in a dry, covered area to prevent corrosion.
Pro tip: Apply a thin coat of silicone spray or light oil to the blade before long-term storage. This protective layer prevents rust without attracting excessive dirt during use.
Invest in High-Quality Blades
Premium blades made from hardened steel or coated with anti-rust treatments last significantly longer than budget options. While they cost more upfront, they reduce sharpening frequency and replacement costs over time. Consider these features when selecting replacement blades:
- Hardened steel: Retains edge longer and resists nicks from debris.
- Coated surfaces: Reduce friction and prevent grass buildup.
- Thicker construction: Provides durability for demanding mowing conditions.
Regular Cleaning and Inspection
Clean your blade after every few mowing sessions to prevent grass buildup that traps moisture. Inspect the edge for nicks or dull spots during cleaning. Early detection of problems allows for quick fixes before significant damage occurs.
Conclusion: Mastering Lawn Mower Blade Maintenance
Sharpening your lawn mower blades every 20-25 hours of use ensures a healthy, vibrant lawn. Recognizing the warning signs of dull blades and following a seasonal schedule prevents costly damage.
Consistent maintenance is the key to extending blade life and achieving professional results. Whether you choose DIY sharpening or professional services, regular attention pays off.
Start by inspecting your blades today and implement the proven methods from this guide. Your lawn will thank you with a lush, green appearance all season long.
Frequently Asked Questions About Sharpening Lawn Mower Blades
How do I know if my lawn mower blade needs sharpening?
Look for brown, ragged grass tips after mowing, which indicates tearing rather than clean cutting. You may also notice increased vibration, uneven cuts, or clumping discharge from the mower deck.
Physically inspect the blade by disconnecting the spark plug and feeling the cutting edge. If it feels rounded or smooth rather than sharp, or shows visible nicks and dents, it’s time to sharpen.
Can I sharpen lawn mower blades without removing them?
Yes, you can use a drill-mounted sharpening attachment like the Oregon 88-025 to sharpen blades while they remain on the mower. This method is quick and convenient for touch-ups but requires careful positioning to maintain the correct angle.
However, removing the blade allows for thorough inspection, proper balancing, and safer sharpening. For best results, remove the blade at least once per season for a complete maintenance check.
What is the best way to sharpen lawn mower blades?
The best method depends on your tools and skill level. A bench grinder offers the fastest results but risks overheating, while a file or sharpening stone is slower yet safer for beginners. The Work Sharp WSSA0001731 electric sharpener balances speed and precision effectively.
Regardless of the tool, maintain the original 30-45 degree bevel angle and check balance afterward. Consistency matters more than speed for achieving professional-quality results.
How often should I replace lawn mower blades instead of sharpening?
Replace blades when they show structural damage like deep cracks, severe bends, or excessive thinning. Blades that have been overheated and turned blue should also be replaced rather than sharpened.
Most residential blades last 2-3 years with regular sharpening, while commercial-grade blades may last longer. If the cutting edge has worn down significantly or the blade won’t balance properly, replacement is the safer option.
Why does my lawn look brown after mowing even with sharp blades?
Brown tips can result from cutting grass too short, mowing during extreme heat, or using a dull blade. Even sharp blades stress grass if you remove more than one-third of the blade height at once.
Raise your mower deck to leave grass at 3-4 inches tall and mow during cooler morning hours. Also ensure your blade is properly balanced to prevent vibration that tears grass rather than cutting it cleanly.
Should I sharpen both sides of the lawn mower blade?
No, you should only sharpen the cutting edge on the top side of the blade. The bottom side remains flat and should not be sharpened, as this alters the blade’s geometry and cutting performance.
Sharpen both ends of the blade equally to maintain balance. Always follow the existing bevel angle and avoid removing more material than necessary to restore a sharp edge.
What happens if I mow with dull lawn mower blades?
Dull blades tear grass rather than cutting it, leaving frayed, brown tips that make your lawn look unhealthy. This damage also creates entry points for diseases and pests, weakening your turf over time.
Additionally, dull blades force your mower’s engine to work harder, increasing fuel consumption and wear on the mower. Regular sharpening prevents these issues and keeps your lawn looking its best.
Can I sharpen a bent lawn mower blade?
No, bent blades should be replaced immediately rather than sharpened. Attempting to straighten a bent blade weakens the metal and creates dangerous stress points that could fail during operation.
A bent blade causes excessive vibration, damages your mower’s spindle, and produces an uneven cut. Inspect your blade after hitting rocks or stumps, and replace it if you notice any warping or bending.