
Wooden tool handles crack primarily due to rapid moisture fluctuation and improper storage, leading to unsightly splits and dangerous failures. Understanding the science behind wood movement is the complete guide to extending your favorite tools’ lifespan. This knowledge saves you money and prevents frustrating mid-project breakages.
This article reveals expert tips on selecting stable woods, applying protective finishes, and adopting smart workshop habits. You will learn proven methods to season new handles and rescue existing ones showing early warning signs. Continue reading to master the simple routines that keep your tools safe and comfortable for years.
Best Wood Conditioners for Handle Preservation
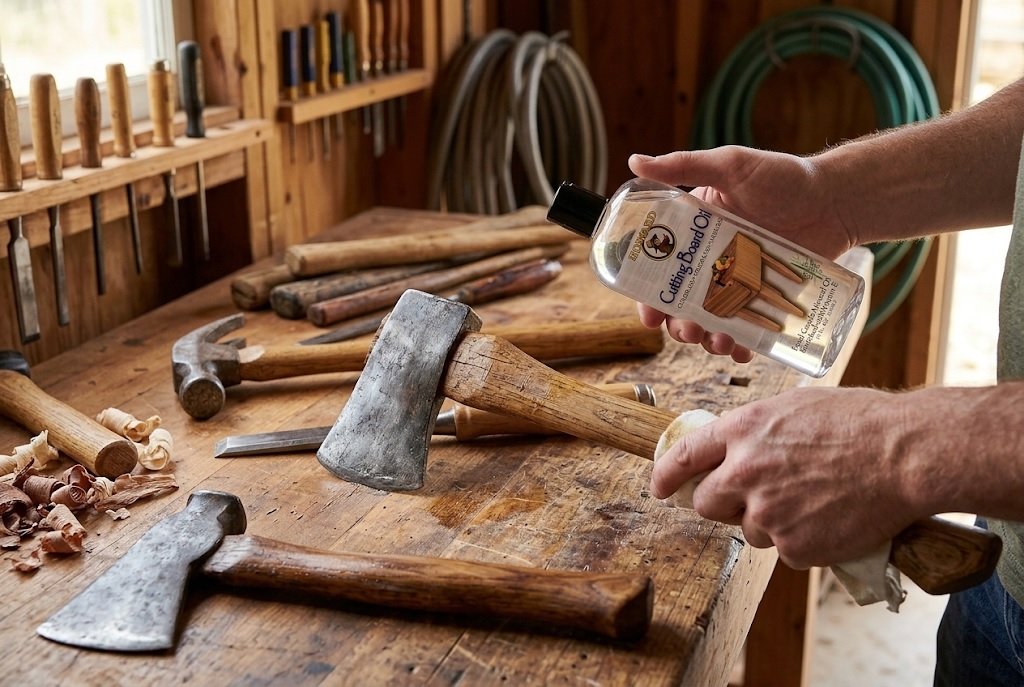
Howard Products ORS003 Cutting Board Oil – Best Overall Choice
This 12-ounce bottle of 100% pure USP-grade mineral oil penetrates deeply to stabilize internal moisture levels. It is the best option for restoring thirsty handles and creating a water-resistant barrier. Ideal for weekly maintenance, it prevents the rapid drying that causes cracks.
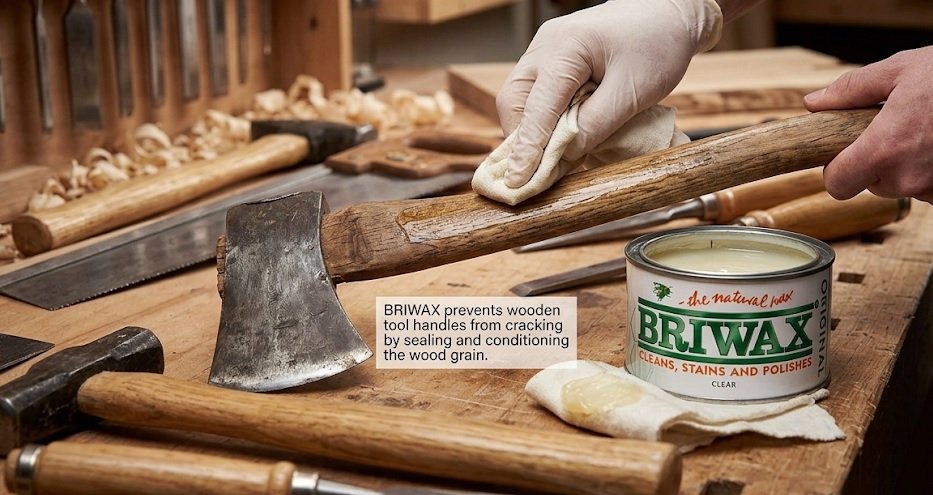
Briwax CWP10 Carnauba Wax – Best Protective Finish
Briwax combines carnauba and beeswax to seal the wood surface against humidity swings. Recommended for finished handles, this paste creates a hard, durable shell that repels moisture and resists grime. It is perfect for workshop tools that face varying garage temperatures.
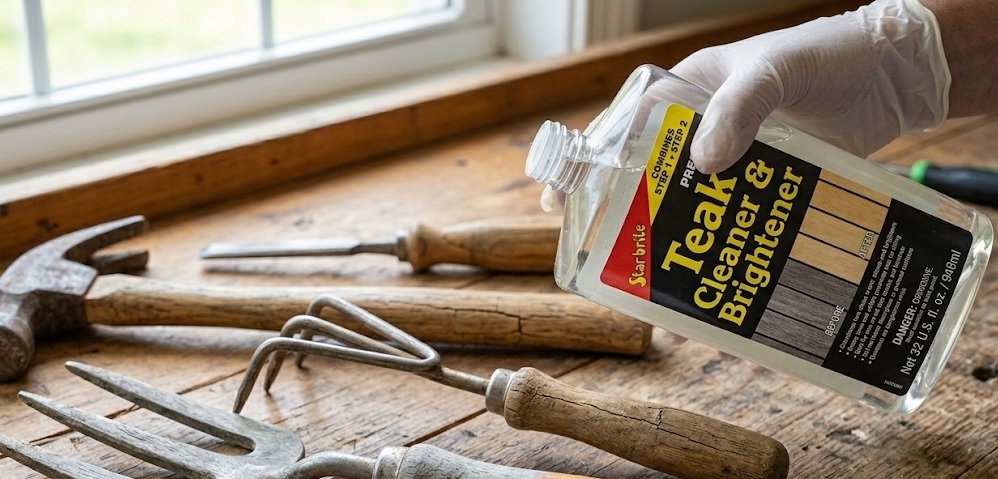
Star Brite Star brite Wood Polish – Best for Outdoor Tools
Formulated with UV inhibitors and water repellents, this polish is ideal for garden and outdoor tools. It protects against sun damage and rain exposure while enhancing the natural grain. A quick application ensures your handles remain smooth and splinter-free all season long.
Understanding the Root Causes of Handle Splitting
Wood is a hygroscopic material, meaning it constantly absorbs and releases moisture from the surrounding air. This natural process causes the wood fibers to swell and shrink continuously. When the stress from this movement exceeds the wood’s internal strength, cracks appear along the grain.
The Role of Rapid Moisture Loss
Leaving tools in a hot garage or direct sunlight accelerates moisture evaporation from the surface. The outer layers dry and shrink faster than the inner core, creating tremendous tensile stress. This imbalance is the primary culprit behind most handle failures.
- Sun exposure: UV rays bake out moisture and degrade lignin, the natural glue holding fibers together.
- Dry climates: Low humidity environments pull water from the wood rapidly, causing surface checking.
- Heat sources: Furnaces and radiators accelerate the drying process unevenly across the handle.
Impact Damage and Stress Fractures
Striking surfaces, prying objects, or dropping tools creates microscopic internal fractures that propagate over time. These impact forces compress the wood fibers, weakening their structural integrity. Repeated shock loads eventually cause visible splits to form at stress concentration points.
Key Takeaway: Wood movement is unavoidable, but you can control the rate of change. Slowing moisture exchange and cushioning impacts are your two main defense strategies.
Poor Grain Orientation and Defects
Handles cut from lumber with irregular grain patterns or near knots are inherently weaker. Manufacturers often select straight-grained ash or hickory for premium tools, but budget options may use inferior stock. Inspect your handles for these structural weaknesses before they fail.
Proven Prevention Methods to Extend Handle Life
Preventing cracks is significantly easier than repairing them, and simple habits make a dramatic difference. By controlling moisture and minimizing impact stress, you can keep handles in service for decades. The following strategies are recommended by professional woodworkers and tool manufacturers.
Seasoning and Conditioning New Handles
New handles often arrive with moisture content that is too high for your local environment. Allow them to acclimate in your workshop for two weeks before first use. This gradual adjustment prevents the shock of rapid moisture exchange.
- Apply boiled linseed oil: Thin coats penetrate deep and cure to a flexible, water-resistant finish.
- Sand between coats: Use 220-grit sandpaper to smooth raised grain and promote even absorption.
- Repeat three times: Allow 24 hours of drying time between applications for optimal buildup.
Proper Storage Techniques
Where you store your tools is just as critical as how you maintain them. Avoid leaning handles against walls where they can absorb ground moisture. Instead, hang them horizontally or store them vertically in a dry, ventilated rack.
Key Takeaway: Consistent humidity levels between 40-50% are ideal for wooden handles. Use a dehumidifier in damp basements and a humidifier in arid climates to maintain this range.
Regular Maintenance Routine
Monthly inspections catch small cracks before they become dangerous structural failures. Run your hands along the handle to feel for splinters, rough spots, or hairline fractures. Reapply conditioning oil whenever the wood appears dull or feels dry to the touch.
- Clean with mild soap: Remove dirt and grime that can trap moisture against the wood surface.
- Dry immediately: Never store wet tools; moisture trapped in crevices accelerates fiber breakdown.
- Sand rough areas: Smoothing minor blemishes prevents them from becoming stress concentration points.
How to Repair Small Cracks Before They Worsen
Early intervention is critical when you spot a hairline fracture or small split in a wooden handle. Ignoring minor damage allows moisture to penetrate deeper, worsening the crack with every use. Fortunately, most small cracks can be stabilized with basic materials and a little patience.
Epoxy Injection for Structural Repair
For cracks that are still tight but visible, thin cyanoacrylate or epoxy can be wicked directly into the fissure. This adhesive penetrates the gap and bonds the wood fibers back together, restoring significant strength. Choose a low-viscosity epoxy designed for wood repair for best results.
- Clean the crack: Use compressed air to remove dust and debris from the fissure.
- Apply adhesive: Inject slowly until the crack is saturated and the adhesive begins to seep out.
- Clamp and cure: Apply light pressure with a clamp and allow 24 hours for full curing.
- Sand smooth: Level the repair area with 150-grit sandpaper and reapply finish.
Bow Tie or Butterfly Inlays for Larger Splits
Wider splits that compromise the handle’s integrity require a mechanical reinforcement solution. A bow tie inlay involves cutting a wooden key that bridges the crack and locks both sides together. This traditional technique is highly effective for handles that experience heavy impact loads.
Key Takeaway: If a crack extends more than one-third of the handle’s length or passes through a knot, replacement is the safest option. A compromised handle can snap under load, causing injury.
When Replacement Is the Smart Choice
Some damage is simply too severe for a reliable repair, and attempting to save a failing handle risks personal safety. Hairline cracks that run the full length, deep gouges, or rot indicate the wood’s structural integrity is gone. Replacing the handle is often more cost-effective than the time spent on complex repairs.
- Check for movement: If the crack flexes when you apply pressure, the bond is already broken.
- Assess the head: Loose tool heads indicate the handle’s shoulder has worn or split internally.
- Prioritize safety: A $20 replacement handle is cheaper than an emergency room visit.
Selecting the Best Wood Types for Maximum Durability
Not all wood species perform equally when subjected to repeated impact and moisture fluctuations. Choosing a handle made from the right hardwood is your first line of defense against cracking. Understanding the properties of common handle materials helps you make informed purchasing decisions.
Premium Hardwoods: Ash and Hickory
White ash and hickory are the gold standards for tool handles due to their exceptional strength-to-weight ratios. These woods feature long, interlocking grain fibers that absorb shock without propagating cracks. Hickory is notably denser and more impact-resistant, while ash offers a lighter, more flexible feel.
| Wood Type | Impact Resistance | Flexibility | Weight | Best For |
|---|---|---|---|---|
| Hickory | Excellent | Moderate | Heavy | Sledgehammers, axes |
| White Ash | Very Good | High | Light | Hammers, picks |
| Maple | Good | Low | Medium | Chisels, mallets |
| Oak | Fair | Low | Heavy | Shovels, rakes |
Exotic Options and Fiberglass Alternatives
Some manufacturers use tropical hardwoods like hickory’s cousin, keruing, for specialized applications. These woods often have higher natural oil content, providing inherent moisture resistance. However, they are typically more expensive and can be harder to find in retail stores.
Key Takeaway: Fiberglass and steel handles eliminate cracking entirely but transfer more vibration to your hands. This can increase fatigue during prolonged use, making quality hardwood the preferred choice for comfort.
Grain Orientation Matters
Examine the end grain of a handle before purchasing; vertical grain orientation indicates superior strength. Handles with grain running parallel to the tool head are less likely to split under impact. Avoid handles with pronounced grain runout or visible knots in the stress zones.
- Straight grain: Look for parallel lines running the full length of the handle.
- Tight growth rings: Denser wood with 8-12 rings per inch offers better durability.
- No checks: Inspect the ends for existing cracks or drying defects before buying.
Seasonal Care Tips for Year-Round Handle Protection
Wooden handles face different environmental challenges as seasons change, requiring adjustments to your maintenance routine. The dry indoor air of winter and the humid outdoor conditions of summer both stress wood fibers. Adapting your care approach ensures your tools remain stable and crack-free all year.
Winter Care: Combating Dry Indoor Air
Heating systems drastically reduce indoor humidity levels during colder months, pulling moisture from wooden handles. This rapid drying causes surface checking and shrinkage that can loosen tool heads. Counteract this by increasing the frequency of oiling to every two weeks during winter.
- Use a humidifier: Maintain 40-50% relative humidity in your workshop or storage area.
- Apply heavier oils: Boiled linseed oil or tung oil provide a thicker barrier against moisture loss.
- Avoid heat proximity: Store tools away from radiators, furnaces, and wood stoves.
Summer Care: Managing Humidity and Moisture
High summer humidity causes wood to absorb excess moisture, leading to swelling and fiber softening. Handles may feel slightly thicker and less responsive during humid months. Ensure tools are wiped dry immediately after use in damp environments.
Key Takeaway: Seasonal swelling and shrinking are normal; the goal is to slow these changes, not stop them. Gradual moisture exchange prevents the stress fractures that cause cracks.
Transitional Seasons: Spring and Fall Adjustments
Spring and fall bring rapid temperature swings and fluctuating humidity levels that stress wooden handles. These transitional periods are the most common time for new cracks to appear. Increase inspection frequency and be proactive with conditioning treatments.
- Wipe with a damp cloth: This helps rehydrate handles that dried out during winter.
- Apply a light oil coat: A thin application seals the surface against sudden moisture spikes.
- Check for loose heads: Swelling and shrinking can loosen wedges; tap them back in securely.
- Store in a stable environment: Avoid attics and sheds with extreme temperature variations.
Common Mistakes That Accelerate Handle Cracking
Many DIYers and professionals unknowingly shorten the lifespan of their wooden handles through well-intentioned but harmful practices. Recognizing these common errors helps you avoid them and extend tool durability. Simple changes to your routine can prevent costly replacements and safety hazards.
Over-Oiling and Improper Finish Application
Applying too much oil or using the wrong finish can saturate wood fibers, making them soft and prone to compression damage. Thick coats of varnish or polyurethane create a brittle shell that cracks with flexing. Stick to thin, penetrating oils that cure inside the wood rather than on top of it.
- Limit oil frequency: Once a month is sufficient for most climates and usage levels.
- Wipe off excess: After 15 minutes, buff away any oil that has not absorbed into the wood.
- Avoid paint: Paint traps moisture beneath its surface, accelerating internal decay.
Using Handles as Pry Bars or Wedges
Wooden handles are designed to deliver striking force, not to act as leverage tools. Using a hammer handle to pry nails or a shovel handle to lift heavy objects creates extreme bending stress. This lateral force is the fastest way to snap or split even the highest-quality hickory.
Key Takeaway: Match the tool to the task. If you need to pry, use a pry bar. If you need leverage, use a wrecking bar. Respecting tool boundaries prevents most catastrophic failures.
Neglecting Loose Tool Heads
A loose hammer, axe, or sledgehammer head causes the handle to wobble and strike unevenly. This repeated impact at an angle creates stress concentrations that lead to cracks near the shoulder. Tighten wedges promptly and replace worn wedges to maintain a secure fit.
- Check wedges monthly: Tap them with a punch to ensure they are still seated firmly.
- Replace damaged heads: A cracked or deformed tool head can damage a perfectly good handle.
- Soak in oil: For wooden wedges, a drop of oil helps them swell and tighten their grip.
Storing Tools in Extreme Environments
Leaving tools in a car trunk, unheated shed, or damp basement exposes them to severe temperature and humidity swings. These conditions cause rapid, repeated expansion and contraction that fatigues wood fibers. Choose a climate-controlled storage location whenever possible.
Advanced Finishing Techniques for Superior Protection
While basic oiling provides adequate protection, advanced finishing techniques offer enhanced durability and moisture resistance. These methods create a multi-layered barrier that shields wood from environmental stress. Professional woodworkers often combine techniques for maximum performance.
The Danish Oil Method for Deep Penetration
Danish oil is a blend of varnish and penetrating oil that cures inside the wood while forming a tough surface film. This hybrid approach provides both deep moisture protection and surface abrasion resistance. It is ideal for handles that see heavy use and frequent handling.
- Sand to 220 grit: A smooth surface ensures even oil absorption and a professional finish.
- Apply liberally: Flood the surface and allow it to penetrate for 20-30 minutes.
- Wipe and repeat: Apply 3-4 thin coats over 24 hours, buffing between applications.
- Final cure: Allow 72 hours before heavy use for complete polymerization.
Shellac Sealer for Moisture Barrier
Shellac provides a hard, brittle barrier that effectively blocks moisture exchange but can crack under impact. It is best used as a sealer coat beneath a flexible topcoat. This combination offers the best of both worlds: moisture protection and impact flexibility.
Key Takeaway: The ideal finish system for tool handles is a penetrating oil base with a flexible wax topcoat. This combination allows wood to breathe while repelling surface moisture.
Wax Topcoats for Slip Resistance and Sheen
Paste wax applied over oiled wood creates a smooth, water-repellent surface that reduces friction and prevents blisters. It also protects the oil layer from being worn away by constant handling. Reapply wax every few months to maintain its protective properties.
- Buff to a sheen: A soft cloth creates a smooth, low-gloss finish that repels dirt.
- Choose natural waxes: Carnauba and beeswax blends offer the best durability and food-safe properties.
- Avoid silicone products: Silicone contaminates wood and prevents future finish adhesion.
Two-Part Epoxy Sealing for Extreme Conditions
For handles exposed to constant moisture, such as marine or agricultural tools, a two-part epoxy sealer provides an impermeable barrier. This method completely seals the wood surface, preventing any water absorption. However, it sacrifices the natural feel and shock absorption of bare wood.
Conclusion: Preserve Your Wooden Tool Handles for Years of Reliable Service
Understanding why wooden tool handles crack empowers you to take preventive action and save money on replacements. Controlling moisture, applying proper finishes, and inspecting regularly are simple habits with significant payoff. Your tools will perform better and last longer with minimal effort.
Start implementing these proven methods today and inspect your current tool collection for early warning signs. Consistent care is the secret to maintaining safe, comfortable handles that withstand years of demanding work. Your hands will thank you for the reliability and comfort.
Frequently Asked Questions about Wooden Tool Handles
What is the best oil for wooden tool handles?
Boiled linseed oil and pure tung oil are the top choices for wooden tool handle maintenance. Both penetrate deeply into the wood fibers, providing flexible, water-resistant protection without creating a brittle surface layer. They are also easy to apply and reapply as needed.
Danish oil is another excellent option, combining penetrating oils with varnish for a durable hybrid finish. For food-safe applications, mineral oil works well but offers less protection. Avoid vegetable oils that can turn rancid and sticky over time.
How often should I oil my wooden tool handles?
For tools used regularly, oiling once a month is generally sufficient to maintain moisture balance. In dry winter months or arid climates, increase frequency to every two weeks. Tools stored for long periods may only need oiling every three months before seasonal use.
Watch for visual cues like dull, dry-looking wood or rough texture that indicates the finish is depleted. A simple test is to place a drop of water on the handle; if it beads up, the finish is still effective. If it soaks in immediately, it is time to reapply oil.
Why does my wooden hammer handle keep cracking?
Repeated impact from hammering creates microscopic stress fractures that accumulate over time. If your hammer handle is cracking repeatedly, you may be striking harder than the wood species can handle, or the grain orientation may be weak. Hickory and ash are the best choices for high-impact tools.
Another common cause is a loose hammer head that causes uneven striking force. Check and tighten wedges regularly to ensure a snug fit. Also, inspect your striking technique to ensure you are not using the handle for prying or leverage tasks.
Can I fix a cracked wooden tool handle or should I replace it?
Small hairline cracks can be repaired with thin cyanoacrylate or epoxy injected into the fissure. After clamping and curing, sand the area smooth and reapply finish. This works well for cracks that are less than one-third of the handle’s length and not under heavy stress zones.
However, replace the handle immediately if the crack extends the full length, passes through a knot, or flexes under pressure. A compromised handle can snap during use, causing serious injury. Replacement handles are affordable, and the swap takes only 30 minutes with basic tools.
What is the best way to store wooden tools to prevent cracking?
Store tools in a climate-controlled area with stable humidity levels between 40% and 50%. Hang them horizontally or vertically in a ventilated rack, avoiding contact with concrete floors that transfer moisture. Keep them away from direct sunlight, radiators, and heating vents.
Avoid storing tools in unheated sheds, garages, or car trunks where temperatures fluctuate dramatically. For long-term storage, apply a generous coat of oil and wrap the handle in breathable cloth. This slows moisture exchange and protects against dust and scratches.
Are fiberglass handles better than wooden handles?
Fiberglass handles offer superior impact resistance and never crack, rot, or splinter. They also require zero maintenance and perform well in extreme weather conditions. However, they transmit more vibration to your hands, causing fatigue during extended use.
Wooden handles provide natural shock absorption and a warmer, more comfortable grip. They are also more repairable and replaceable. For heavy-impact tools like sledgehammers, fiberglass has an edge; for comfort and traditional feel, wood remains the preferred choice.
How do I remove a cracked handle from a tool head?
First, remove any wedges or retaining pins from the tool head using a punch and hammer. Then, saw off the handle flush with the tool head if it is still intact. Drill out the remaining wood from the eye of the tool head using a drill bit slightly smaller than the opening.
For stubborn pieces, use a torch to burn out the wood, being careful not to overheat the metal and ruin its temper. Alternatively, soak the head in a bucket of water overnight to swell and loosen the wood. Always wear safety glasses and work in a well-ventilated area.
What is the best way to season a new wooden handle?
Allow a new handle to acclimate in your workshop for two weeks before installing it. This lets the wood adjust to your local humidity levels, preventing future stress cracking. Apply three thin coats of boiled linseed oil, allowing 24 hours of drying time between each coat.
Sand lightly with 220-grit paper between coats to smooth raised grain and promote even absorption. After the final coat, buff the handle with a clean cloth to remove excess oil. This process creates a durable, water-resistant finish that protects the wood for years.