
How to oil and maintain garden tools to prevent rust requires a simple three-step process: clean, oil, and store properly. This complete guide delivers proven methods to extend your equipment’s lifespan and keep blades sharp.
Discover expert tips for selecting the right oils, removing existing corrosion, and establishing a seasonal maintenance routine. Master these techniques to save money and ensure your tools are ready for every planting season. Continue reading to transform your shed into a rust-free zone.
Best Oils for Garden Tool Maintenance – Detailed Comparison
Choosing the right oil is crucial for effective rust prevention. The best option penetrates metal pores, displaces moisture, and leaves a protective barrier without being overly sticky. Below are the top three products recommended by gardening professionals for their superior performance and value.
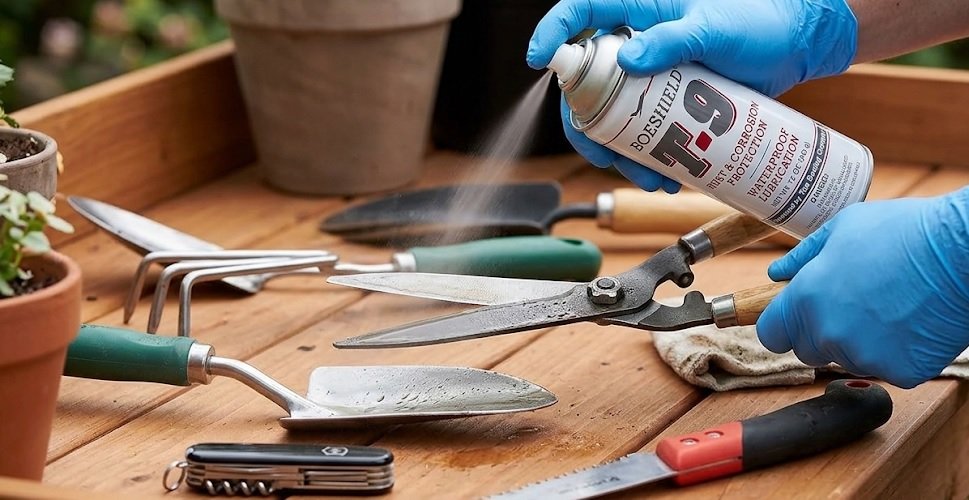
Boeshield T-9 – Best Overall Choice
Boeshield T-9 is the industry standard for metal protection, originally developed for Boeing aircraft. It combines a solvent carrier with a wax-based lubricant that dries to a clear, durable film. This provides **exceptional, long-lasting rust prevention** that withstands outdoor humidity and light rain. Ideal for pruners, shovels, and shears that see frequent use.
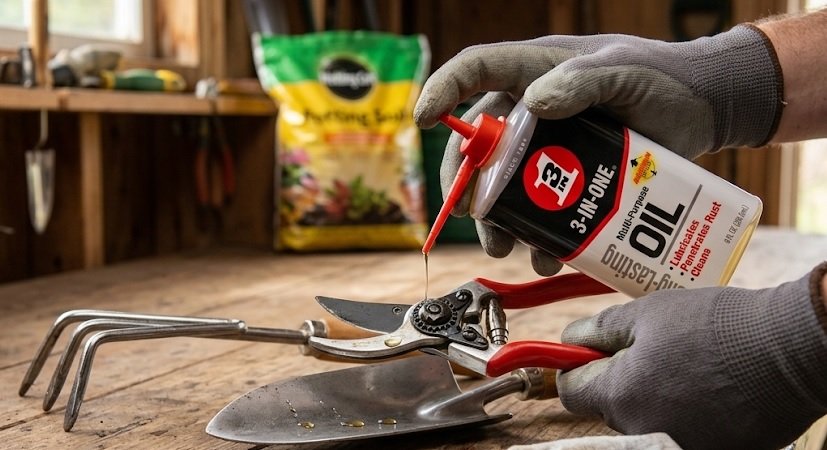
3-IN-ONE Professional Grade Penetrating Oil – Best Budget Option
This classic formula is a reliable, cost-effective solution for general tool maintenance. It works quickly to **loosen rusted parts and dissolve light corrosion** while leaving a lubricating film. While not as durable as T-9, it is perfect for seasonal upkeep and cleaning blades before sharpening. Its precision drip spout allows for targeted application on hinges and bolts.
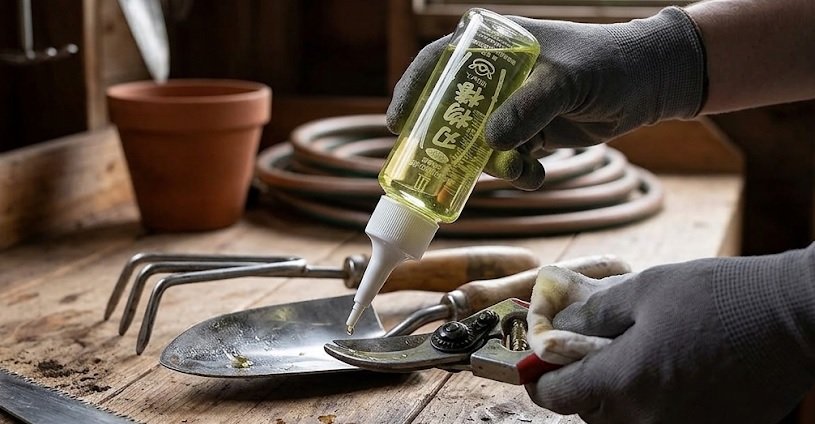
Camellia Oil (Tsubaki) – Best for High-Carbon Steel
Used by Japanese craftsmen for centuries, pure Camellia oil is a food-safe, non-toxic option that prevents rust exceptionally well. It is **ideal for high-carbon steel tools** like Japanese hoes and knives, as it doesn’t polymerize or gum up over time. This oil is perfect for long-term storage and is safe to use around edible gardens.
Step-by-Step Cleaning Process Before Oiling
Proper surface preparation determines how well your oil will protect the metal. Dirt, sap, and old grease create a barrier that prevents oil from reaching the steel surface. Always clean tools thoroughly before applying any rust preventative.
Removing Dirt and Sap
Start by scrubbing blades with a stiff wire brush or steel wool to remove caked-on soil. For sticky tree sap or resin, apply a degreaser or rubbing alcohol and let it sit for five minutes. Rinse with warm water and dry completely with a clean cloth.
Key Takeaway: A dry tool is a protected tool. Moisture trapped under oil will cause rust to form faster than no oil at all.
Dealing With Existing Rust
Light surface rust can be removed with fine-grit sandpaper (220-grit) or a rust eraser. Work in one direction along the blade grain to avoid scratching. For heavier corrosion, use a rust remover solution or electrolysis method.
After removing rust, wipe the metal with a solvent like mineral spirits. This removes any remaining particles and leaves a perfectly clean surface ready for oil application.
Drying and Final Prep
- Heat drying: Pass the blade over a flame briefly to evaporate all moisture.
- Solvent wipe: Use acetone or denatured alcohol as a final cleaning step.
- Immediate oiling: Apply oil within minutes of cleaning for best results.
This preparation ensures maximum adhesion of the protective oil layer. Skipping this step is the most common mistake that leads to premature rust formation. Taking these ten extra minutes will dramatically extend the life of your garden tools.
How to Apply Oil Correctly for Maximum Protection
Applying oil seems straightforward, but technique matters significantly. The goal is to create a thin, even barrier that coats every metal surface without attracting dirt. Proper application prevents rust while keeping tools clean and ready for use.
Choosing Your Application Method
Use a lint-free cloth or microfiber rag for most tools. Apply a few drops of oil directly to the cloth rather than the tool itself. This prevents over-oiling and ensures even coverage across the blade surface.
For hard-to-reach areas like hinges, springs, and pivot points, use a precision applicator. A small brush or cotton swab works perfectly for tight spaces where rust typically develops first.
The Thin Coat Technique
- Apply sparingly: Use 2-3 drops for small tools, 5-6 drops for larger implements.
- Spread evenly: Wipe the oil across the entire metal surface in one direction.
- Buff to a sheen: Use a clean section of cloth to remove excess oil until surfaces feel slightly slick but not wet.
Pro Tip: A properly oiled tool should not feel greasy. If you can see visible oil droplets, you have applied too much.
Frequency of Application
For tools used weekly, apply oil after every cleaning session. For seasonal storage, apply a heavier coat before putting tools away for winter or extended periods of inactivity.
Tools exposed to high humidity or frequent rain may need oiling every two weeks. Monitor your tools regularly and reapply at the first sign of dullness or surface moisture.
Remember that consistent maintenance beats intensive restoration. A quick two-minute oiling after each use prevents the need for hour-long rust removal sessions later.
Proper Storage Techniques to Complement Oiling
Oiling alone cannot prevent rust if your storage conditions are poor. Even the best protective coating will fail in a damp, humid environment. Combining correct oiling with smart storage creates a complete defense against corrosion.
Ideal Storage Environment
Store tools in a dry, well-ventilated area like a shed, garage, or tool closet. Avoid leaning tools directly against exterior walls where moisture can seep through. Maintain airflow by hanging tools on pegboards or wall-mounted racks rather than piling them in buckets.
Consider adding a silica gel packet or moisture absorber to your storage space. These inexpensive items dramatically reduce ambient humidity and extend the life of your oil coating.
Storage Methods by Tool Type
- Hand tools (trowels, pruners): Hang individually or store in a dry toolbox with ventilation holes.
- Long-handled tools (shovels, hoes): Hang vertically with blades facing down to prevent water pooling.
- Power tools: Store in original cases with a light oil coating on metal parts.
Key Takeaway: Air circulation is your best friend. Tools that touch each other trap moisture and create rust hotspots.
Seasonal Storage Preparation
Before winter storage, apply a heavier coat of oil than you would during regular use. Wrap blades in oiled cloth or newspaper for added protection against condensation. This extra layer prevents rust during months of inactivity.
For tools with wooden handles, apply linseed oil to the wood while protecting the metal. This dual approach ensures the entire tool remains in peak condition. Check stored tools monthly and reapply oil if surfaces feel dry or show any sign of moisture.
Common Tool Maintenance Mistakes That Cause Rust
Even experienced gardeners make errors that accelerate rust formation. Recognizing these pitfalls helps you avoid them and maintain your equipment properly. Avoiding these mistakes is just as important as following correct oiling procedures.
Mistake 1: Leaving Tools Dirty Before Oiling
Applying fresh oil over dirty, soiled tools traps moisture and debris against the metal. This creates the perfect environment for rust to develop beneath the oil layer. Always clean and dry tools thoroughly before applying any protective coating.
Many gardeners skip this step to save time, but it leads to more work later. A clean surface ensures oil penetrates the metal properly and forms a lasting barrier.
Mistake 2: Using the Wrong Type of Oil
| Oil Type | Best For | Avoid For |
|---|---|---|
| Mineral oil | General tools | High-carbon steel |
| Camellia oil | Japanese tools | Heavy-duty equipment |
| WD-40 | Quick drying | Long-term storage |
| Motor oil | Large implements | Food-adjacent tools |
Using cooking oils like vegetable or olive oil attracts pests and turns sticky over time. These oils also go rancid, creating a gummy residue that damages tools. Stick with purpose-made products for reliable protection.
Mistake 3: Storing Tools Wet or Damp
Putting away tools immediately after cleaning without thorough drying is a common error. Even small water droplets trapped in crevices cause significant rust damage. Always dry tools completely and allow them to air out before storage.
Pro Tip: Keep a dedicated drying cloth in your shed. Wipe down tools before and after each use to establish a consistent maintenance habit.
By avoiding these three common mistakes, you dramatically reduce rust risk and extend tool longevity. Consistent, correct maintenance prevents costly replacements and keeps your garden equipment performing at its best.
Seasonal Maintenance Schedule for Year-Round Protection
Consistent maintenance throughout the year prevents rust and keeps tools performing optimally. A simple seasonal routine ensures your equipment is always ready for use. Following a schedule eliminates guesswork and builds lasting protection habits.
Spring: Pre-Season Preparation
Inspect all tools for winter damage, rust spots, or loose handles. Sharpen blades, tighten screws, and apply a fresh coat of oil before the busy growing season begins. Replace any tools that are beyond repair to avoid frustration during peak gardening months.
This is also the ideal time to condition wooden handles with linseed oil. Well-maintained handles prevent splinters and improve grip comfort during extended use.
Summer: Regular Upkeep
- Weekly: Wipe blades clean and apply light oil after each use.
- Monthly: Deep clean tools, removing all dirt and sap buildup.
- As needed: Sharpen cutting edges whenever they feel dull.
Summer heat and frequent use cause oil to evaporate faster. Check tools more frequently during heavy gardening periods and reapply as necessary.
Key Takeaway: Ten minutes of weekly maintenance saves hours of rust removal work later.
Fall and Winter: Storage Preparation
Before winter storage, give every tool a thorough cleaning and heavy oil application. Repair any damage, replace worn handles, and ensure all moving parts operate smoothly. Store tools in a dry location with proper air circulation.
Check stored tools monthly throughout winter. If you spot any moisture or early rust signs, clean and re-oil immediately. This proactive approach prevents small issues from becoming major problems.
By following this seasonal schedule, you maintain a rust-free toolkit year-round. Consistent care extends tool life, saves money, and makes gardening more enjoyable.
Eco-Friendly Alternatives for Sustainable Tool Care
Many gardeners prefer natural, environmentally conscious options for rust prevention. Fortunately, several effective alternatives exist that protect tools without harsh chemicals. These sustainable methods are safe for you, your plants, and the environment.
Natural Oil Options
Linseed oil, derived from flax seeds, provides excellent rust protection and is fully biodegradable. It penetrates metal deeply and creates a durable, water-resistant coating. Apply sparingly and allow it to cure completely before storing tools.
Beeswax mixed with mineral oil creates a thick, protective paste ideal for long-term storage. This combination repels moisture effectively while being completely non-toxic. It is particularly suitable for tools used around edible plants.
Homemade Protective Pastes
- Beeswax and coconut oil: Melt equal parts together, cool, and apply as a paste.
- Lanolin spray: A natural wool-derived product that displaces moisture effectively.
- Used coffee grounds: Works as an abrasive cleaner before oiling, not a protectant.
Sustainability Tip: Reuse clean cloth rags for oil application instead of disposable paper towels. Wash and reuse them multiple times to reduce waste.
Proper Disposal of Oily Rags
Never throw oil-soaked rags in regular trash without proper handling. They can spontaneously combust in warm conditions. Store used rags in a sealed metal container filled with water until disposal.
Check your local regulations for proper hazardous waste disposal guidelines. Many communities offer collection events for oil-contaminated materials. This responsible approach protects both the environment and your household.
By choosing eco-friendly options, you maintain effective rust prevention while reducing your environmental footprint. These sustainable alternatives prove that responsible tool care and environmental stewardship go hand in hand.
Restoring Severely Rusted Tools: Step-by-Step Rescue Guide
Even neglected tools can be brought back to life with the right restoration techniques. Severe rust looks daunting but is often surface-level damage. With patience and the proper methods, you can salvage most rusted garden equipment.
Assessing the Damage
Before starting restoration, determine if the tool is worth saving. Check for deep pitting, structural weakness, or cracks that compromise integrity. Surface rust with light pitting is usually restorable, while severe corrosion may require professional attention.
Light rust appears as orange powder that wipes away easily. Heavy rust shows as flaking metal or deep pits that change the blade’s shape. Evaluate the tool’s value and replacement cost before investing significant restoration time.
Chemical Rust Removal Methods
- White vinegar soak: Submerge rusted parts in white vinegar for 12-24 hours.
- Citric acid solution: Mix 1 part citric acid powder with 9 parts warm water.
- Commercial rust removers: Products like Evapo-Rust work without harsh scrubbing.
After chemical treatment, scrub remaining rust with steel wool or a wire brush. Rinse thoroughly with water and dry completely before oiling.
Warning: Never mix different rust removal chemicals together. Toxic fumes can result from combining vinegar with bleach or other cleaners.
Mechanical Restoration Techniques
For tools with heavy rust, use an angle grinder with a wire wheel attachment. Work carefully to remove rust without gouging the underlying metal. Follow with progressively finer sandpaper (80 to 220 grit) for a smooth finish.
After all rust is removed, the metal surface is highly vulnerable to re-corrosion. Apply a rust converter or primer immediately to stabilize the surface. Finish with your regular oiling routine to establish lasting protection.
Restored tools require extra attention during the first few months. Check them weekly for any signs of returning rust and reapply oil as needed. With proper care, restored tools can serve you for many more years.
Conclusion: Master Garden Tool Maintenance for Lasting Performance
Learning how to oil and maintain garden tools to prevent rust transforms your gardening experience. Clean, oil, and store properly to keep equipment performing at its best. Consistent care prevents costly replacements and frustrating breakdowns.
Start implementing these proven methods today. Gather your supplies, inspect your tools, and establish a simple maintenance routine. Your future self will thank you when every tool is ready for action.
With these expert tips, you now have everything needed for a rust-free toolkit. Happy gardening!
Frequently Asked Questions about Oiling and Maintaining Garden Tools
How often should I oil my garden tools?
For tools used regularly during the growing season, apply a light oil coating after every use. This takes only two minutes and prevents moisture from settling on metal surfaces. Tools stored for extended periods should receive a heavier coat before storage.
Tools exposed to humid conditions or frequent rain may need oiling every two weeks. Check your tools weekly and reapply at the first sign of dullness or surface moisture. Consistent light applications work better than infrequent heavy treatments.
What is the best oil to use on garden tools to prevent rust?
Boeshield T-9 is widely considered the best option for long-lasting rust protection on garden tools. It dries to a durable wax film that withstands humidity and light rain. For budget-conscious gardeners, 3-IN-ONE Professional Grade oil offers reliable protection at a lower price point.
Camellia oil is ideal for high-carbon steel tools and is food-safe for edible gardens. Avoid cooking oils like vegetable or olive oil, as they turn sticky and attract pests. Purpose-made products provide superior protection and longer-lasting results.
Can I use WD-40 to prevent rust on garden tools?
WD-40 works well for quick drying and displacing moisture but is not ideal for long-term rust prevention. Its protective coating evaporates quickly, leaving metal vulnerable to corrosion. Use WD-40 for cleaning and loosening rusted parts, then apply a dedicated protectant.
For best results, follow WD-40 application with Boeshield T-9 or another long-lasting oil. This two-step approach provides immediate moisture displacement and durable protection. Relying solely on WD-40 leads to frequent reapplication and potential rust development.
How do I remove rust from garden tools before oiling?
Light surface rust can be removed with fine-grit sandpaper (220-grit) or a rust eraser. Work in one direction along the blade grain to avoid scratching the metal. For heavier corrosion, soak tools in white vinegar for 12-24 hours or use a commercial rust remover.
After chemical treatment, scrub remaining rust with steel wool or a wire brush. Rinse thoroughly with water and dry completely before applying oil. Proper rust removal ensures the protective oil layer adheres correctly to the metal surface.
Should I oil wooden handles on garden tools?
Yes, wooden handles benefit from regular oiling with linseed oil or boiled linseed oil. This conditions the wood, prevents cracking and splintering, and improves grip comfort. Apply a thin coat and allow it to cure completely before using the tool.
Treat wooden handles two to three times per season, or more frequently in dry climates. Avoid getting handle oil on metal parts, as this can interfere with rust prevention. This dual maintenance approach keeps the entire tool in peak condition.
What is the best way to store garden tools to prevent rust?
Store tools in a dry, well-ventilated area like a shed or garage with good airflow. Hang tools on pegboards or wall-mounted racks rather than piling them in buckets. Avoid leaning tools against exterior walls where moisture can seep through.
Add silica gel packets or a moisture absorber to your storage space to reduce ambient humidity. Apply a heavier oil coat before long-term storage and wrap blades in oiled cloth. Check stored tools monthly and reapply oil if surfaces feel dry.
Can I restore severely rusted garden tools?
Yes, severely rusted tools can often be restored with patience and the right techniques. Assess the damage first to determine if the tool is worth saving. Surface rust with light pitting is restorable, while deep pits or structural weakness may require replacement.
Use chemical rust removers like white vinegar or citric acid solutions for heavy corrosion. For extreme cases, an angle grinder with a wire wheel attachment removes rust quickly. Apply a rust converter immediately after cleaning, then finish with your regular oiling routine.
Why do my garden tools rust even after I oil them?
Rust formation after oiling typically indicates improper surface preparation or application technique. Oil cannot adhere to dirty, damp, or previously rusted surfaces. Always clean and dry tools thoroughly before applying any protective coating.
Using the wrong type of oil or applying too thin a layer also contributes to rust. Ensure you apply enough oil to create a visible barrier without leaving excess. Store tools properly and check them regularly to catch early rust signs before they spread.