
Building a wall-mounted tool rack on a budget is easier than you think, saving you floor space and keeping your garage organized without breaking the bank. With the right materials and a few expert tips, you can create custom storage for under $50.
This complete guide reveals proven methods for designing and installing a sturdy rack using affordable supplies. You’ll learn material selection, layout strategies, and installation steps to maximize every square inch of wall space. Let’s get your workshop organized today.
Best Wall-Mounted Tool Rack Products for Budget Organizing
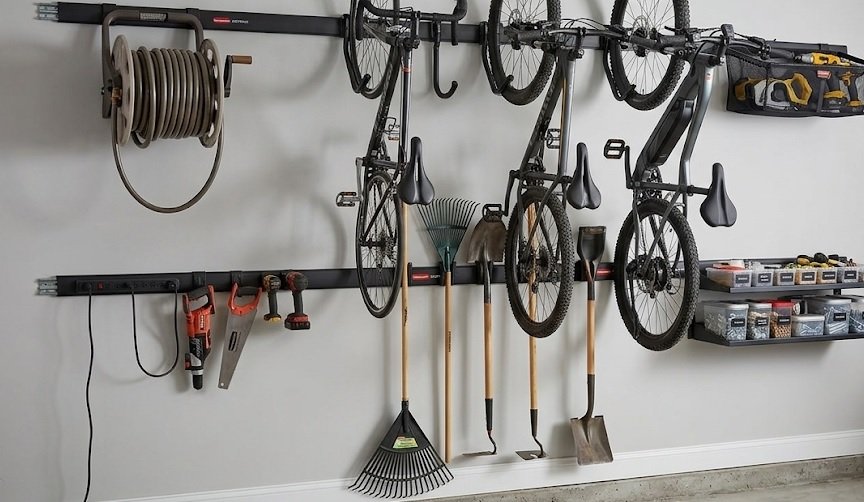
Rubbermaid FastTrack Garage Rail System (FG3600) – Best Overall Choice
The **Rubbermaid FastTrack** system offers a sleek, modular rail design that installs in minutes. Its galvanized steel construction supports up to 75 pounds per rail, making it ideal for heavy power tools and garden equipment. This budget-friendly option costs under $30 and allows you to mix hooks and bins freely.
This is the **best option** for DIYers seeking versatility without drilling dozens of holes. The included mounting hardware fits standard studs, ensuring a secure fit. Pairs perfectly with accessory hooks sold separately.
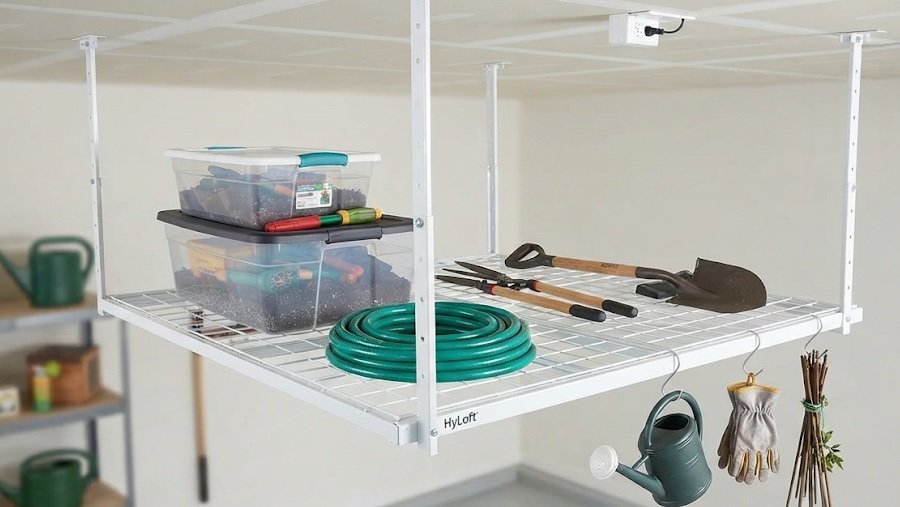
Hyloft Heavy-Duty Steel Rack (HYS-001) – Best for Maximum Weight
The **Hyloft HYS-001** delivers exceptional strength with a 100-pound capacity per shelf. Its powder-coated finish resists rust and scratches, making it perfect for damp garages or workshops. This rack is recommended for storing bulky items like extension cords and tool cases.
It is **ideal for** users who need a permanent, heavy-duty solution on a tight budget. The tool-free assembly takes under five minutes, and its compact footprint fits narrow wall spaces.
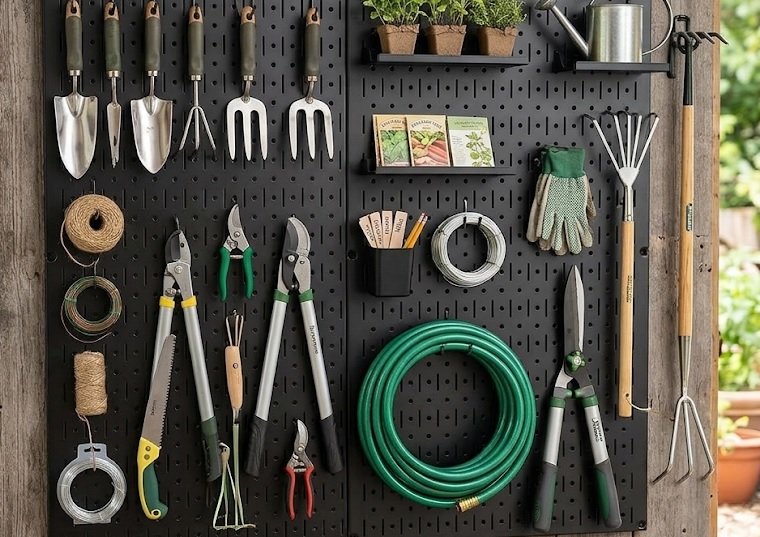
Wall Control Steel Pegboard (Pegboard-16×32) – Best for Customization
The **Wall Control Pegboard** features durable 16-gauge steel with a smooth, rust-resistant finish. Its 16×32-inch size provides ample space for over 50 tools using standard pegboard hooks. This is the **recommended** choice for those who prefer a classic pegboard look with modern durability.
It is **best for** precision organization of hand tools, screwdrivers, and wrenches. The sleek black or white finish complements any garage aesthetic, and the reinforced edges prevent bending under heavy loads.
Planning Your Wall-Mounted Tool Rack Layout for Maximum Efficiency
Before you buy materials or mount anything, you need a solid plan. A well-designed layout prevents wasted space and keeps frequently used tools within arm’s reach.
Assessing Your Tool Inventory and Storage Needs
Start by grouping your tools into categories: hand tools, power tools, and gardening equipment. Count each item and measure the largest tool to determine required spacing.
- Hand tools (hammers, wrenches): Require 2-3 inches of clearance per hook
- Power tools (drills, saws): Need 12-18 inches of vertical space
- Long items (shovels, rakes): Need a dedicated 24-inch rail section
This quick audit tells you exactly how much linear wall space you need. Most home garages require between 8 and 12 feet of rail for complete organization.
Choosing the Right Wall Location
Select a wall that is dry, accessible, and near a power outlet if you store battery chargers. Avoid exterior walls with poor insulation, as moisture can rust your tools.
Measuring Stud Spacing for Secure Installation
Use a stud finder to locate wall studs, which are typically spaced 16 inches apart. Mark each stud location with a pencil to ensure your screws hit solid wood.
If your rack must span a gap between studs, use heavy-duty drywall anchors rated for at least 50 pounds. This prevents sagging and keeps your rack safe under heavy loads.
DIY Installation: Step-by-Step Guide to Mounting Your Tool Rack
Once your layout is planned, it is time to mount the rack securely. Follow these proven steps to ensure a sturdy, long-lasting installation.
Gathering Essential Tools and Materials
Before starting, collect all necessary supplies to avoid mid-project interruptions. You will need a drill, a stud finder, a level, and a socket wrench.
- Drill with Phillips bit: For driving screws into studs
- Level (24-inch): Ensures rails are perfectly horizontal
- Socket wrench: Tightens lag bolts without stripping
Having these tools ready makes the entire process smoother and faster.
Step-by-Step Mounting Process
- Mark stud locations: Use your stud finder and pencil to mark every stud along the planned rail path.
- Hold the rail in place: Position the rail against the wall, aligning its pre-drilled holes with your stud marks.
- Level the rail: Place your level on top of the rail and adjust until the bubble is centered.
- Drill pilot holes: Use a 3/16-inch drill bit to create pilot holes through the rail into the studs.
- Secure with lag bolts: Drive 1/4-inch lag bolts (at least 2.5 inches long) into each pilot hole using your socket wrench.
- Verify stability: Pull firmly on the rail to ensure it does not move before adding tools.
Installing Hooks and Accessories
After the rails are secure, snap your hooks and bins into place. Arrange frequently used tools at eye level and heavier items lower to prevent accidents.
Budget-Friendly Alternatives: Building a Custom Wooden Tool Rack
If you prefer a rustic look or want to save even more money, building a wooden rack is a fantastic DIY option. With basic lumber and simple cuts, you can create a fully customized storage solution.
Materials and Cost Breakdown
A custom wooden rack costs roughly $25 to $40 in materials, depending on lumber prices. This is often cheaper than pre-made metal systems.
| Material | Quantity | Estimated Cost |
|---|---|---|
| 2×4 lumber (8 ft) | 2 pieces | $8 – $12 |
| 1×4 lumber (8 ft) | 1 piece | $5 – $8 |
| Wood screws (3-inch) | 1 box | $6 – $10 |
| Wood stain or paint | 1 can | $8 – $15 |
You likely already own the required tools: a saw, drill, and measuring tape.
Building the Frame and Shelving
Start by cutting your 2×4 lumber into two vertical side supports and two horizontal crossbars. Typically, a 4-foot wide rack uses two 4-foot crossbars and two 3-foot vertical supports.
- Cut the lumber: Use a circular saw or handsaw for precise, straight cuts
- Assemble the rectangle: Screw the crossbars between the vertical supports to form a sturdy rectangle
- Add pegboard backing: Attach a 1/4-inch pegboard sheet to the back for hook compatibility
Secure the frame to wall studs using 3-inch wood screws and washers.
Finishing and Customizing Your Rack
Sand all edges to prevent splinters, then apply a coat of stain or paint for moisture resistance. Add small shelves or shallow bins to the bottom crossbar for storing screws and small parts.
This custom approach gives you complete control over size and style while staying firmly within a budget.
Smart Organization Tips to Maximize Your Wall-Mounted Tool Rack
Installing the rack is only half the battle; organizing it effectively ensures long-term usability. A thoughtful arrangement saves time and prevents tool damage.
Strategic Tool Placement for Daily Efficiency
Place your most frequently used tools at eye level (between 48 and 60 inches from the floor). This zone allows for quick grabbing without bending or stretching.
- Everyday tools (tape measure, hammer): Place at eye level for instant access
- Heavy power tools: Store at waist height to reduce lifting strain
- Seasonal items (shovels, pruners): Mount on upper rails or end hooks
This zoning method reduces clutter and keeps your workflow uninterrupted.
Categorizing Tools by Function and Frequency
Group similar tools together to create logical “zones” on your rack. For example, dedicate one section to woodworking tools and another to plumbing supplies.
Use colored tape or labels on hooks to identify tool categories at a glance. This simple system helps family members return tools to the correct spot.
Maintaining and Upgrading Your Rack Over Time
Inspect your rack monthly for loose screws or bent hooks. Tighten any hardware immediately to prevent accidents.
- Check for rust: Wipe metal rails with a dry cloth to prevent corrosion
- Re-evaluate weight load: Move heavier items closer to wall studs
- Add accessories: Expand with magnetic strips or small shelves as your collection grows
A quick monthly check keeps your budget-friendly rack safe and functional for years.
Common Mistakes to Avoid When Building a Budget Tool Rack
Even seasoned DIYers make errors that compromise safety and durability. Avoiding these pitfalls ensures your wall-mounted tool rack remains sturdy and functional.
Overloading the Rack Beyond Its Weight Capacity
Every rack has a specific weight limit, often printed on the packaging or manual. Exceeding this limit causes rails to bend and hooks to pull out of the wall.
- Check manufacturer specs: Note the per-rail and total weight limits
- Distribute weight evenly: Spread heavy tools across multiple hooks
- Reinforce weak points: Add extra screws if you notice any sagging
A simple weight audit prevents catastrophic failures and protects your tools.
Skipping the Stud Finder and Using Flimsy Anchors
Using drywall anchors alone is the most common reason racks fall. Anchors rated for 50 pounds can still fail under dynamic loads or vibration.
If you cannot find studs, consider installing a plywood backing board first. Screw the plywood into studs, then mount your rack to the plywood.
Poor Spacing and Cramped Layout
Placing hooks too close together makes it difficult to remove and return tools. This frustration often leads to tools being left on the floor.
- Allow 2-3 inches clearance between each hook for easy access
- Group tools by size to avoid overlapping handles
- Test the layout with your largest tools before finalizing
Taking time to space hooks properly creates a more user-friendly system.
Creative Upcycling Ideas for an Ultra-Low-Cost Tool Rack
If you want to spend almost nothing, repurposing everyday materials can create a unique and functional rack. Upcycling saves money and adds character to your workspace.
Using Pallet Wood for a Rustic Industrial Rack
Pallet wood is free from local warehouses or recycling centers and offers sturdy, weathered planks. Disassemble pallets carefully using a pry bar to avoid splitting the boards.
- Sand thoroughly: Remove splinters and rough edges before handling
- Attach to studs: Use 3-inch screws to secure the pallet frame directly to wall studs
- Add nails as hooks: Hammer large nails or dowels into the wood for hanging tools
This approach costs nearly zero dollars and creates a charming, rustic aesthetic.
Repurposing Old Cabinet Hardware and Pipes
Look around your home for unused items that can serve as hooks and brackets. Old drawer knobs, pipe fittings, and even sturdy coat hangers work well.
Screw cabinet knobs into a wooden board for a neat row of small-tool hooks. This method is perfect for organizing screwdrivers and pliers.
Transforming an Old Ladder into a Vertical Rack
An old wooden or metal ladder can become a stylish vertical tool organizer. Lean it against the wall or mount it flat for a space-saving design.
- Mount horizontally: Secure the ladder to studs for a long, multi-tiered rack
- Use rungs as shelves: Rest power tools and bins between the rungs
- Hang hooks on rungs: Add S-hooks for hanging cords and hand tools
This upcycled solution is both functional and a great conversation starter in any garage.
Safety Considerations for Your Wall-Mounted Tool Rack
A sturdy rack is only safe if installed and used correctly. Prioritizing safety prevents injuries and protects your valuable tools from damage.
Securing Heavy Tools to Prevent Accidental Falls
Heavy power tools can cause serious injury if they fall from a hook. Always double-check that hooks are rated for the specific tool weight.
- Use locking hooks: Choose hooks with spring-loaded clips for drills and saws
- Add safety straps: Wrap a bungee cord around bulky items for extra security
- Position away from walkways: Mount heavy tools over workbenches, not near doors
These precautions are especially important in households with children or pets.
Ensuring Proper Weight Distribution Across the Rack
Uneven weight distribution can cause the entire rack to tilt or pull away from the wall. Balance heavy items across multiple studs and rails.
Place the heaviest tools on the bottom rail or closest to the wall studs. This lowers the center of gravity and reduces stress on upper anchors.
Keeping the Rack Area Clear and Well-Lit
A cluttered area around your rack increases the risk of tripping and accidental tool drops. Maintain a clear floor space of at least 24 inches in front of the rack.
- Install task lighting: Use an LED work light to illuminate the rack area
- Remove obstacles: Keep ladders, buckets, and cords away from the rack zone
- Establish a return habit: Always hang tools back immediately after use
A well-lit, uncluttered space makes your rack safer and more enjoyable to use.
Conclusion: Build Your Wall-Mounted Tool Rack on a Budget Today
Building a wall-mounted tool rack on a budget is a rewarding project that saves space and money. Whether you choose a pre-made system or a custom wooden design, the benefits are immediate.
Start your project this weekend. Measure your wall, gather your materials, and follow the steps in this guide for a professional result. Your garage will feel bigger, and every tool will have a designated home.
A well-organized workspace boosts productivity and reduces stress. Take action now and enjoy a clutter-free workshop for years to come.
Frequently Asked Questions about Building a Wall-Mounted Tool Rack on a Budget
What is the best material for a budget-friendly wall-mounted tool rack?
The best materials are galvanized steel rails or untreated pine lumber. Steel offers durability and rust resistance, while pine is cheaper and easy to customize. Both cost under $40 for a standard 4-foot setup.
For heavy power tools, steel is the recommended choice. For hand tools and light gardening equipment, a wooden frame with pegboard backing works perfectly and looks great.
How much weight can a wall-mounted tool rack safely hold?
A properly installed rack fastened into wall studs can hold between 75 and 150 pounds, depending on the system. Pre-made rails like Rubbermaid FastTrack support up to 75 pounds per rail. Custom wooden frames with 2×4 lumber can handle even more.
Always check the manufacturer’s weight rating and distribute heavy items evenly. Overloading the rack is the most common cause of failure and can damage your wall.
How do I find wall studs without a stud finder?
Tap the wall gently with your knuckles and listen for a solid, low-pitched sound, which indicates a stud. Alternatively, look for electrical outlets and measure 16 inches to the left or right, as studs are typically spaced at that interval.
You can also use a strong magnet to locate drywall screws, which are usually driven into studs. Once you find one screw, check for others in the same vertical line.
Can I install a tool rack on drywall without studs?
Yes, but you must use heavy-duty drywall anchors rated for at least 50 pounds. Toggle bolts and molly bolts are excellent choices for hollow drywall. However, they are not recommended for very heavy power tools.
For maximum safety, mount a plywood backing board into studs first, then attach your rack to the plywood. This distributes weight across a larger area and reduces the risk of pull-out.
What is the ideal height to mount a tool rack in a garage?
The ideal height is between 48 and 60 inches from the floor, placing frequently used tools at eye level. This zone allows for comfortable reach without bending or stretching. For overhead storage, mount rails higher, around 72 inches.
Consider your own height and the types of tools you store. Adjust the rack height to suit your specific needs and reach.
How do I organize a tool rack to maximize space?
Group tools by category and frequency of use. Store everyday tools at eye level, heavy tools at waist height, and seasonal items on upper rails. Use a mix of hooks, shelves, and magnetic strips to accommodate different tool shapes.
Label each hook or section to create a consistent system. This makes it easier to return tools to their designated spots and keeps your rack tidy.
What is the difference between a pegboard and a slatwall tool rack?
A pegboard uses a perforated board with wire hooks, while a slatwall features horizontal grooves for specialized brackets. Pegboard is generally cheaper and offers more hook variety, while slatwall is more rigid and allows for easier repositioning of accessories.
For budget builds, pegboard is the best option due to its low cost and versatility. Slatwall is ideal for heavier tools but requires a higher initial investment.
Why does my tool rack sag in the middle, and how do I fix it?
Sagging occurs when the rack is overloaded or when the rail spans too far between studs. The fix is to add a center support bracket or move the rail to align with additional studs. Reinforce the rail with a steel support bar underneath.
Reduce the weight on the sagging section and redistribute tools evenly. Regular inspections can help you catch and fix sagging before it becomes a serious problem.