
To build a thriving garden, the bottom of your raised bed should contain a **drainage layer** of coarse material like gravel or wood chunks, topped with a weed barrier. This proven method prevents waterlogging while blocking pests and weeds from below.
In this complete guide, you will learn the exact sequence of layers, expert tips for different budgets, and how to avoid common mistakes. Continue reading to master the foundation of a productive raised bed.
Best Drainage Materials for Raised Garden Beds – Detailed Comparison
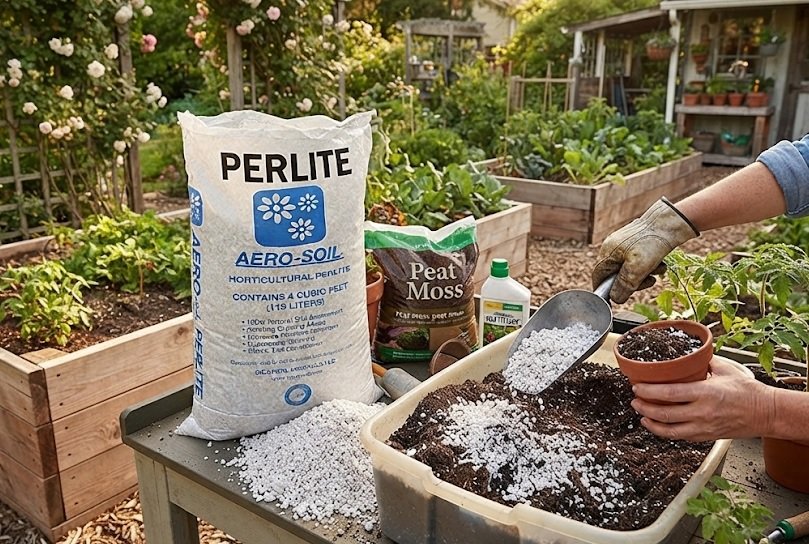
Horticultural Perlite (Coarse Grade) – Best Overall Choice
Coarse-grade perlite (like Viagrow 4 cubic feet) is the **best option** for improving drainage without adding heavy weight. This volcanic glass prevents soil compaction while retaining essential moisture. It is ideal for raised beds on patios or balconies where structural load matters. Mix it into the bottom 2-3 inches of your bed for proven results.
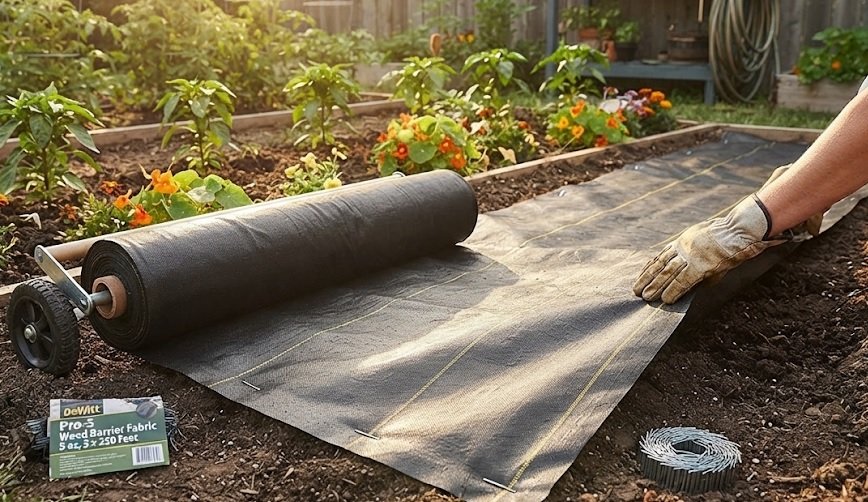
Landscape Fabric (Professional Grade) – Best Weed Barrier
The Dewitt 12-Year Pro 5-ounce landscape fabric is the **recommended** choice for blocking weeds and burrowing pests. This heavy-duty polypropylene layer allows water and air to pass through while stopping aggressive roots. It is ideal for gardeners who want a permanent, low-maintenance barrier between native soil and fresh bed mix. Install it tightly with landscape staples for maximum effectiveness.
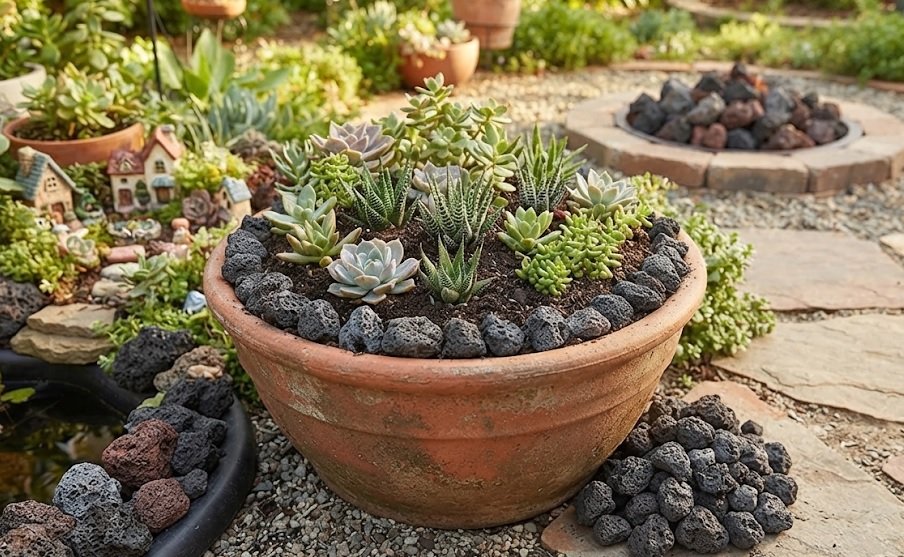
Volcano Rock (1-2 Inch Size) – Best for Large Beds
For extensive garden beds, the **best option** is 1-2 inch volcano rock (available from Quikrete). This porous stone creates massive air pockets, ensuring rapid drainage at the base of deep beds. It is ideal for vegetable gardens that require consistent root oxygenation. Unlike gravel, its rough texture prevents shifting, keeping your upper soil layers stable for years.
Understanding the Purpose of Bottom Layers in Raised Beds
The bottom layers of a raised garden bed serve three critical functions: drainage, weed suppression, and pest control. Without proper layering, your soil can become waterlogged, leading to root rot and plant failure.
Why Drainage Matters First
Excess water needs an escape route. A drainage layer at the bottom prevents soggy conditions that suffocate roots and encourage fungal diseases.
- Gravel or rocks: Create large air pockets for rapid water movement
- Coarse wood chips: Absorb excess moisture while slowly decomposing into organic matter
- Perlite or pumice: Lightweight options that improve aeration without adding bulk
Blocking Weeds and Pests from Below
Weeds and burrowing pests like voles or gophers can invade your bed from underneath. A physical barrier layer stops these threats before they reach your plants.
Landscape fabric is the most reliable barrier, but cardboard or thick newspaper also work well as biodegradable alternatives. These materials block sunlight, preventing weed seeds from germinating while allowing water to pass through.
Choosing the Right Layer Order
For best results, follow this proven sequence from bottom to top:
- Coarse material (gravel, rocks, or wood chunks) – 2-3 inches for drainage
- Barrier layer (landscape fabric or cardboard) – blocks weeds and pests
- Soil mix – your actual growing medium
Key Takeaway: Skip fine sand or small pebbles at the bottom—they compact and trap water. Always prioritize coarse materials that maintain airflow.
Understanding these layers ensures your raised bed remains productive for years. Next, we will explore specific material options and how to adapt them to your climate and budget.
Material Options for the Bottom Layer of a Raised Garden Bed
Selecting the right material depends on your budget, bed depth, and local climate. Each option offers distinct advantages and trade-offs that affect long-term soil health.
Organic Materials: Wood Chips, Logs, and Cardboard
Organic materials are excellent for deep beds (18 inches or more) because they decompose over time, adding nutrients to the soil. This method, often called **hugelkultur**, uses logs and branches as the base layer.
- Logs and branches: Retain moisture during dry spells and slowly release carbon
- Wood chips: Create air pockets while breaking down into rich compost
- Cardboard or newspaper: Acts as a biodegradable weed barrier that worms love
Keep in mind that decomposition causes the soil level to drop. You will need to top up your bed annually with fresh compost.
Inorganic Materials: Gravel, Rocks, and Landscape Fabric
Inorganic options provide permanent drainage and require no maintenance. They are ideal for shallow beds under 12 inches where soil volume is limited.
Crushed gravel or river rocks create durable drainage channels that never break down. However, they add significant weight, making them unsuitable for rooftop gardens or movable planters.
| Material | Lifespan | Best For |
|---|---|---|
| Wood chips | 2-3 years | Deep beds, moisture retention |
| Gravel | Permanent | Shallow beds, stable drainage |
| Cardboard | 1 season | Weed suppression, composting |
Combining Materials for Maximum Benefit
Most gardeners achieve the best results by combining organic and inorganic layers. Start with coarse rocks at the very bottom, add a fabric barrier, then finish with wood chips or logs. This hybrid approach maximizes drainage while building soil fertility.
Key Takeaway: Match your material choice to your bed depth. Shallow beds need permanent inorganic drainage; deep beds benefit from decomposing organic matter.
Step-by-Step Guide to Layering Your Raised Garden Bed
Proper layering is straightforward once you understand the sequence. Follow these steps to build a healthy, productive raised bed from the ground up.
Step 1: Prepare the Ground Beneath the Bed
Before placing any materials, clear the area of grass, weeds, and debris. If you are placing the bed directly on lawn, lay down cardboard or thick newspaper to smother existing vegetation.
This initial barrier prevents aggressive weeds like bindweed or Bermuda grass from pushing up through your bed. It also creates a food source for earthworms, which will eventually work their way into your soil.
Step 2: Add the Coarse Drainage Layer
Spread 2-3 inches of coarse material—gravel, river rock, or broken terracotta pots—evenly across the bottom. For deeper beds, you can increase this layer to 4-5 inches.
- Use larger stones at the very bottom, tapering to smaller sizes on top
- Avoid fine sand or pea gravel, which compacts and blocks water flow
- Slope slightly toward one corner if your bed sits on a hard surface like concrete
Step 3: Install a Barrier Layer
Place landscape fabric or a layer of cardboard over the drainage material. This barrier prevents soil from washing down into the rocks while blocking pests like voles and moles.
Cut small slits in the fabric if you plan to grow deep-rooted crops like carrots or potatoes. This allows roots to penetrate deeper while maintaining the barrier’s protective function.
Step 4: Fill with Quality Soil Mix
Fill the remaining space with a blend of 60% topsoil, 30% compost, and 10% aeration amendments like perlite or vermiculite. Water thoroughly to settle the layers, then top up with more soil after a few days.
Key Takeaway: Always water your bed immediately after filling. This reveals any settling issues and ensures your drainage layers are functioning properly from day one.
Common Mistakes to Avoid When Layering Raised Garden Beds
Even experienced gardeners make errors when building their bed’s foundation. Avoiding these pitfalls will save you time, money, and frustration down the road.
Mistake 1: Using Rocks at the Bottom of Shallow Beds
Many gardeners believe adding gravel to shallow beds improves drainage, but this actually creates a “perched water table.” Water collects at the boundary between soil and rocks, keeping roots constantly wet.
Better approach: For beds under 12 inches deep, skip the rock layer entirely. Use only soil amended with perlite or coarse sand to ensure proper drainage throughout the root zone.
Mistake 2: Adding Fresh Manure or Untreated Wood
Fresh manure can burn plant roots, while untreated wood may contain pathogens or pests. These materials also decompose rapidly, causing your soil to sink unevenly.
- Use aged compost or well-rotted manure instead of fresh products
- Choose rot-resistant wood like cedar or redwood for hugelkultur layers
- Avoid pressure-treated lumber which can leach chemicals into your soil
Mistake 3: Skipping the Weed Barrier Entirely
Without a barrier, weeds from the native soil below will invade your raised bed within weeks. This is especially problematic for beds placed directly on grass or disturbed ground.
Proven solution: Always install at least one layer of cardboard or landscape fabric at the bottom. This simple step eliminates most weed problems before they start, saving hours of maintenance each season.
Mistake 4: Filling the Entire Bed with Pure Compost
Compost is nutrient-rich but drains poorly and compacts easily. Using it exclusively creates dense soil that suffocates roots and holds excess moisture.
Key Takeaway: The ideal soil mix is 60% topsoil, 30% compost, and 10% aeration amendments. This balance ensures proper drainage, nutrient availability, and root development.
Special Considerations for Different Raised Bed Types
Not all raised beds are the same. Your layering strategy should adapt based on bed depth, location, and what you plan to grow.
Deep Beds (18-36 Inches): Maximize Organic Matter
Deep beds offer the most flexibility for layering. You can incorporate substantial organic materials like logs, branches, and wood chips at the bottom without worrying about soil settling too quickly.
- Hugelkultur method: Fill the bottom third with logs and branches to retain moisture and build fertility over time
- Add grass clippings or leaves as a middle layer to accelerate decomposition
- Expect settling: Deep beds with organic layers may drop 2-4 inches annually
Shallow Beds (6-12 Inches): Prioritize Drainage
Shallow beds have limited room for error. Skip coarse rock layers entirely and focus on soil structure to prevent waterlogging.
Use a lightweight mix of potting soil, compost, and perlite for maximum drainage. Place a fine mesh hardware cloth at the bottom to block burrowing pests without taking up valuable depth.
Raised Beds on Hard Surfaces
Beds placed on concrete, patios, or decks require special attention to drainage. Since water cannot escape downward, you must create an internal drainage system.
| Surface Type | Recommended Base Layer | Drainage Solution |
|---|---|---|
| Concrete slab | 2-3 inches of gravel | Add drainage holes or weep pipes |
| Wooden deck | Landscape fabric only | Elevate bed with feet for airflow |
| Balcony | Lightweight perlite | Use self-watering inserts |
Beds for Specific Crops
Root vegetables like carrots prefer loose, sandy soil with no barriers. Leafy greens tolerate richer, moisture-retentive mixes with organic layers.
Key Takeaway: Always match your bottom layers to your bed’s depth and location. A one-size-fits-all approach leads to poor drainage or wasted space.
Maintaining and Refreshing Your Raised Bed Layers Over Time
Raised garden beds are not static systems. Organic layers decompose, soil compacts, and nutrients deplete, requiring regular maintenance to keep your garden productive.
Annual Soil Top-Ups and Compost Additions
Each spring, add 1-2 inches of fresh compost to the top of your bed. This replenishes nutrients lost during the previous growing season and compensates for natural soil settling.
- Test your soil every 2-3 years to identify nutrient deficiencies
- Add lime or sulfur based on pH test results
- Mix in worm castings for a microbial boost
When to Replace Bottom Layers
Inorganic layers like gravel and landscape fabric can last for decades with proper care. However, organic materials such as wood chips and logs will eventually decompose completely—usually within 3-5 years.
Signs it’s time to rebuild: persistent water pooling, soil level dropping more than 3 inches annually, or foul odors indicating anaerobic decomposition. At this point, remove the top soil, refresh the drainage layer, and rebuild your barrier.
Seasonal Care Tips for Longevity
Protect your bed’s structure and layers throughout the year to maximize its lifespan. These simple habits prevent premature breakdown and reduce maintenance workload.
- Mulch in summer: Add 2-3 inches of straw or wood chips to retain moisture and regulate soil temperature
- Cover in winter: Use a tarp or cover crop to prevent erosion and nutrient leaching
- Avoid walking on soil: Use stepping stones to prevent compaction
- Water deeply, less often: Encourages deep root growth and efficient drainage
Refreshing an Existing Bed Without Full Rebuild
You don’t always need to start from scratch. For beds showing moderate signs of aging, a partial refresh often restores productivity.
Remove the top 6-8 inches of soil, set it aside, and inspect your barrier and drainage layers. Replace any degraded materials, then mix the old soil with fresh compost before returning it to the bed.
Key Takeaway: Consistent annual maintenance is far easier than rebuilding a neglected bed. Invest 30 minutes each spring to inspect and refresh your layers for decades of productive gardening.
Budget-Friendly Alternatives for Raised Bed Bottom Layers
You don’t need expensive materials to build an effective raised bed foundation. Many common household and yard items work just as well as commercial products.
Free and Low-Cost Organic Options
Look around your property for materials that would otherwise go to waste. These organic alternatives decompose slowly while improving soil structure.
- Fallen leaves: Pack them loosely at the bottom to create air pockets and add carbon
- Untreated grass clippings: Layer thinly to avoid matting and odor
- Small twigs and brush: Great for creating drainage channels in deep beds
- Kitchen scraps (vegetable only): Bury them deep to avoid attracting pests
Repurposed Household Materials
Before buying new supplies, check your garage or recycling bin for these useful items. Repurposing saves money and reduces waste.
| Household Item | Use in Raised Bed | Lifespan |
|---|---|---|
| Cardboard boxes | Weed barrier | 1-2 seasons |
| Newspaper (5-6 sheets) | Weed suppression | 1 season |
| Broken terracotta pots | Drainage layer | Permanent |
| Plastic milk crates | Inverted for drainage space | Permanent |
When to Invest in Commercial Products
Some situations justify spending money on professional-grade materials. If you have persistent pest problems, invest in hardware cloth or gopher wire.
Landscape fabric is worth the cost for permanent beds where you want zero weed penetration. High-quality fabric lasts 10+ years, making it more economical than replacing cardboard annually.
Smart Shopping Tips
Buy materials in bulk during off-season sales to save significantly. Check local landscaping supply companies for discounted “fill dirt” or imperfect gravel.
Key Takeaway: Start with free materials you already have, then upgrade only where performance matters most—typically pest barriers and long-term drainage.
Conclusion: Master Your Raised Garden Bed Layers for Lasting Success
Getting the bottom layers right is the foundation of a thriving raised garden bed. Proper drainage, weed barriers, and material choices prevent common failures like waterlogging and pest invasions.
Start with coarse materials, add a reliable barrier, and finish with quality soil. Match your approach to your bed’s depth and location for the best results.
Take action today by assessing your current bed or planning your new one. Apply these proven methods and enjoy healthier plants, less maintenance, and bigger harvests for years to come.
Frequently Asked Questions about Raised Garden Bed Layers
What is the best material to put at the bottom of a raised garden bed?
The best material depends on your bed’s depth and location. For deep beds over 18 inches, coarse wood chips or logs work excellently as they decompose and add nutrients. For shallow beds, landscape fabric over gravel provides permanent drainage without taking up valuable soil space.
Cardboard is a versatile, budget-friendly option that blocks weeds while decomposing into organic matter. Avoid using fine sand or small pebbles, as they compact and trap water, creating drainage problems.
Should I put rocks in the bottom of my raised garden bed?
Rocks at the bottom of shallow beds under 12 inches can create a perched water table that keeps roots constantly wet. This often leads to root rot and poor plant health. For deeper beds, a 2-3 inch layer of coarse gravel or river rock can improve drainage effectively.
If your bed sits on a hard surface like concrete, rocks become more necessary to create drainage channels. Always pair rocks with a landscape fabric barrier to prevent soil from washing down between them.
How deep should the drainage layer be in a raised garden bed?
A drainage layer of 2-3 inches is sufficient for most raised beds. Deeper beds of 24 inches or more can accommodate up to 4-5 inches of coarse material without compromising soil volume. The key is balancing drainage needs with available growing space for roots.
Remember that plants need at least 12 inches of quality soil for healthy root development. Excessive drainage layers reduce this space and can stunt plant growth, especially for deep-rooted vegetables like tomatoes and carrots.
Can I use cardboard as a weed barrier at the bottom of my raised bed?
Yes, cardboard is an excellent, eco-friendly weed barrier that breaks down naturally over time. Use plain, uncoated cardboard without glossy prints or tape, and overlap edges by at least 4-6 inches to prevent weeds from finding gaps. Wet the cardboard thoroughly before adding soil to help it conform to the bed’s shape.
Cardboard typically lasts 1-2 seasons before fully decomposing. For permanent weed protection, consider combining cardboard with a layer of landscape fabric on top for extended durability.
What should I put at the bottom of a raised garden bed to prevent weeds?
Landscape fabric is the most reliable long-term solution for weed prevention at the bottom of raised beds. It blocks weed growth while allowing water and air to pass through. For a more natural approach, lay 5-6 sheets of newspaper or a single layer of cardboard to smother existing vegetation.
For persistent weed problems, combine a physical barrier with a 2-3 inch layer of coarse gravel on top. This dual-layer approach stops even aggressive weeds like bindweed and Bermuda grass from penetrating your bed.
How do I keep pests like voles and gophers out of my raised garden bed?
Install 1/4-inch hardware cloth or galvanized wire mesh at the bottom of your bed to block burrowing pests. This metal barrier is permanent and prevents voles, gophers, and moles from tunneling up into your soil. Cut the mesh slightly larger than your bed and bend edges up the sides by 2-3 inches for complete protection.
For added security, place the mesh between two layers of landscape fabric. This prevents soil from clogging the mesh while keeping pests out effectively.
Can I put grass clippings at the bottom of a raised garden bed?
Yes, grass clippings work well as a bottom layer, but use them sparingly and mix with coarse materials. A thin 1-2 inch layer of dry clippings adds nitrogen as it decomposes, benefiting plant growth. Avoid thick layers of fresh clippings, which can mat together and create anaerobic conditions that produce foul odors.
Always mix grass clippings with brown materials like leaves or wood chips to balance carbon and nitrogen. This ensures proper decomposition without harmful side effects.
How often should I replace the bottom layers of my raised garden bed?
Inorganic materials like gravel and landscape fabric can last 10 years or more with proper maintenance. Organic layers such as wood chips, logs, and cardboard typically decompose within 3-5 years and should be refreshed during this period. Monitor your bed for signs of settling or reduced drainage to determine when replacement is needed.
If you notice water pooling on the surface or soil levels dropping significantly, inspect your bottom layers. A partial refresh, rather than a complete rebuild, often restores proper function without major disruption to your plants.