
You should replace the soil in a raised garden bed every 2 to 3 years, but only if you notice compaction or nutrient depletion. However, most gardeners can simply refresh the existing soil to extend its life. This complete guide reveals the proven methods for maintaining optimal plant health.
In this article, you will learn the exact signs that indicate your soil needs replacing versus simple amending. We provide expert tips on top-dressing, crop rotation, and long-term soil care strategies. Continue reading to discover how to keep your raised beds thriving for decades without the hard work of a full replacement.
Best Soil Testing Kits for Raised Garden Beds – Detailed Comparison
Before deciding whether to replace or amend your raised bed soil, you need accurate data. A reliable soil test kit removes guesswork and saves you money by identifying specific deficiencies. Here are our top three recommendations based on accuracy, ease of use, and value.
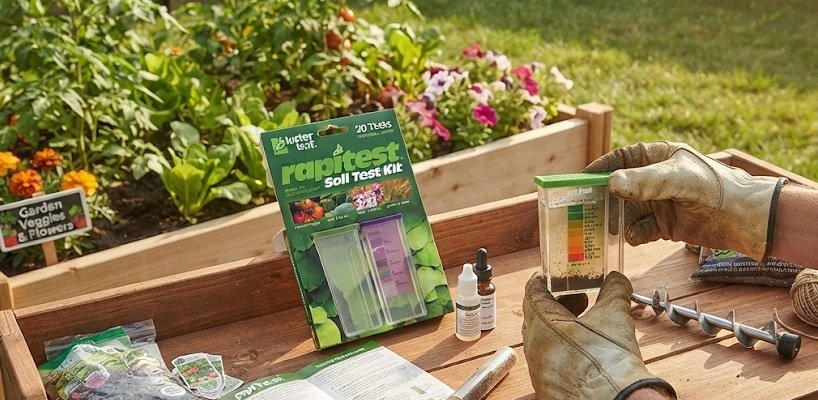
Luster Leaf 1601 Rapitest – Best Overall Choice
The Luster Leaf 1601 Rapitest is our top pick for gardeners who want a balance of simplicity and detailed results. This kit tests pH, Nitrogen, Phosphorus, and Potash with a simple color-match system. It is ideal for quick seasonal checks and includes a comprehensive guide to correcting nutrient imbalances.
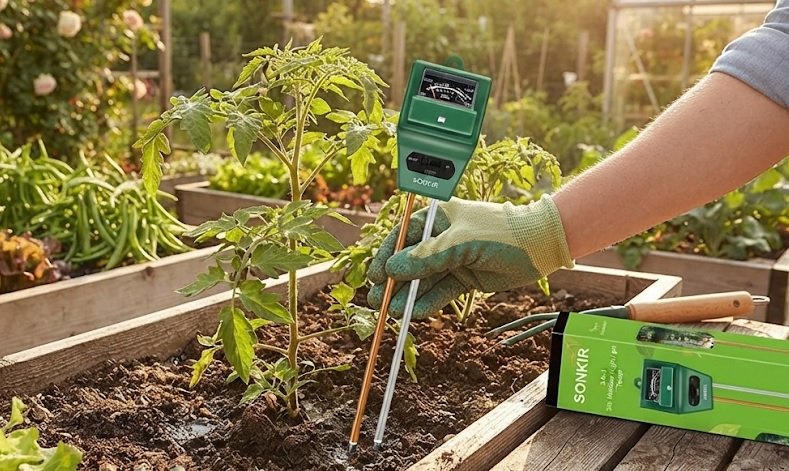
Sonkir Soil pH Meter MS02 – Best for Instant Results
For those who need immediate answers without chemical reagents, the Sonkir Soil pH Meter MS02 is the best option. This 3-in-1 tool measures pH, moisture, and light levels directly in the soil. It is recommended for frequent monitoring and is perfect for gardeners who prefer a low-maintenance, probe-style device.
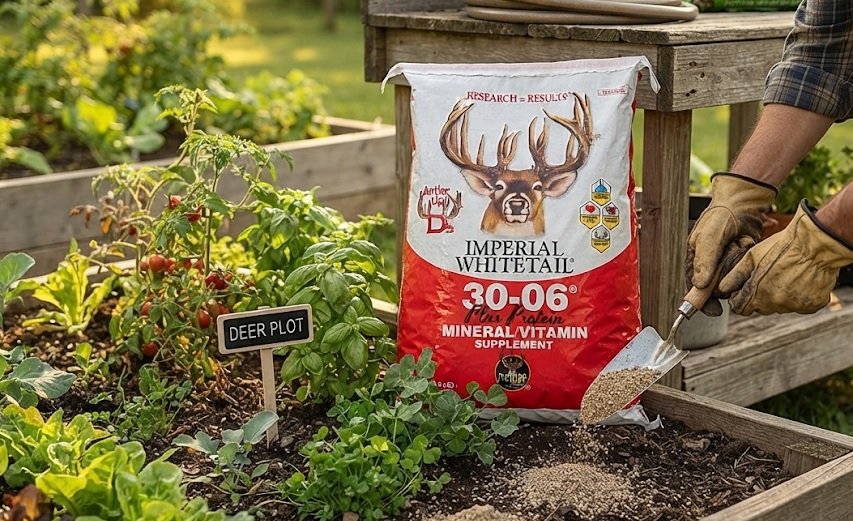
Whitetail Institute 2840 – Best Professional Laboratory Kit
If you want precise, lab-grade analysis, the Whitetail Institute 2840 is the best choice. You simply mail a soil sample to their lab and receive a detailed report with exact fertilizer recommendations. This is ideal for serious growers who want to maximize yield and avoid over-amending their raised beds.
Signs Your Raised Bed Soil Needs Replacement
Understanding when to replace soil in a raised garden bed starts with recognizing the warning signs. Most gardeners wait until plants fail, but proactive observation prevents wasted effort. Here are the key indicators that your soil is exhausted or degraded.
Visual and Physical Symptoms
The most obvious sign is a sunken soil level inside the bed. Organic matter breaks down over time, causing the surface to drop significantly. Additionally, if water pools on the surface after watering, your soil has likely become compacted and lost its porous structure.
- Poor drainage: Water sits for hours, indicating clay-like compaction.
- Shrinking volume: Soil level drops more than 2 inches below the bed rim.
- White crust: Salt buildup on the surface, often from synthetic fertilizers.
- Strong odor: A sour or rotten smell suggests anaerobic conditions.
Plant Performance Decline
Even with regular fertilization, plants may show stunted growth or yellowing leaves. This often indicates a pH imbalance or micronutrient deficiency that simple fertilizer cannot fix. If you see these symptoms for two consecutive seasons, replacement is likely necessary.
Key Takeaway: If your soil fails a pH test or shows severe compaction despite amending, replace it entirely. Otherwise, refreshing the top 2-3 inches usually restores vitality.
When to Amend Instead of Replace
Replacement is labor-intensive, so consider amending first. If your soil still has good structure and drainage, adding compost and worm castings annually may be sufficient. Only replace when the soil has become hydrophobic or contaminated with pests or diseases.
Step-by-Step Guide to Refreshing Raised Bed Soil
Refreshing your raised bed soil is a sustainable alternative to full replacement. This proven method restores nutrients and structure without the back-breaking work of removing old soil. Follow this simple process every 1-2 years to keep your beds productive.
How to Top-Dress Your Raised Beds
Top-dressing involves adding a nutrient-rich layer over the existing soil surface. Start by removing any mulch or dead plant debris from the bed. Then, spread a 1-2 inch layer of quality compost evenly across the entire surface.
- Loosen the top layer: Use a garden fork to gently aerate the top 2-3 inches without disturbing plant roots.
- Add organic matter: Apply compost, aged manure, or worm castings at a rate of 1 cubic foot per 25 square feet.
- Mix gently: Blend the new compost into the existing soil using a hand cultivator.
- Water thoroughly: This activates the nutrients and settles the soil structure.
Using Crop Rotation to Extend Soil Life
Rotating your crops prevents nutrient depletion and reduces disease buildup. Different plants absorb different nutrients, so rotating them keeps the soil balanced. For example, follow heavy feeders like tomatoes with nitrogen-fixing legumes like beans.
Expert Tip: Plant cover crops like clover or buckwheat during the off-season. These “green manures” add organic matter and prevent soil erosion when pulled under in spring.
When Full Replacement Is Necessary
If your soil has been contaminated by disease, or if it has become hydrophobic and repels water, replacement is the safest option. Remove the top 6-8 inches of old soil and replace it with a fresh mix of 60% topsoil, 30% compost, and 10% perlite for optimal drainage.
How to Replace Soil in a Raised Garden Bed Properly
When replacement becomes unavoidable, doing it correctly ensures your new soil lasts longer. This process requires planning and physical effort, but the results are worth it. Follow this systematic approach for a successful soil overhaul.
Removing Old Soil Safely
Begin by removing any remaining plants and roots from the bed. Use a spade to dig out the old soil, working in sections for easier handling. Dispose of diseased soil away from your garden to prevent contamination.
- Compost it: Healthy old soil can be added to your compost pile in thin layers.
- Reuse elsewhere: Use old soil for non-edible landscaping beds or fill low spots in your yard.
- Bag and dispose: Contaminated soil should be sealed in bags and sent to landfill.
Choosing the Best Soil Mix Recipe
The ideal raised bed mix balances drainage, moisture retention, and nutrition. A proven recipe is 50% topsoil, 30% compost, and 20% aeration materials like perlite or coarse sand. This combination provides a stable base while preventing compaction over time.
Key Takeaway: Avoid using 100% compost as your growing medium. It breaks down too quickly, causing the soil level to drop dramatically within one season.
Preparing the Bed for New Soil
Before adding fresh soil, inspect the bed frame for rot or damage. Line the bottom with landscape fabric to prevent weeds from invading. Then, fill the bed with your new mix, leaving about 1 inch of space at the top for watering.
Water the soil thoroughly after filling to settle any air pockets. Wait 2-3 days before planting to allow the soil structure to stabilize. This simple step prevents root shock and ensures better plant establishment.
Extending Soil Life with Seasonal Maintenance
Once you have healthy soil, the goal is to keep it that way for as long as possible. Consistent seasonal maintenance is the secret to avoiding frequent replacements. By adopting these habits, you can extend your soil’s lifespan to 5 years or more.
Spring and Fall Soil Care Routines
In early spring, test your soil pH and amend it before planting. Add a balanced organic fertilizer and a fresh layer of compost to kick-start microbial activity. In fall, remove spent plants and add a thick layer of mulch to protect soil structure during winter.
- Spring: Apply 1 inch of compost and a slow-release fertilizer.
- Summer: Replenish mulch to retain moisture and suppress weeds.
- Fall: Plant cover crops or add shredded leaves for overwintering.
- Winter: Avoid walking on wet soil to prevent compaction.
Mulching Strategies for Moisture Retention
Organic mulches like straw, wood chips, or grass clippings break down and feed your soil. They also regulate soil temperature and reduce water evaporation by up to 30%. Apply a 2-3 inch layer around plants, keeping it away from stems to prevent rot.
Expert Tip: Worms are your best allies in soil maintenance. Encourage them by adding organic matter and avoiding chemical pesticides. Their castings are a natural fertilizer that improves soil structure.
Monitoring Soil Health Year-Round
Regular observation helps you catch problems early. Check soil moisture levels weekly by squeezing a handful of soil—it should hold together but crumble easily. Look for earthworm activity as a sign of healthy, living soil.
Keep a simple garden journal to track your soil amendments and plant performance. This helps you identify patterns and adjust your maintenance routine accordingly. Over time, you will develop a customized care plan that keeps your raised beds productive indefinitely.
Common Soil Replacement Mistakes to Avoid
Even experienced gardeners make errors when managing raised bed soil. These mistakes can waste money, harm plants, and shorten soil life. Here are the most frequent pitfalls and how to avoid them.
Over-Amending and Nutrient Burn
Adding too much compost or fertilizer can actually harm your plants. Excess nutrients create salt buildup that burns roots and inhibits water uptake. Always follow recommended application rates and test your soil before adding amendments.
- Mistake: Adding fresh manure directly before planting—it can burn roots.
- Solution: Use aged manure or compost it for at least 6 months first.
- Mistake: Applying fertilizer without testing soil first.
- Solution: Use a soil test kit to identify actual deficiencies.
Ignoring Soil pH Levels
Most vegetables prefer a slightly acidic pH between 6.0 and 7.0. If your soil is too acidic or alkaline, nutrients become locked up and unavailable to plants. Test pH annually and amend with lime to raise it or sulfur to lower it.
Key Takeaway: A pH imbalance is often mistaken for a nutrient deficiency. Always test pH before adding more fertilizer.
Using Poor Quality Soil Mixes
Cheap soil blends often contain fillers that break down quickly or compact easily. Invest in high-quality topsoil and compost from reputable sources. Check for uniform texture and a rich, earthy smell—avoid mixes with large clumps or foul odors.
Another common mistake is failing to account for soil settling. New soil will settle significantly within the first few weeks. Fill beds slightly higher than needed and be prepared to add more soil after the initial settling period.
Cost Comparison: Replacing vs. Refreshing Raised Bed Soil
Budget plays a significant role in deciding whether to replace or refresh your soil. Understanding the financial implications helps you make a smart, cost-effective choice. Here is a breakdown of what each approach typically costs.
Estimated Costs for Soil Replacement
Full replacement requires purchasing new topsoil, compost, and aeration materials. For a standard 4×8-foot bed (32 square feet), you will need roughly 16 cubic feet of new mix. Expect to pay between $80 and $150 depending on material quality and local prices.
| Material | Quantity Needed | Estimated Cost |
|---|---|---|
| Topsoil | 8 cubic feet | $30 – $60 |
| Compost | 5 cubic feet | $25 – $50 |
| Perlite/Coarse Sand | 3 cubic feet | $15 – $40 |
| Total | 16 cubic feet | $70 – $150 |
Cost-Effective Refreshing Methods
Refreshing your existing soil is significantly cheaper, often costing just $20 to $40 per bed. You mainly need compost and perhaps a small amount of organic fertilizer. This approach saves money while still providing essential nutrients.
- Compost: $10 – $20 per cubic foot, depending on source.
- Organic fertilizer: $10 – $20 per bag, lasting multiple seasons.
- Worm castings: $15 – $30 per bag for a nutrient boost.
Key Takeaway: Refreshing soil saves 50-70% of the cost of full replacement. Only opt for replacement when soil is severely degraded or contaminated.
Long-Term Value Considerations
While replacement costs more upfront, it may extend bed productivity for several years. However, consistent refreshing can achieve similar results with less expense. Factor in labor time and disposal costs when making your decision.
Frequently Asked Questions About Raised Bed Soil Lifespan
Gardeners often have specific questions about soil longevity and care. This section addresses the most common queries with clear, actionable answers. Use this as a quick reference guide for your raised bed maintenance.
How Many Years Does Raised Bed Soil Last?
With proper care, raised bed soil can last 5 to 7 years before needing full replacement. However, this depends on your climate, crops, and maintenance routine. Regular amending and crop rotation significantly extend soil life.
- Light feeders: Lettuce, herbs, and radishes are less demanding on soil.
- Heavy feeders: Tomatoes, squash, and corn deplete nutrients quickly.
- Perennials: These plants require consistent soil health over multiple years.
Can I Reuse Old Soil From a Raised Bed?
Yes, you can absolutely reuse old soil if it is healthy and disease-free. Refresh it by adding compost and aeration materials before replanting. If plants showed signs of disease, sterilize the soil or replace it entirely to prevent recurrence.
Quick Answer: Reuse soil for up to 3 years with annual refreshing. After that, consider replacing the top half to maintain vigor.
What Is the Best Way to Sterilize Old Soil?
Solarization is an effective, chemical-free method to sterilize soil. Moisten the soil, cover it with clear plastic, and leave it in direct sunlight for 4-6 weeks. This kills pathogens, weed seeds, and pests without harming beneficial microbes.
For smaller quantities, oven sterilization works well. Spread soil on a baking tray and heat at 180°F for 30 minutes. Allow it to cool completely before using. Note that this method also kills beneficial organisms, so add compost afterward.
Conclusion: Mastering Raised Garden Bed Soil Longevity
Knowing how often to replace soil in a raised garden bed empowers you to make smart, cost-effective decisions. **Refresh your soil annually** with compost and only replace it every 5-7 years when truly necessary.
The key takeaway is simple: proactive maintenance beats reactive replacement. Test your soil, rotate crops, and monitor plant health consistently.
Start implementing these expert strategies today to enjoy thriving, productive raised beds for years. Your plants will reward you with abundant harvests and vibrant growth. Happy gardening!
Frequently Asked Questions about Replacing Soil in Raised Garden Beds
How often should I replace soil in a raised garden bed?
You should replace the soil in a raised garden bed every 5 to 7 years under normal conditions. However, this timeline varies based on crop types, climate, and maintenance habits. Regular refreshing with compost can extend this period significantly.
If you notice severe compaction, persistent disease, or hydrophobic soil, replace it sooner. Testing your soil annually helps you make an informed decision rather than guessing. Proactive care is always more cost-effective than frequent replacement.
What is the best way to refresh raised bed soil?
The best way to refresh raised bed soil is by top-dressing with 1-2 inches of quality compost each spring. Gently mix it into the top few inches of existing soil using a hand cultivator. This adds nutrients and improves structure without disturbing plant roots.
Additionally, incorporate worm castings or aged manure for an extra nutrient boost. Cover crops during the off-season also replenish organic matter naturally. These methods are affordable and sustainable for long-term soil health.
Can I reuse old soil from a raised garden bed?
Yes, you can reuse old soil from a raised garden bed if it is healthy and free from disease. Refresh it by adding compost, perlite, and organic fertilizer before replanting. This approach saves money and reduces waste in your garden.
However, if plants showed signs of disease or pests, sterilize the soil or replace it entirely. Solarization is an effective method for killing pathogens without chemicals. Always test pH and nutrient levels before reusing soil.
Why does soil level drop in raised garden beds?
Soil level drops in raised garden beds primarily because organic matter breaks down over time. Compost and other organic materials decompose, reducing volume and causing the surface to sink. This is a natural process that occurs faster in warm, moist conditions.
Additionally, watering and wind can cause soil compaction and erosion. To counteract this, add fresh compost annually and top up with new soil as needed. Expect some settling in the first few weeks after initial filling.
What is the best soil mix for a raised garden bed?
The best soil mix for a raised garden bed is 50% topsoil, 30% compost, and 20% aeration materials like perlite or coarse sand. This combination provides excellent drainage while retaining moisture and nutrients. It also resists compaction better than pure compost or topsoil.
For vegetable gardens, add a balanced organic fertilizer to the mix before planting. Avoid using 100% compost as it breaks down too quickly. This recipe supports healthy root growth and productive plants for multiple seasons.
How do I know if my raised bed soil is bad?
You can tell if your raised bed soil is bad by checking for poor drainage, foul odors, or stunted plant growth. Water pooling on the surface and white crust from salt buildup are clear warning signs. These symptoms indicate compaction, nutrient imbalance, or contamination.
Perform a simple soil test to check pH and nutrient levels. If plants show yellowing leaves or fail to thrive despite fertilization, the soil likely needs attention. Address these issues promptly to prevent further degradation.
Should I replace soil if plants have root rot?
Yes, you should replace soil if plants have root rot, as the pathogens can survive in the soil. Remove affected plants and dispose of them away from your garden. Then, sterilize the soil using solarization or replace it entirely.
Root rot thrives in waterlogged conditions, so improve drainage in your new soil mix. Add perlite or sand to increase aeration and avoid overwatering. This prevents recurrence and keeps your plants healthy.
What is the difference between amending and replacing soil?
Amending soil means adding materials like compost, fertilizer, or perlite to improve its quality without removing it. This is a less invasive and more cost-effective approach for maintaining soil health. Replacement involves removing old soil and adding fresh mix entirely.
Choose amending when your soil structure is still good and only nutrients are depleted. Opt for replacement when soil is severely compacted, contaminated, or hydrophobic. Understanding this difference saves time, money, and effort.