
Learning **how to sharpen garden shears at home** transforms dull, frustrating tools into precision cutting instruments. This simple skill saves you money and makes every pruning session effortless. You will restore your shears to factory-sharp condition using common household items.
This complete guide covers four proven methods, from quick file tricks to professional honing techniques. We will show you exactly how to disassemble, clean, and sharpen both bypass and anvil shears. **Let’s bring your garden tools back to life** with these expert tips.
Best Sharpening Tools for Garden Shears – Detailed Comparison
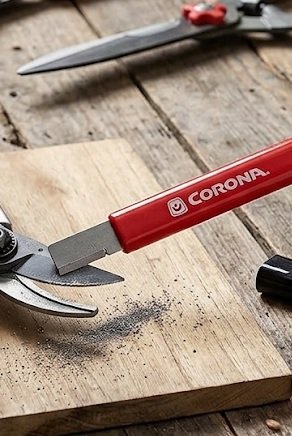
Corona Professional Sharpening Tool (Part #SC-3200) – Best Overall Choice
The **Corona SC-3200** features a tungsten carbide blade that quickly restores a sharp edge on any garden shear. Its ergonomic handle provides a comfortable grip, making the job fast and safe. This tool is the **best option** for gardeners who need a simple, no-fuss solution without removing the blade from the shears.
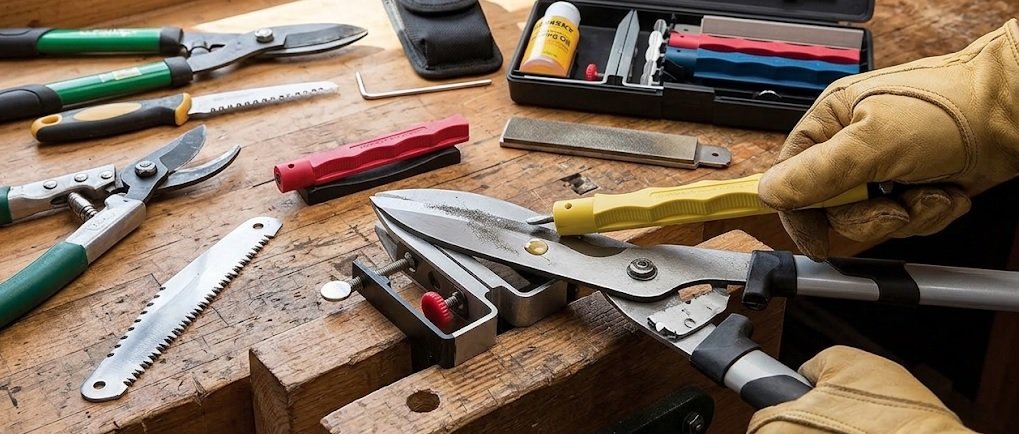
Lansky Controlled-Angle Sharpening System (Model LKCW01) – Best for Precision
The **Lansky LKCW01** uses a patented angle guide to ensure a consistent, factory-level bevel every time. It is ideal for high-end bypass pruners where precision matters most. This system is **recommended** for users who want professional results and don’t mind a slightly longer setup process.
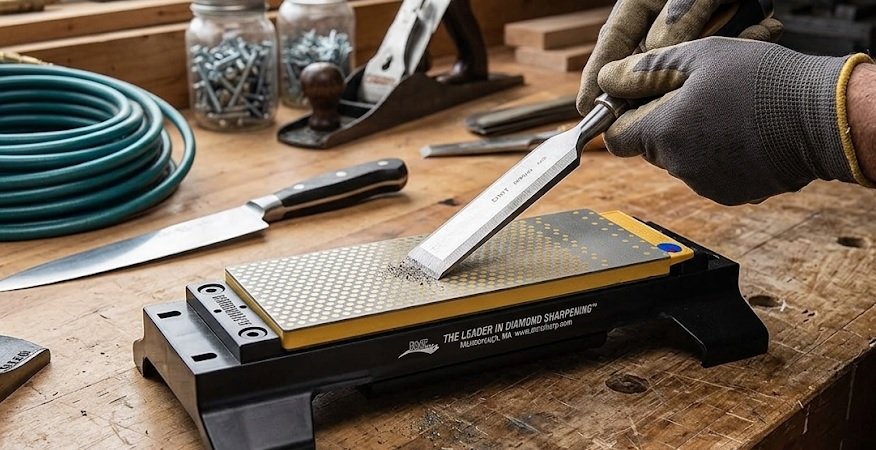
DMT Diamond Sharpening Bench Stone (Model D8C) – Best for Heavy-Duty Restoration
The **DMT D8C** is a coarse/fine diamond stone that handles nicked or severely dull blades with ease. It is perfect for restoring old, neglected shears to peak performance. This is the **ideal for** heavy jobs, offering a durable, flat surface that will last for years of regular use.
Preparing Your Garden Shears for Sharpening
Before you start sharpening, proper preparation ensures a safe and effective process. Skipping these steps often leads to uneven edges or damaged tools. Follow this quick routine to get your shears ready.
Cleaning and Inspection
First, remove all dirt, sap, and rust from the blades. Use a wire brush or steel wool with warm soapy water for the best results. Dry the shears completely to prevent rust during the sharpening process.
Inspect the blades for deep nicks, bends, or excessive wear. Minor nicks can be filed out, but cracked blades require replacement. Check the pivot bolt for tightness and lubricate it with a few drops of oil.
Disassembling the Shears
Most bypass and anvil shears come apart with a simple wrench or screwdriver. Removing the center bolt separates the two blades for easier access. This step is crucial for achieving a consistent angle along the entire cutting edge.
- Bypass shears: Only sharpen the outside edge of the beveled blade.
- Anvil shears: Sharpen only the single cutting blade, never the flat anvil.
- Safety tip: Wear cut-resistant gloves to protect your hands.
Once disassembled, secure the blade in a bench vise to keep it steady. Now you are ready to select your sharpening method and restore that razor edge.
Step-by-Step Sharpening Methods for Garden Shears
Now that your shears are clean and secured, it’s time to restore the edge. Here are the three most effective methods for sharpening garden shears at home. Each technique suits different skill levels and tool conditions.
Method 1: Using a Sharpening Stone or Whetstone
This traditional method offers maximum control and a polished finish. Start by applying a few drops of honing oil to the stone’s surface. Hold the blade at a **20-degree angle** against the stone, matching the existing bevel.
- Push the blade: Move it across the stone in a sweeping arc, away from your body.
- Repeat 10-15 times: Maintain consistent pressure until a slight burr forms on the back edge.
- Remove the burr: Flip the blade flat and make 2-3 light passes to smooth it.
Method 2: Using a Flat File
A mill file is perfect for removing nicks or reshaping a badly worn edge. Clamp the blade securely in a vise with the bevel facing up. Follow the original angle with long, smooth strokes from the base to the tip.
Use a **single-direction push stroke** rather than a back-and-forth motion. This prevents rounding the edge and ensures a cleaner cut. Finish with a fine stone to polish away any file marks.
Method 3: Using a Rotary Tool
For quick results, a rotary tool with a grinding stone attachment works well. This method is best for experienced users comfortable with power tools. Work slowly to avoid overheating the metal, which ruins the blade’s temper.
How to Test Sharpness and Reassemble Your Shears
Sharpening is only half the battle—testing and reassembly are just as critical. A properly sharpened blade should cut cleanly without crushing stems. Here is how to verify your work and put everything back together safely.
Testing the Edge for Sharpness
The easiest test is the **paper test**. Hold a piece of standard printer paper and try to slice it with the blade. A sharp edge will cut smoothly with minimal pressure, while a dull one will tear or snag.
- Visual check: Look for a consistent, reflective edge with no dull spots.
- Thumbnail test: Gently drag the edge across your thumbnail—it should catch slightly.
- Plant test: Cut a fresh twig; the cut should be clean and not crushed.
Reassembling the Garden Shears
Once satisfied with the edge, align the two blades and reinsert the pivot bolt. Tighten the bolt until the blades move smoothly without excessive play. Over-tightening causes friction, while a loose bolt leads to sloppy cuts.
Apply a drop of **light machine oil** to the pivot point and along the blade edge. This reduces friction during cutting and protects against moisture. Wipe off any excess oil with a clean cloth.
Final Adjustments and Maintenance Tips
If the blades rub together, check for a small tension screw on the side. Adjust it gradually until the action feels smooth and precise. Store your shears hanging or in a dry toolbox to prevent accidental damage.
Common Mistakes to Avoid When Sharpening Garden Shears
Even experienced gardeners make errors that ruin perfectly good blades. Avoiding these pitfalls keeps your tools in top condition and saves you from costly replacements. Here are the most frequent mistakes and how to sidestep them.
Sharpening the Wrong Side of the Blade
The most common error is sharpening the flat back of a bypass shear blade. Only the **beveled edge** should touch the stone or file. Sharpening the flat side destroys the cutting geometry and makes the tool useless.
Always examine the blade profile before you start. The bevel is the angled surface that meets the cutting edge. If you are unsure, compare the two blades—only one has a visible bevel.
Using the Wrong Grit or Tool
Starting with a coarse stone on a relatively sharp blade removes too much metal. This shortens the blade’s lifespan and creates a rough edge. Use a **medium grit (250-400)** for routine sharpening and reserve coarse grits for major repairs.
- Diamond stones: Best for hard steel and quick material removal.
- Whetstones: Offer a finer finish but require soaking and oil.
- Files: Ideal for reshaping but leave a rough edge.
Overheating the Blade with Power Tools
Rotary tools generate friction heat that can **draw the temper** from the steel. This makes the edge soft and prone to dulling quickly. Keep the tool moving and use light pressure to minimize heat buildup.
If the blade turns blue or discolored, you have overheated it. Stop immediately and let it cool naturally—do not quench it in water, as this causes cracking.
Maintaining Your Garden Shears for Long-Lasting Sharpness
Sharpening is a temporary fix if you neglect regular maintenance. A consistent care routine keeps your shears cutting smoothly all season long. Here is how to preserve that fresh edge and extend the life of your tools.
Cleaning After Every Use
Sap, dirt, and plant debris dull blades faster than normal wear. Wipe the blades clean with a dry cloth immediately after each pruning session. For stubborn sap, use rubbing alcohol or a specialized blade cleaner.
Do not leave your shears dirty overnight. Acids in plant sap can pit the steel and create rust spots. A quick 30-second wipe prevents hours of future scrubbing.
Lubrication and Rust Prevention
Apply a thin coat of **camellia oil** or light machine oil to the blades after cleaning. This creates a protective barrier against moisture and reduces friction during cutting. Focus on the pivot point and the cutting edge.
- Monthly oiling: Keeps the action smooth and prevents seizing.
- Winter storage: Apply a heavier grease before long-term storage.
- Avoid WD-40: It displaces water but evaporates quickly, leaving blades unprotected.
When to Sharpen Again
Most home gardeners need to sharpen shears every 4-6 weeks during active growing season. Heavy users or those cutting woody stems may need to sharpen more frequently. Watch for signs like crushed stems or increased effort required to cut.
Test your shears regularly with the paper test. If the blade tears rather than slices, it is time for a quick touch-up. A few passes with a fine stone often restore the edge without a full sharpening session.
Frequently Asked Questions About Sharpening Garden Shears
Many gardeners have specific questions about blade angles, tools, and techniques. Here are direct answers to the most common queries. These insights will help you sharpen with confidence and avoid costly errors.
What Angle Should I Use to Sharpen Garden Shears?
Most garden shears have a factory bevel between **20 and 25 degrees**. Match this existing angle when sharpening to maintain proper cutting performance. Using a steeper angle makes the edge stronger but less sharp, while a shallower angle cuts better but dulls faster.
If you are unsure, use a permanent marker to color the bevel. Make one pass with your stone—the marker will wear away only where the stone contacts the metal. Adjust your angle until the entire bevel is clean.
Can I Sharpen Serrated Garden Shears?
Yes, but serrated blades require a different approach than straight edges. Use a **tapered round file** that fits into each serration groove. Push the file in one direction only, matching the existing angle of each tooth.
- Do not: Use a flat stone or bench grinder on serrated blades.
- Do: Work slowly, sharpening each tooth individually.
- Tip: Mark every other tooth with a marker to track your progress.
How Often Should I Oil My Garden Shears?
Oil your shears after every cleaning session, especially if you cut wet or sappy plants. A light coat on the blades and pivot point is sufficient for regular use. For long-term storage, apply a slightly heavier layer to protect against humidity.
Use food-safe oils like **camellia oil** if you prune edible plants. Mineral oil is also safe and widely available. Avoid vegetable oils, which can turn rancid and gum up the mechanism.
Troubleshooting Common Garden Shear Problems
Even with proper sharpening, shears can develop issues that affect performance. Understanding the root cause helps you fix problems quickly. Here are solutions for the most frequent shear complaints.
Shears Are Hard to Open and Close
Stiff action usually means the pivot bolt is too tight or debris has accumulated. First, loosen the pivot bolt slightly and test the action. If the problem persists, disassemble the shears and clean the pivot area thoroughly.
Apply a drop of oil to the pivot point and work the blades open and closed several times. This distributes the lubricant and flushes out any remaining grit. If stiffness continues, check for bent blades or a damaged spring.
Blades Are Not Cutting Cleanly
Clean cuts require both sharp edges and proper blade alignment. Check that the blades meet evenly along their entire length. If there is a gap, adjust the tension screw or file down any high spots.
- Crushed stems: Blades are too dull or the bypass clearance is too wide.
- Torn edges: The bevel angle is incorrect or the edge has burrs.
- Uneven cuts: One blade is sharper than the other or misaligned.
Rust on the Blades
Surface rust is easy to remove with fine steel wool or a rust eraser. Rub gently along the blade surface until the rust disappears. Rinse with clean water and dry thoroughly before oiling.
For deep rust pitting, use a wire brush attachment on a drill. This aggressive method removes material quickly, so work carefully to preserve the blade profile. After cleaning, apply a rust inhibitor to prevent recurrence.
Conclusion: Master the Art of Sharpening Garden Shears
Learning **how to sharpen garden shears at home** saves money and keeps your garden thriving. With the right tools and techniques, you can maintain razor-sharp blades in minutes. Regular maintenance prevents costly replacements and ensures clean, healthy cuts every time.
Start with a simple sharpening stone and build your skills from there. **Consistency beats intensity**—a quick monthly touch-up outperforms an annual deep sharpening session. Your plants will thank you for the precision cuts, and your hands will appreciate the effortless action.
Now go grab those dull shears and put these expert tips to work today!
Frequently Asked Questions about Sharpening Garden Shears
What is the best way to sharpen garden shears at home?
The best way is using a medium-grit sharpening stone or a flat file. Secure the blade in a vise, match the factory bevel angle, and push the stone along the edge in one direction. This method offers control and prevents overheating.
For quick touch-ups, a tungsten carbide sharpener works well. However, a stone gives you the finest finish and removes less metal over time. Choose the stone method for longevity and precision.
How often should I sharpen my garden shears?
Most home gardeners should sharpen shears every 4-6 weeks during active growing season. Heavy users or those cutting woody stems may need to sharpen more frequently. Watch for crushed stems or increased cutting effort as signs.
Test your shears with the paper test regularly. If the blade tears paper instead of slicing it cleanly, it is time for a quick sharpening session.
Can I use a bench grinder to sharpen garden shears?
Yes, but only with extreme caution. Bench grinders remove metal quickly and generate significant heat, which can ruin the blade’s temper. If you use one, work in short bursts and keep the blade moving to avoid overheating.
Dip the blade in water frequently to keep it cool. However, for most gardeners, a manual stone or file is safer and produces better results.
Why are my garden shears still dull after sharpening?
You may be sharpening the wrong side of the blade. Only the beveled edge should be sharpened, never the flat back. Alternatively, you might be using too coarse a grit, leaving a rough edge that feels dull.
Check that you are maintaining a consistent angle throughout the stroke. A burr left on the edge can also make cuts feel rough. Finish with a fine stone to remove the burr.
Should I disassemble my shears before sharpening?
Yes, disassembling is highly recommended for the best results. Removing the center bolt separates the blades, giving you full access to the cutting edge. This allows for a consistent angle and prevents accidental injury.
If you cannot disassemble your shears, open them fully and secure them in a vise. Work carefully to avoid nicking the opposite blade.
What oil should I use on garden shears after sharpening?
Use a light machine oil, camellia oil, or mineral oil for best results. These oils protect against rust and reduce friction without gumming up the mechanism. Avoid vegetable oils, which turn rancid over time.
Apply a thin coat to the blade edges and pivot point after each use. This simple habit extends the life of your shears significantly.
Can I sharpen serrated garden shears?
Yes, but you need a tapered round file that fits into each serration. Work each tooth individually, pushing the file in one direction only. Match the existing angle of each tooth for best results.
Never use a flat stone or bench grinder on serrated blades, as this destroys the cutting profile. Take your time and mark every other tooth to track your progress.
What is the difference between bypass and anvil shears for sharpening?
Bypass shears have two curved blades that slide past each other, resembling scissors. Only the outside edge of the beveled blade needs sharpening. Anvil shears have one straight blade that cuts against a flat anvil, so only the single cutting blade is sharpened.
Never sharpen the anvil itself, as this disrupts the cutting action. Understanding your shear type prevents costly mistakes.