
**Plant leaves turning brown at the edges** typically signals water stress, low humidity, or excess fertilizer. This common issue, known as leaf tip burn, affects both indoor and outdoor plants. The good news? Most causes are easily fixable once you identify the culprit.
In this complete guide, you will learn the exact reasons behind crispy leaf edges and how to restore your plant’s health. We will cover watering techniques, environmental adjustments, and expert tips for prevention. Keep reading to save your struggling foliage today.
Best Moisture Meters for Preventing Brown Leaf Edges
Accurate watering is the number one solution for leaf tip burn. A reliable moisture meter removes the guesswork and prevents both overwatering and underwatering. Here are the three best options for keeping your plants perfectly hydrated.
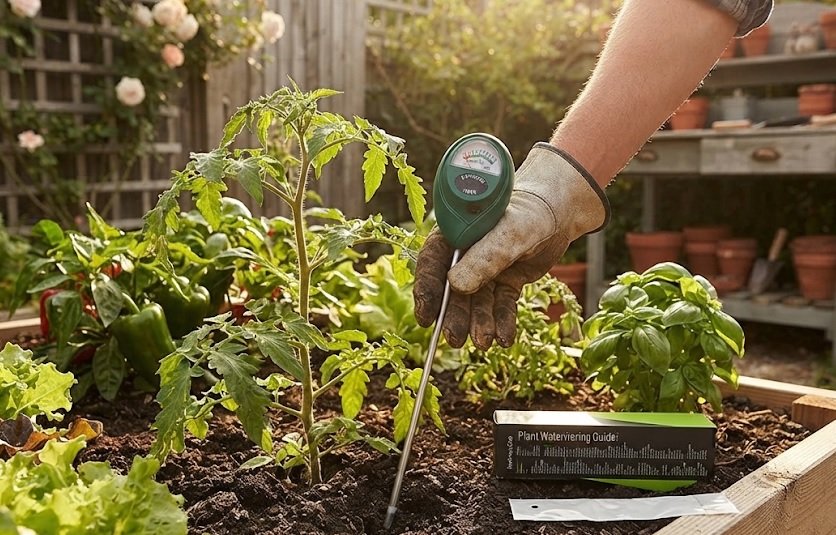
XLUX T10 Soil Moisture Meter – Best Overall Choice
The XLUX T10 provides instant readings without batteries, making it the simplest tool for daily checks. Its single-probe design minimizes root disturbance while delivering accurate moisture levels. This meter is ideal for beginners who need a straightforward, reliable method to prevent both drought stress and root rot. It is the best option for quick, effortless diagnostics.
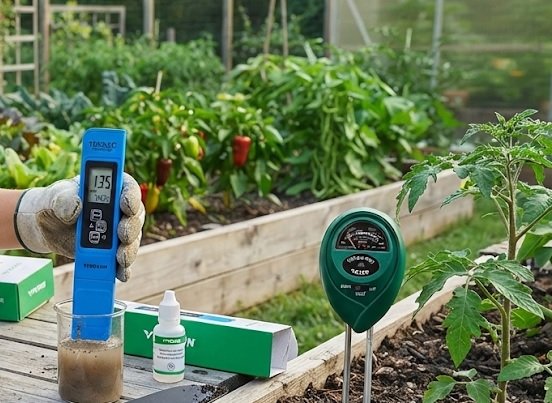
VIVOSUN Digital Soil Tester – Best for Tech-Savvy Gardeners
The VIVOSUN Digital Soil Tester offers a clear LCD screen displaying moisture, pH, and light levels. This three-in-one functionality helps you address the environmental factors causing brown edges. It is recommended for gardeners managing diverse plant collections where pH imbalances often mimic watering issues. This digital tool provides comprehensive data for precise plant care.
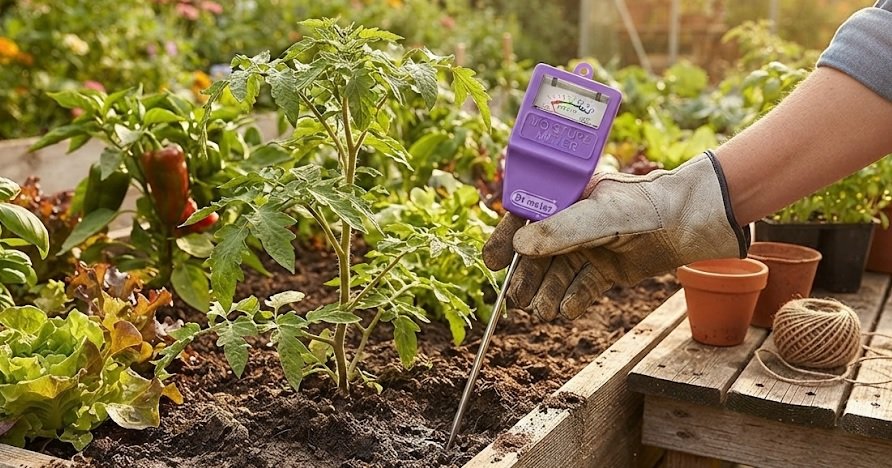
Dr.meter S10 Soil Moisture Meter – Best for Deep Root Watering
Featuring a 10-inch long probe, the Dr.meter S10 is perfect for large potted plants and garden beds. It allows you to check deep soil moisture where root tips often dry out, causing crispy edges. This model is ideal for outdoor containers and established houseplants that require deep, infrequent watering. It ensures you hydrate the root zone, not just the surface.
Common Causes of Brown Leaf Edges and How to Identify Them
Diagnosing leaf tip burn requires observing your plant’s specific symptoms and environment. Each cause leaves a distinct pattern that helps you pinpoint the exact problem. Here is how to identify the most common culprits.
Inconsistent Watering and Soil Moisture
Underwatering causes leaf edges to become dry, crispy, and brown, typically starting at the tips. Overwatering often produces soft, dark brown edges accompanied by yellowing leaves. Both extremes damage root function, preventing proper nutrient and water uptake.
Low Humidity and Dry Air
Tropical plants like calatheas and ferns suffer from brown edges when indoor humidity drops below 40%. Dry air pulls moisture from leaf cells faster than roots can replace it. This causes the leaf margins to desiccate and turn brown while the rest of the leaf remains green.
- Solution: Use a pebble tray or humidifier near affected plants
- Solution: Group plants together to create a microclimate
- Solution: Mist leaves daily during dry winter months
Fertilizer Burn and Mineral Buildup
Excess soluble salts from over-fertilizing draw water out of root tissues, causing brown leaf tips. White crust on the soil surface or pot rim indicates salt accumulation. Flush the soil thoroughly with distilled water to remove excess minerals and reset nutrient balance.
Tap water containing chlorine, fluoride, or high mineral content can also cause tip burn in sensitive species. Switch to filtered or rainwater for plants like spider plants and dracaenas to see improvement within two weeks.
Step-by-Step Treatment Plan to Fix Brown Leaf Edges
Once you have identified the likely cause, immediate action prevents further damage. Follow this proven treatment plan to restore your plant’s health and encourage new, vibrant growth. Consistency is key to seeing lasting results.
Step 1: Prune Damaged Foliage Correctly
Brown leaf edges will not heal, so removing them improves the plant’s appearance and redirects energy to healthy growth. Use sterilized scissors to follow the leaf’s natural shape, leaving a thin margin of brown tissue. Cutting into healthy green tissue creates new wounds that invite infection.
Step 2: Adjust Your Watering Routine
Establish a consistent schedule based on your plant’s specific needs rather than calendar dates. Insert your finger or a moisture meter two inches deep to check dryness before watering. Water thoroughly until it drains from the bottom, then empty the saucer to prevent soggy roots.
- Succulents: Wait until soil is completely dry before watering
- Tropical plants: Keep soil consistently moist but not waterlogged
- Adjust seasonally: Reduce watering frequency during winter dormancy
Step 3: Flush Soil and Reset Nutrients
Salt buildup requires a deep flush to reset the root environment. Run room-temperature distilled water through the pot for several minutes, allowing it to drain completely. Repeat this process monthly if you use tap water or fertilize regularly.
| Issue | Flush Frequency | Water Type |
|---|---|---|
| Fertilizer burn | Immediately, then monthly | Distilled |
| Tap water sensitivity | Every 4-6 weeks | Filtered or rainwater |
| Preventive maintenance | Every 3 months | Room-temp filtered |
Monitor your plant for two weeks after treatment. New growth emerging without brown edges indicates your corrective measures are working effectively.
Preventive Care Tips to Stop Brown Edges Before They Start
Prevention is always easier than treatment when it comes to leaf tip burn. By establishing consistent care routines and monitoring environmental conditions, you can avoid this common issue entirely. These proven methods keep your plants thriving year-round.
Optimize Light Exposure and Temperature
Incorrect light levels stress plants, making them more susceptible to leaf damage. Bright, indirect light suits most houseplants, while direct sun scorches edges and leaves brown patches. Maintain temperatures between 65-75°F (18-24°C) and avoid placing plants near heating vents or cold drafts.
Maintain Consistent Humidity Levels
Most indoor plants prefer humidity between 50-60%, which is often higher than typical home levels. Use a hygrometer to monitor moisture in the air around your plants. During winter, indoor heating drops humidity dramatically, so increase misting or use a room humidifier.
Establish a Balanced Fertilization Schedule
Fertilize only during active growing seasons, typically spring through early fall. Use a balanced, water-soluble fertilizer diluted to half strength every 4-6 weeks. **Over-fertilizing is a leading cause of brown leaf edges**, so when in doubt, skip a feeding.
- Spring/Summer: Fertilize monthly at half strength
- Fall/Winter: Stop fertilizing entirely
- New plants: Wait 3 months before first feeding
- Repotted plants: Delay fertilizer for 6 weeks
Use Proper Potting Mix and Drainage
Heavy, compacted soil retains excess water and suffocates roots, leading to brown tips. Choose a well-aerated potting mix appropriate for your plant type, such as orchid bark for epiphytes. Ensure pots have drainage holes and use a coarse layer of pebbles at the bottom if needed.
By implementing these preventive strategies, you create an environment where brown leaf edges rarely occur. Regular monitoring and small adjustments keep your plants healthy, vibrant, and free from unsightly damage.
Plant-Specific Solutions for Brown Leaf Tips
Different plant species have unique sensitivities that require tailored care approaches. Understanding your specific plant’s needs helps you address brown edges more effectively. Here are targeted solutions for the most common houseplants affected by leaf tip burn.
Spider Plants and Dracaena: Fluoride Sensitivity
These popular houseplants are extremely sensitive to fluoride found in tap water, causing distinctive brown tips. Switch to filtered, distilled, or rainwater exclusively to prevent this issue. **Visible improvement typically appears within 2-3 weeks** of switching water sources.
Calatheas and Marantas: Humidity Demands
Prayer plants require 60%+ humidity to maintain healthy leaf margins. Brown, crispy edges indicate the air is too dry for these tropical natives. Place them in bathrooms or kitchens with higher ambient moisture, or use a dedicated humidifier nearby.
- Pebble tray: Place pot on tray filled with water and pebbles
- Grouping: Cluster humidity-loving plants together
- Misting: Mist leaves every morning with distilled water
Palms and Tropical Foliage: Nutrient Deficiencies
Palms often develop brown edges from magnesium or potassium deficiencies, not just watering issues. Use a palm-specific fertilizer containing micronutrients like manganese and iron. Apply according to package instructions during spring and summer growing months.
| Plant Type | Primary Cause | Best Solution |
|---|---|---|
| Spider plants | Fluoride in tap water | Use distilled water |
| Calatheas | Low humidity | Increase to 60%+ |
| Palms | Nutrient deficiency | Palm-specific fertilizer |
| Peace lilies | Overwatering | Allow topsoil to dry |
Matching your care routine to your plant’s specific requirements prevents recurring brown edges. Research your species’ native habitat to replicate ideal conditions and maintain lush, healthy foliage.
When to Worry: Distinguishing Brown Edges from Serious Diseases
Not all browning indicates a simple watering issue. Sometimes, brown leaf edges signal a more serious underlying problem requiring immediate intervention. Learning to distinguish between cosmetic damage and disease prevents small issues from becoming fatal.
Bacterial Leaf Spot vs. Simple Tip Burn
Bacterial infections produce brown patches with yellow halos, often accompanied by a wet, greasy appearance. Simple tip burn stays confined to the edges without spreading inward or developing halos. If you notice dark, water-soaked lesions expanding across the leaf, isolate the plant immediately to prevent spread.
Root Rot Symptoms You Should Not Ignore
Root rot causes brown edges alongside yellowing lower leaves and a foul smell from the soil. Healthy roots appear white and firm, while rotting roots turn brown, mushy, and fall apart easily. If you suspect root rot, remove the plant from its pot and inspect the root system immediately.
- Mushy stems: Indicates advanced root decay
- Fungus gnats: Signal consistently wet soil conditions
- Stagnant growth: Suggests compromised root function
Pest Infestations Causing Leaf Damage
Spider mites, thrips, and scale insects feed on leaf tissue, causing browning and stippling. Inspect the undersides of leaves with a magnifying glass for tiny webs, moving specks, or waxy bumps. Treat infestations with insecticidal soap or neem oil, repeating applications weekly until pests are eliminated.
| Condition | Key Identifier | Action Required |
|---|---|---|
| Simple tip burn | Dry, crispy edges only | Adjust watering/humidity |
| Bacterial spot | Yellow halos, wet lesions | Isolate and treat |
| Root rot | Mushy roots, foul odor | Repot immediately |
| Pest damage | Webs, specks, sticky residue | Apply insecticidal soap |
When in doubt, err on the side of caution by isolating affected plants. Early detection and proper diagnosis are critical for saving your plant from irreversible damage.
Reviving Severely Damaged Plants: Advanced Recovery Techniques
When brown edges have spread significantly, basic adjustments may not be enough to restore your plant. Severe damage requires more aggressive intervention to encourage new growth. These advanced techniques help rescue plants on the brink of decline.
Hydroponic Recovery for Root Rehabilitation
Transferring a struggling plant to water temporarily allows roots to recover without soil complications. Clean all soil from the roots and place the plant in a jar of filtered water with diluted liquid fertilizer. **Monitor root health weekly**, changing the water every 3-4 days to prevent bacterial growth.
Full Foliage Pruning for Stressed Plants
If more than 50% of leaves show significant browning, consider a hard prune to redirect energy to healthy tissue. Remove severely damaged leaves at the base using sterilized shears. This drastic step encourages fresh, vigorous growth from the root system.
- Cut at 45° angle: Prevents water pooling on cut surfaces
- Remove yellow leaves: They drain energy without contributing photosynthetically
- Reduce watering: Less foliage means less water uptake needed
Soil Replacement and Pot Upgrade
Old, depleted soil often contains accumulated salts and degraded structure. Repot your plant with fresh, well-draining mix, gently loosening compacted roots. Choose a pot only 1-2 inches larger than the current root ball to prevent overwatering issues.
| Recovery Method | Best For | Timeframe |
|---|---|---|
| Hydroponic transfer | Severe root damage | 2-4 weeks |
| Hard pruning | Extensive leaf damage | 4-6 weeks |
| Soil replacement | Salt buildup, compaction | Immediate |
Combine these techniques for the best chance of revival in severely damaged plants. Patience is essential, as recovery may take several months before substantial new growth appears.
Seasonal Care Adjustments to Prevent Brown Leaf Edges
Plants experience different stress factors throughout the year, requiring seasonal care adjustments. What works in summer may damage your plant in winter. Adapting your routine to seasonal changes prevents brown edges before they develop.
Winter Challenges: Dry Air and Reduced Light
Indoor heating dramatically reduces humidity, often dropping levels below 30% during winter months. Shorter daylight hours also slow photosynthesis, reducing your plant’s water needs. **Combine increased humidity with reduced watering frequency** to match your plant’s slower winter metabolism.
- Move plants: Relocate away from radiators and heat vents
- Add humidity: Run a humidifier or place water trays nearby
- Reduce feeding: Stop fertilizing completely from November to February
Summer Stress: Heat and Intense Sunlight
Summer brings increased light intensity that can scorch leaves, especially during afternoon hours. Windows facing south or west may amplify heat, causing rapid moisture loss through leaves. Monitor soil moisture more frequently as higher temperatures increase evaporation rates.
Transition Periods: Spring and Autumn Adjustments
Seasonal transitions require gradual adjustments rather than sudden changes. Slowly acclimate plants to new light conditions over 1-2 weeks when moving them outdoors or indoors. Check for drafts during autumn as windows become less sealed against cooler temperatures.
| Season | Primary Risk | Key Adjustment |
|---|---|---|
| Winter | Dry air, overwatering | Increase humidity, reduce water |
| Summer | Heat scorch, rapid drying | Filter light, water more often |
| Spring/Autumn | Sudden changes | Gradual transitions |
Consistent seasonal monitoring keeps your plants resilient against environmental stressors. Small proactive adjustments prevent the reactive cycle of treating brown edges after they appear.
Conclusion: Master Plant Care and Prevent Brown Leaf Edges
Brown leaf edges are fixable with proper diagnosis and consistent care adjustments. By understanding watering needs, humidity levels, and seasonal changes, you can restore your plant’s vibrant health. **Prevention through routine monitoring** is the most effective strategy for long-term success.
Start implementing these proven methods today to see noticeable improvement within weeks. Monitor your plant’s response and adjust your approach as needed. Your dedication will reward you with lush, healthy foliage that transforms your space.
Take action now and give your plants the care they deserve. Healthy plants are within your reach.
Frequently Asked Questions about Brown Leaf Edges
Can brown leaf edges turn green again?
No, damaged leaf tissue cannot regenerate or turn green again once it has turned brown. The affected cells are dead and cannot be revived with any treatment or adjustment.
Your best approach is to prune the brown edges and focus on preventing new damage. New growth will emerge healthy if you correct the underlying cause, gradually replacing damaged foliage over time.
How often should I water plants with brown leaf tips?
Watering frequency depends on your plant species, pot size, and environmental conditions rather than a fixed schedule. Check soil moisture two inches deep before watering to determine actual needs.
Most houseplants prefer watering when the top inch of soil feels dry to the touch. Adjust frequency seasonally, watering less during winter months when plant metabolism slows significantly.
Why do my plant leaves turn brown even though I water regularly?
Regular watering does not guarantee proper hydration if drainage is poor or roots are damaged. Overwatering can cause root rot, preventing roots from absorbing water effectively, which leads to brown edges.
Check that your pot has drainage holes and soil is not compacted. Also consider whether tap water chemicals, low humidity, or fertilizer buildup might be causing the issue despite consistent watering.
What is the best way to fix brown edges on indoor plants?
The best approach combines immediate treatment with long-term prevention. Start by pruning damaged edges, flushing soil to remove salts, and adjusting your watering routine based on moisture readings.
Then address environmental factors like humidity, light exposure, and temperature. Consistency with these adjustments for 2-3 weeks typically shows significant improvement in new growth appearance.
Does misting plants help with brown leaf edges?
Misting provides temporary humidity relief but is not a long-term solution for brown leaf edges. The effect lasts only 15-30 minutes before moisture evaporates, offering minimal benefit for most plants.
For lasting results, use a pebble tray, room humidifier, or group plants together to maintain consistent humidity. These methods provide continuous moisture rather than brief, intermittent relief.
Can tap water cause brown tips on plant leaves?
Yes, tap water containing chlorine, fluoride, or high mineral content can cause brown leaf tips in sensitive plants. Spider plants, dracaenas, and peace lilies are particularly susceptible to fluoride damage.
Switch to filtered, distilled, or rainwater to see improvement within 2-3 weeks. Alternatively, let tap water sit overnight to allow chlorine to evaporate before watering your plants.
Why are only the tips of my plant leaves turning brown?
Tip-only browning typically indicates water stress, low humidity, or fertilizer burn rather than disease. The leaf tips are farthest from the water supply, making them first to show dehydration symptoms.
Evaluate your watering consistency and check for salt buildup in the soil. Adjusting these factors usually resolves tip-only browning within one to two growth cycles.
Is it better to cut off brown leaf tips or leave them?
Cutting off brown tips improves appearance and redirects energy to healthy growth, but do it correctly. Leave a small margin of brown tissue to avoid cutting into healthy green areas, which can invite infection.
Use sterilized scissors and follow the leaf’s natural shape when trimming. This cosmetic fix does not solve the underlying issue, so continue addressing the root cause for lasting results.