
Learning how to identify blight on tomato plants is the first critical step to saving your harvest. Early detection of this devastating fungal disease can mean the difference between a thriving garden and complete crop loss.
This complete guide provides expert tips and proven methods for recognizing all three types of blight. You will learn the distinct visual symptoms, common look-alikes, and immediate action steps to protect your tomato plants.
Best Fungicides for Treating Tomato Blight – Detailed Comparison
When you have confirmed blight on your tomato plants, immediate treatment is essential. The right fungicide can halt the spread, but choosing the correct one depends on whether your infection is early, active, or severe.
Bonide Products 811 Copper Fungicide – Best Overall Choice
The Bonide Copper Fungicide is the recommended first line of defense for organic gardeners. This liquid concentrate works on contact to stop spores from germinating on leaves and stems. It is ideal for early-stage infections and acts as a protective barrier against both early and late blight, keeping your plants productive.
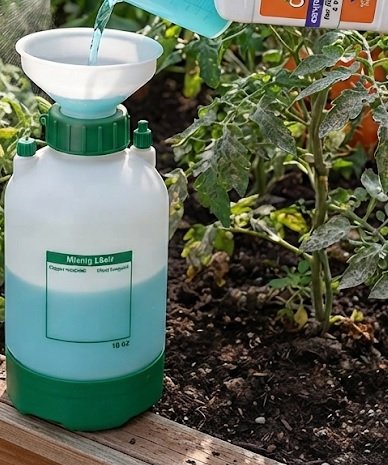
Southern Ag Liquid Copper Fungicide – Best Value Option
For large gardens, the Southern Ag Liquid Copper offers concentrated protection at an economical price. This fungicide is easy to mix and adheres well to foliage, providing excellent coverage. It is the best option for preventative spraying schedules, ensuring your plants remain disease-free throughout the humid summer months when blight thrives.
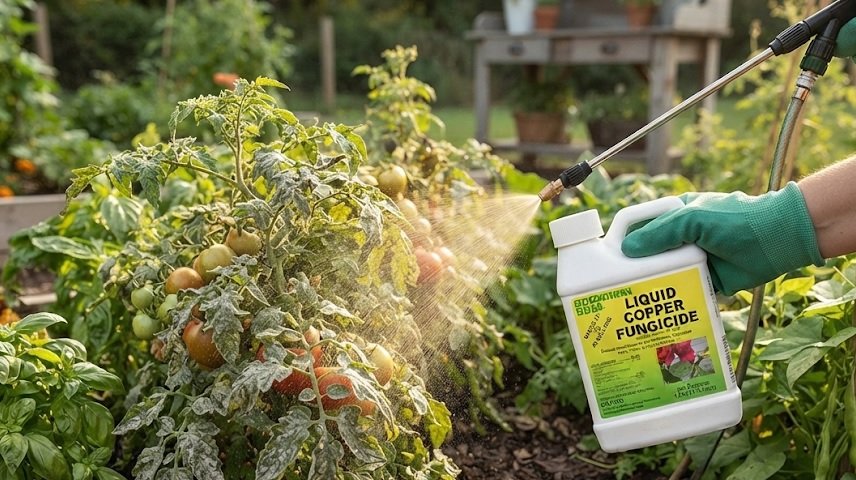
Daconil Weather Stik Concentrate – Best for Severe Outbreaks
When blight has spread aggressively, Daconil Weather Stik is the strongest chemical option available. Unlike copper formulas, this systemic fungicide penetrates the plant tissue to stop existing infections. It is highly recommended for advanced cases, offering up to 14 days of protection against new spore development.
Understanding the Three Types of Tomato Blight
To accurately identify blight on tomato plants, you must first distinguish between the three main pathogens. Each type requires a different treatment approach, and misdiagnosis is a common reason for crop failure.
Early Blight: The Most Common Culprit
Early blight, caused by the fungus Alternaria solani, typically appears on lower leaves first. You will notice small brown spots with concentric rings that resemble a bullseye pattern.
- Leaf Symptoms: Yellowing tissue surrounds the target-like spots.
- Stem Symptoms: Dark, sunken lesions form near the soil line.
- Progression: Leaves drop off, moving upward as the plant weakens.
Late Blight: The Devastating Destroyer
Late blight, caused by Phytophthora infestans, is the disease responsible for the Irish Potato Famine. It spreads rapidly in cool, wet weather and can kill plants within two weeks.
- Leaf Symptoms: Large, greasy-looking, water-soaked patches that turn brown quickly.
- Stem Symptoms: Black or dark brown lesions that appear brittle.
- White Fungus: A white, fuzzy growth appears on the underside of leaves during high humidity.
Septoria Leaf Spot: The Silent Killer
Septoria is often confused with early blight but is distinct in appearance. It produces numerous tiny, circular spots with gray centers and dark borders.
| Feature | Early Blight | Late Blight | Septoria |
|---|---|---|---|
| Spot Size | Large (1/4 inch) | Large, irregular | Small (1/16 inch) |
| Pattern | Bullseye rings | Greasy patches | Gray centers |
| Location | Lower leaves first | Entire plant | Lower leaves first |
| Speed | Slow spread | Very rapid | Moderate |
Accurately identifying the specific pathogen is essential for selecting the right fungicide from the list above. Early blight responds well to copper treatments, while late blight often demands stronger systemic options.
How to Diagnose Blight Symptoms on Tomato Plants Accurately
Once you understand the disease types, you need a systematic approach to examine your plants. Accurate diagnosis prevents wasted treatments and stops the disease from spreading to neighboring vegetables.
Step-by-Step Visual Inspection Process
Begin your inspection at the bottom of the plant and work upward. Blight almost always starts on the oldest, lowest leaves where moisture lingers longest after irrigation.
- Check lower leaves first: Look for yellowing, spots, or curling on the oldest foliage.
- Inspect leaf undersides: Use a magnifying glass to spot fungal spores or fuzzy growth.
- Examine stems and branches: Look for dark, sunken cankers or lesions near soil level.
- Assess fruit development: Check for greasy spots or rotting patches on green tomatoes.
Common Look-Alikes That Confuse Gardeners
Many gardeners mistake nutrient deficiencies or pest damage for blight. **Blossom end rot** appears as dry, sunken leathery patches at the fruit base, but it is a calcium deficiency, not a fungus.
- Spider mite damage: Causes stippling and yellowing, but lacks distinct fungal rings.
- Calcium deficiency: Affects fruit only, never leaves or stems.
- Herbicide drift: Causes leaf curling but no spots or lesions.
Environmental Conditions That Trigger Blight
Blight spores require specific conditions to germinate and spread. Understanding these triggers helps you predict outbreaks before they damage your crop.
Humidity above 85% and temperatures between 60-80°F create the perfect environment for spore growth. Overhead watering and dense foliage trap moisture, accelerating the infection cycle significantly.
Immediate Action Plan for Treating Blight on Tomato Plants
When you confirm blight, time is critical. Taking decisive action within 24 hours can save unaffected parts of the plant and protect neighboring crops from infection.
Step 1: Remove and Destroy Infected Foliage
Using sterilized pruning shears, remove all leaves showing spots, yellowing, or lesions. Place infected material directly into a sealed plastic bag—**never compost blight-infected plants**, as spores survive in compost piles.
- Sterilize tools: Wipe blades with rubbing alcohol between each cut.
- Dispose properly: Seal bags and place in trash, not garden waste bins.
- Wash hands: Spores transfer easily from hands to healthy plants.
Step 2: Apply the Right Fungicide Immediately
After pruning, apply your chosen fungicide according to the product label instructions. For early blight, the **Bonide Copper Fungicide** provides effective contact protection. For late blight, **Daconil Weather Stik** offers systemic control that stops internal spread.
Reapply fungicide every 7-14 days, especially after rainfall. Consistency is crucial because new growth remains vulnerable to spore germination.
Step 3: Adjust Your Watering Practices
Blight thrives in moisture, so changing how you water is essential. **Water at the base of plants** using drip irrigation or soaker hoses instead of overhead sprinklers.
- Morning watering: Allows foliage to dry completely before evening.
- Increase spacing: Improve airflow between plants to reduce humidity.
- Mulch heavily: Prevents soil-borne spores from splashing onto lower leaves.
Preventing Tomato Blight: Proven Methods for Future Seasons
Prevention is always more effective than treatment when dealing with blight. By implementing strategic practices before planting, you can significantly reduce the risk of infection and ensure healthier, more productive tomato plants.
Choose Blight-Resistant Tomato Varieties
Selecting resistant cultivars is your strongest defense. Look for seed packets or plant tags with **disease-resistant codes** like “V,” “F,” and “T” indicating resistance to specific pathogens.
- Early blight resistant: Mountain Merit, Defiant PhR, and Iron Lady.
- Late blight resistant: Legend, Jasper, and Mountain Magic.
- Septoria resistant: Roma, San Marzano, and Rutgers.
While resistant varieties may still show minor symptoms, they rarely suffer severe damage or crop loss.
Implement Crop Rotation and Garden Sanitation
Blight spores survive in soil and plant debris for up to three years. Rotating your tomato planting location annually breaks the disease cycle effectively.
Never plant tomatoes, potatoes, or peppers in the same soil consecutively. These nightshade family members share the same blight pathogens and can reinfect each other.
Optimize Plant Spacing and Airflow
Dense plantings create humid microclimates where blight thrives. Proper spacing ensures leaves dry quickly after rain or watering.
- Space plants 24-36 inches apart to allow air circulation.
- Prune lower branches to keep foliage off the soil surface.
- Use stakes or cages to keep plants upright and well-ventilated.
- Apply organic mulch like straw or shredded leaves to prevent soil splash.
Organic and Natural Remedies for Tomato Blight Control
Many gardeners prefer chemical-free solutions for managing blight. While organic options require more frequent application, they are safe for beneficial insects, pets, and edible fruit.
Homemade Baking Soda Spray
A simple mixture of baking soda creates an alkaline environment on leaf surfaces that inhibits fungal spore germination. This remedy works best as a preventative measure applied weekly.
- Recipe: Mix 1 tablespoon baking soda, 1 teaspoon liquid soap, and 1 gallon water.
- Application: Spray thoroughly on both leaf surfaces every 7 days.
- Timing: Apply early morning to avoid leaf burn in direct sun.
Neem Oil as a Natural Fungicide
Neem oil is a plant-based extract that disrupts fungal cell membranes and prevents spore reproduction. It is highly effective against early blight and septoria when applied consistently.
Mix 2 tablespoons of neem oil with 1 gallon of water and a few drops of dish soap as an emulsifier. Spray every 5-7 days during humid weather for optimal protection.
Compost Tea for Disease Suppression
Brewed compost tea introduces beneficial microorganisms that compete with blight pathogens for space and nutrients. This biological approach strengthens plant immunity naturally.
- Brew method: Steep finished compost in water for 24-48 hours with aeration.
- Application: Spray foliage and soil every 2 weeks.
- Best results: Use actively aerated compost tea for maximum microbial diversity.
These natural remedies work best as part of an integrated management strategy. Combine them with resistant varieties, proper spacing, and good sanitation for comprehensive blight control without synthetic chemicals.
Salvaging Tomatoes from Blight-Infected Plants
When blight strikes late in the season, you can often save unripe fruit before the plant collapses. Acting quickly allows you to enjoy a harvest even when foliage is severely damaged.
Harvesting Green Tomatoes Before Total Collapse
Pick all green tomatoes that have reached mature size—firm, fully grown, and showing a slight color change. **Do not wait for the plant to die completely**, as blight spreads rapidly to fruit within days.
- Check for lesions: Discard any fruit with dark, greasy spots or cracks.
- Wash thoroughly: Rinse fruit in a 10% bleach solution to kill surface spores.
- Dry completely: Store only fully dry fruit to prevent rot during ripening.
Indoor Ripening Methods for Green Tomatoes
Green tomatoes ripen successfully indoors when given the right conditions. Place them in a single layer in a cardboard box or paper bag with a ripe banana to speed the process.
- Temperature: Keep at 65-70°F for steady ripening over 2-4 weeks.
- Humidity: Maintain moderate moisture to prevent shriveling.
- Check regularly: Remove ripened fruit and discard any showing rot.
Preserving Salvaged Tomatoes
Even slightly underripe tomatoes work well for cooking and preserving. Green tomatoes make excellent chutneys, pickles, and fried dishes that mask their tartness.
Remember that salvaged fruit should never be used for canning whole tomatoes due to lower acidity levels. Always add lemon juice or citric acid when preserving to ensure safe acidity.
Seasonal Timing: When to Monitor for Tomato Blight
Blight outbreaks follow predictable seasonal patterns tied to temperature and humidity. Knowing when to intensify your monitoring efforts helps you catch infections early and apply preventative treatments effectively.
Spring: Early Blight Season Begins
Early blight typically appears in late spring when temperatures reach 75-85°F. This is the critical window for starting preventative fungicide applications, especially if you have grown tomatoes in the same soil previously.
- Monitor weekly: Inspect lower leaves for the first bullseye spots.
- Begin spraying: Start copper fungicide applications at first flower set.
- Mulch early: Apply straw or plastic mulch before soil splash occurs.
Summer: Late Blight High-Risk Window
Late blight strikes during cool, wet summer stretches when night temperatures drop below 60°F. These conditions often follow heavy rainstorms or extended cloudy periods.
Check daily during humid spells and after storms. The disease can appear overnight and spread across an entire garden within one week.
Fall: Septoria and Secondary Infections
As temperatures cool, septoria leaf spot becomes more aggressive. Weakened plants also face secondary bacterial infections that compound the damage.
Regional Variations in Blight Timing
Your geographic location significantly shifts these timelines. Southern gardeners face earlier outbreaks, while northern growers experience compressed seasons with higher late blight risk.
- Humid Southeast: Year-round risk; monitor from April through October.
- Dry Southwest: Lower risk; focus on early blight during monsoon season.
- Pacific Northwest: High late blight risk during cool, foggy summers.
- Midwest: Peak risk in July and August after humid weather systems.
Track your local extension service alerts for regional blight warnings. These notifications help you time preventative sprays precisely when spore loads are highest.
Conclusion: Mastering Tomato Blight Identification and Control
Identifying blight on tomato plants early is the single most effective strategy for protecting your harvest. With the visual guides and treatment options provided, you now have the tools to act with confidence.
**Start by inspecting your plants weekly** and implement preventative measures like resistant varieties and proper spacing. When symptoms appear, prune immediately and apply the appropriate fungicide for your specific blight type.
Your vigilance determines your success. **Monitor consistently, act decisively, and enjoy a bountiful tomato harvest** despite the constant threat of disease.
Frequently Asked Questions about Tomato Blight Identification
What does blight look like on tomato leaves?
Blight appears as brown or dark spots on leaves, often with yellow halos surrounding them. Early blight shows distinct bullseye rings, while late blight creates large, greasy-looking patches.
Check the undersides of leaves for white fuzzy growth, which confirms late blight. Septoria produces tiny spots with gray centers and dark borders, easily confused with early blight at first glance.
How do I tell the difference between early blight and late blight?
Early blight starts on lower leaves with small brown spots that develop concentric rings resembling a target. It spreads slowly upward and responds well to copper fungicides.
Late blight appears suddenly on any part of the plant with large, water-soaked patches and white fungal growth. It spreads rapidly and requires immediate removal of affected plants to save the rest of your garden.
Can tomato plants recover from blight?
Plants with early blight can recover if you remove infected foliage promptly and apply fungicide. Late blight rarely allows recovery, especially in cool, wet conditions.
Focus on saving unaffected fruit and preventing spread to neighboring plants. Even with treatment, severely infected plants will produce reduced yields for the remainder of the season.
What is the best way to treat blight on tomato plants organically?
Copper fungicide is the most effective organic treatment for both early and late blight. Apply it weekly as a preventative measure and immediately after detecting symptoms.
Baking soda spray and neem oil offer gentler alternatives but require more frequent application. Combine organic sprays with pruning and proper watering for the best results without synthetic chemicals.
How fast does blight spread on tomato plants?
Late blight spreads extremely rapidly, capable of destroying an entire garden within two weeks under favorable conditions. Early blight progresses more slowly, taking several weeks to move up the plant.
Spores spread through wind, rain splash, and contaminated tools. Check plants daily during humid weather and isolate any infected specimens immediately to slow the spread.
Should I remove tomato plants with blight?
Remove plants with late blight immediately to protect neighboring crops. For early blight, you can prune infected leaves and continue growing if the plant retains healthy foliage.
Always dispose of infected plant material in sealed bags rather than compost bins. Blight spores survive in plant debris and can reinfect future crops for up to three years.
What causes blight on tomato plants?
Blight is caused by fungal pathogens that thrive in warm, humid conditions. Early blight comes from Alternaria solani, while late blight results from Phytophthora infestans.
Spores survive in soil, plant debris, and infected seed. Overhead watering, dense planting, and poor air circulation create ideal conditions for spore germination and rapid spread.
Can I eat tomatoes from a plant with blight?
Yes, tomatoes from blight-infected plants are safe to eat if they show no signs of infection. Wash fruit thoroughly and discard any with dark spots or lesions.
Green tomatoes from infected plants can be ripened indoors successfully. Avoid canning salvaged fruit without adding acid, as reduced acidity creates botulism risks during preservation.