
A wobbly tool is frustrating, dangerous, and slows down your work. Learning how to fix a loose garden tool handle saves you money and prevents injuries. This complete guide delivers proven methods to restore a tight, secure fit in minutes.
We will walk you through simple wedge fixes and advanced epoxy techniques. You will discover expert tips for wooden and fiberglass handles, plus how to prevent future loosening. Keep reading to master this essential DIY skill and get back to gardening safely.
Best Fixes for Loose Garden Tool Handles – Tried and Tested
When a handle comes loose, you need a reliable solution that lasts. These three recommended products deliver professional-grade results for wooden and composite handles alike. Each option below is the best in its category for specific repair scenarios.
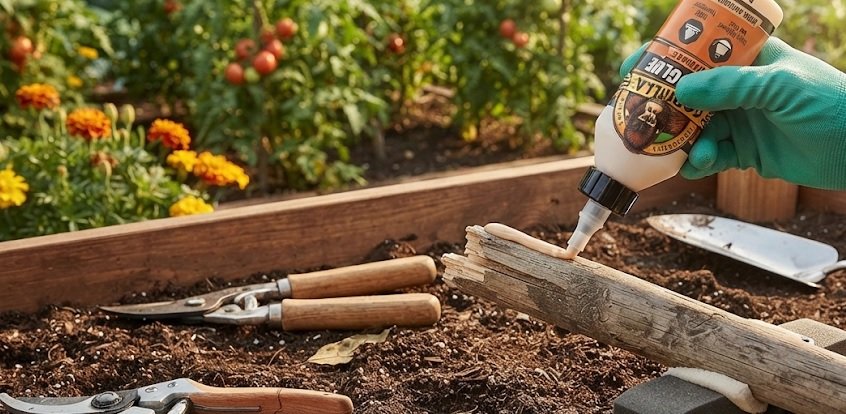
Gorilla Wood Glue – Best Overall for Wooden Handles
Gorilla Wood Glue (8 oz) is our top recommendation for permanent wooden handle repairs. Its waterproof formula creates a bond stronger than the wood itself, making it ideal for shovels, axes, and rakes. The thick consistency fills small gaps perfectly, and it cleans up easily with water. This is the best overall choice for most DIY gardeners.
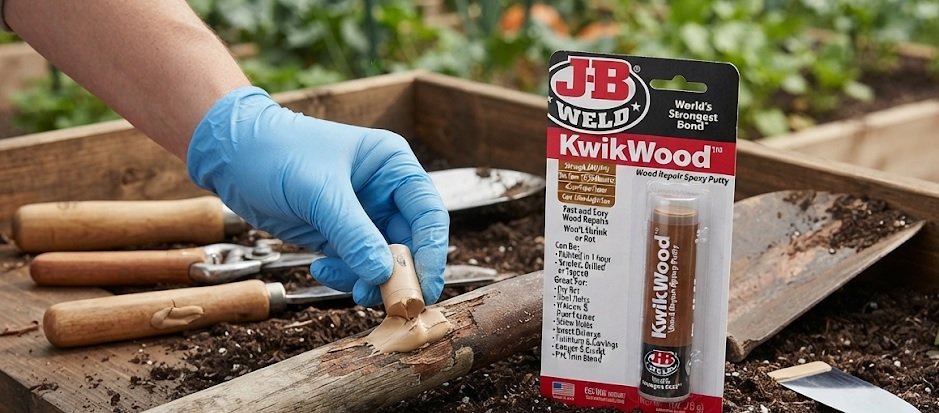
J-B Weld KwikWood – Best for Quick Structural Repairs
J-B Weld KwikWood (Product #8237) is a two-part epoxy putty that repairs loose handles and fills stripped eye sockets. It cures in just 15 minutes, offering a fast, permanent fix without clamping. This product is ideal for emergency repairs where you need the tool back in service immediately. It sands and paints smoothly for a professional finish.
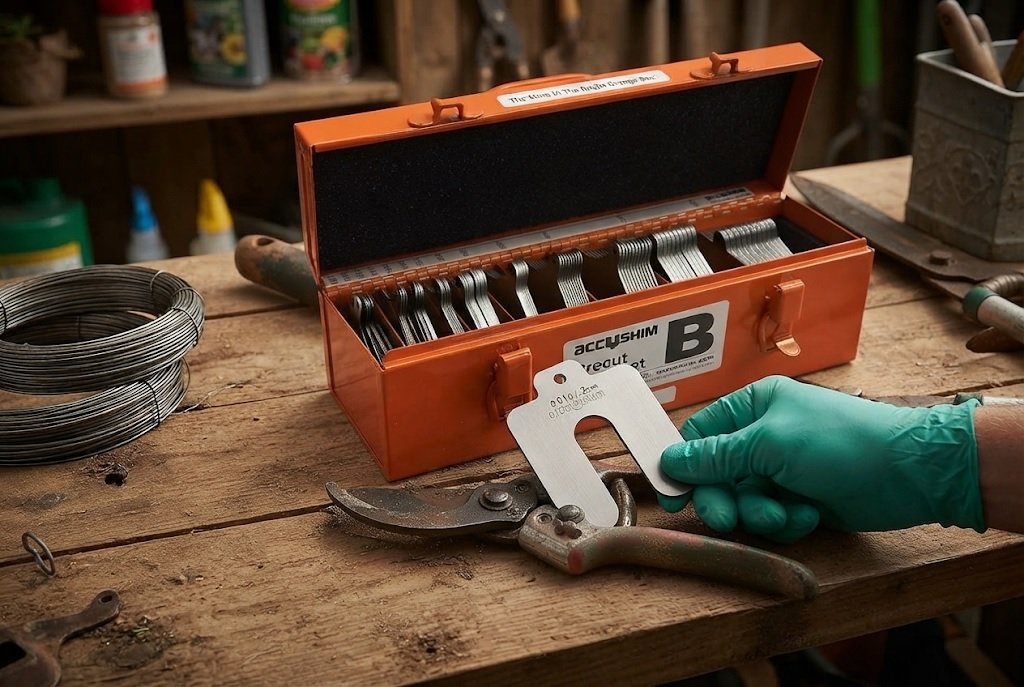
Stanley Wedge & Shim Kit – Best for Traditional Tightening
The Stanley Wedge & Shim Kit (Product #28-100) provides a classic, mechanical fix using hardened steel wedges. Drive these into the handle end to expand the wood and lock it firmly into the tool head. This method is recommended for vintage tools where you want to avoid adhesives. It is a simple, reusable solution that requires no drying time.
How to Diagnose a Loose Garden Tool Handle
Before you fix a loose garden tool handle, you must identify the root cause. Different problems require different repair strategies. A quick inspection saves time and ensures you choose the right method.
Identifying the Type of Loose Connection
First, grip the handle and try to twist the tool head. If it spins, the wood has shrunk inside the socket. If it rocks side-to-side, the eye of the tool head is likely worn or the handle is cracked.
- Rotational looseness: The handle twists within the head, indicating a shrunken or undersized fit.
- Lateral movement: The head rocks back and forth, suggesting a worn eye or split handle.
- Complete detachment: The head slides off entirely, meaning the wedge or pin has failed.
Examining the Handle Material
Wooden handles respond best to wedging and gluing techniques. Fiberglass and composite handles, however, require epoxy adhesives because they do not expand. Check for splinters or cracks along the neck, as these compromise structural integrity and warrant a full handle replacement.
Key Takeaway: A thorough diagnosis prevents repeat repairs. Always check both the handle and the tool head socket before choosing a fix.
Gathering the Right Tools
For most repairs, you will need a hammer, wood glue, wedges, and a clamp. For fiberglass handles, have epoxy putty and sandpaper ready. Having everything prepared beforehand makes the process smoother and faster.
Step-by-Step Guide: How to Fix a Loose Garden Tool Handle with Wedges
Wedging is the most traditional and effective method for tightening wooden handles. This mechanical fix expands the wood inside the tool head, creating a rock-solid fit. Follow these steps for a permanent repair.
Step 1: Remove the Old Wedge and Handle
Tap the tool head off the handle using a mallet. If the head is stuck, soak it in warm water for 30 minutes to soften the wood. Remove any remaining wedge pieces and clean the eye socket thoroughly.
Step 2: Cut a New Wedge Slot
Using a hacksaw, cut a vertical slot into the top of the handle, about 1 inch deep. This slot will accept the new wedge and allow the wood to expand. Ensure the slot aligns with the longest axis of the tool head eye for maximum grip.
- Measure the eye depth: The slot should be slightly shorter than the eye length.
- Cut straight down: Keep the saw perpendicular to the handle surface.
- Clean out sawdust: A vacuum or compressed air works best.
Pro Tip: Apply wood glue inside the slot before driving in the wedge. This creates a chemical bond alongside the mechanical grip, ensuring the handle never loosens again.
Step 3: Drive in the Wedge
Place a metal or wooden wedge into the slot and drive it in with a hammer. The wedge forces the handle to expand and lock tightly against the eye walls. Cut off any protruding wedge flush with the handle top using a chisel.
Allow the glue to cure for 24 hours before using the tool. This method works exceptionally well for shovels, hoes, and axes with standard wooden handles.
How to Fix a Loose Garden Tool Handle Using Epoxy and Adhesives
Epoxy is the best solution for fiberglass handles or when the tool eye is worn too smooth. Unlike wedging, this method creates a chemical bond that fills gaps completely. It is also ideal for handles that have already been wedged multiple times.
When to Choose Epoxy Over Wedging
If your handle is fiberglass, wedging will crack it. If the eye socket is oval-shaped from years of use, a wedge cannot grip properly. Epoxy fills these irregularities and hardens into a custom-fit socket.
- Fiberglass handles: Wedges cause splintering and structural failure.
- Oversized tool eyes: Epoxy bridges the gap between handle and metal.
- Repeated repairs: Old wedge holes prevent new wedges from gripping.
Step-by-Step Epoxy Application Process
Start by cleaning the handle end and the inside of the tool eye with rubbing alcohol. This removes grease and dirt that prevent adhesion. Mix your two-part epoxy according to the manufacturer’s instructions.
- Apply epoxy liberally to the handle end and inside the eye socket.
- Insert the handle and twist it slightly to distribute the adhesive evenly.
- Align the tool head correctly and wipe away excess epoxy immediately.
- Secure with a clamp or tape and let it cure for 24 hours.
Key Takeaway: Epoxy repairs are permanent. There is no easy way to remove the handle later, so ensure alignment is perfect before curing begins.
Reinforcing with Pins or Screws
For heavy-duty tools like sledgehammers, add a mechanical fastener after the epoxy cures. Drill a small hole through the tool eye and handle, then drive in a sheet metal screw. This dual method offers maximum holding power for high-impact applications.
Preventative Maintenance: How to Keep Garden Tool Handles Tight
Fixing a loose garden tool handle is essential, but preventing the problem is even better. Regular maintenance extends the life of your tools and saves you repair time. A few simple habits make a significant difference.
Seasonal Oiling and Conditioning
Wooden handles dry out and shrink, especially in hot, dry climates. Apply boiled linseed oil or tung oil to wooden handles twice a year. This prevents moisture loss and keeps the wood swollen and snug inside the tool eye.
- Spring: Apply a fresh coat of oil before heavy gardening season.
- Fall: Clean and oil handles before winter storage.
- Monthly: Wipe handles with a dry cloth to remove moisture and dirt.
Proper Storage Techniques
Never leave tools standing in water or leaning against damp walls. Moisture causes the wood to swell and then shrink, leading to looseness. Hang tools vertically in a dry shed or garage to maintain consistent humidity levels.
Pro Tip: Store tools with the handle facing down and the head up. This prevents any trapped water from pooling around the joint where the handle meets the tool head.
Routine Inspections and Quick Fixes
Check your tools every few weeks during active use. A slight wiggle is easier to fix than a fully detached head. Tighten loose screws or pins immediately and re-wedge any handle that shows movement.
| Inspection Point | What to Look For | Action |
|---|---|---|
| Handle joint | Visible gap or movement | Re-wedge or apply epoxy |
| Wood surface | Cracks or splinters | Sand and seal with oil |
| Metal eye | Rust or deformation | Clean and file edges |
By adopting these habits, you will rarely need to perform major repairs. Consistent care keeps your tools safe, reliable, and ready for any job.
When to Replace the Handle Instead of Repairing It
Sometimes, fixing a loose garden tool handle is not worth the effort. Severe damage or excessive wear means a replacement is safer and more cost-effective. Knowing when to replace saves you time and prevents tool failure mid-task.
Signs That Replacement Is Necessary
Inspect your handle for deep cracks, rot, or severe splintering. If the wood is soft or spongy, it has lost structural integrity. Bent or warped fiberglass handles also require replacement, as they cannot be straightened safely.
- Deep cracks: Cracks longer than 2 inches compromise strength.
- Rot or mildew: Soft spots indicate internal decay.
- Previous repairs: More than two wedges or epoxy fills weaken the handle.
- Shortened length: Handles cut down for repairs lose leverage and balance.
How to Choose a Replacement Handle
Match the new handle to the original length and diameter. Hardwood handles like ash or hickory offer the best durability for heavy tools. Fiberglass handles are lighter and resist weather, but they transmit more vibration.
| Material | Best For | Durability |
|---|---|---|
| Ash Wood | Shovels, rakes, hoes | High shock absorption |
| Hickory Wood | Axes, sledgehammers | Extreme strength |
| Fiberglass | Heavy digging tools | Weather resistant |
Key Takeaway: A replacement handle costs less than a new tool. Invest in a quality hardwood handle and install it properly for years of reliable service.
Quick Installation Tips for New Handles
Dry-fit the handle into the tool head before securing it. Sand any high spots for a snug fit, then apply your chosen method—wedge or epoxy. Test the tool with light pressure before full use to ensure the fit is secure.
Safety Tips for Working with Loose Tool Handles
A loose garden tool handle is more than an annoyance—it is a serious safety hazard. A detached tool head can fly off and cause injury. Following proper safety protocols protects you and those around you.
Immediate Risks of a Loose Handle
When a handle is loose, the tool head can slip during a swing or strike. This unpredictable movement can cause strains, cuts, or blunt force injuries. Never use a loose tool for heavy tasks like splitting wood or digging hard soil.
- Flying heads: A detached axe or hammer head travels at high speed.
- Loss of control: Wobbling reduces accuracy and increases fatigue.
- Pinch points: The gap between handle and head can catch fingers.
Safe Handling During Repairs
Always secure the tool in a vise before attempting repairs. This keeps your hands free and prevents the tool from slipping. Wear safety glasses when cutting wedges or drilling holes, as wood chips and metal shavings can fly.
Warning: Never test a repaired tool by swinging it near your body or others. Always test in an open area with a clear strike zone.
Post-Repair Inspection Checklist
After completing any repair, perform a thorough inspection before returning the tool to service. Check for remaining movement, protruding wedges, or uncured adhesive. Allow full curing time for glues and epoxies as specified by the manufacturer.
- Grip test: Hold the handle and try to twist the head firmly.
- Visual check: Look for gaps, cracks, or uneven surfaces.
- Light tap test: Tap the tool head gently against wood to hear a solid sound.
Prioritizing safety ensures that your repaired tool serves you well without risk. A few extra minutes of caution prevent accidents and extend the life of your equipment.
Common Mistakes to Avoid When Fixing a Loose Garden Tool Handle
Even experienced DIYers make errors when repairing tool handles. These mistakes can lead to repeat failures or even dangerous tool breakage. Avoiding them ensures your repair lasts and performs safely.
Using the Wrong Adhesive or Method
Not all glues are suitable for tool handle repairs. Standard white glue lacks waterproof properties and fails quickly. Matching the repair method to the handle material is crucial for long-term success.
- Wrong glue: Using craft glue instead of waterproof wood glue or epoxy.
- Wedging fiberglass: Causes splintering and weakens the handle.
- Epoxy on oily wood: Certain woods repel adhesives without proper cleaning.
Skipping Surface Preparation
Dirt, grease, and old adhesive prevent a strong bond. Always clean the handle end and tool eye thoroughly before applying any repair. Rubbing alcohol or acetone removes oils effectively without damaging wood or fiberglass.
Warning: Never sand fiberglass handles without a dust mask. Fiberglass dust is highly irritating to lungs and skin.
Rushing the Curing Process
Impatience is the most common cause of failed repairs. Using a tool before glue or epoxy fully cures weakens the bond permanently. Always respect manufacturer curing times, which typically range from 12 to 24 hours.
| Repair Method | Minimum Cure Time | Full Strength |
|---|---|---|
| Wood glue | 12 hours | 24 hours |
| Epoxy putty | 1 hour | 24 hours |
| Wedge only | Immediate | Immediate |
By avoiding these common pitfalls, your repair will be reliable and long-lasting. Patience and proper preparation are the keys to a professional-grade fix.
Conclusion: Master How to Fix a Loose Garden Tool Handle
Fixing a loose garden tool handle is a simple DIY task that saves money and prevents injuries. Whether you choose wedging, epoxy, or replacement, the right method restores safety and performance.
Inspect your tools regularly and address looseness immediately. Use the recommended products and follow the step-by-step guides for lasting results.
Put these expert tips into action today. Your tools will thank you, and your gardening will be safer and more enjoyable. Start with one repair and build your confidence.
Frequently Asked Questions about How to Fix a Loose Garden Tool Handle
What is the fastest way to fix a loose garden tool handle?
The fastest method is using a metal wedge. Drive it into a pre-cut slot at the top of the handle to expand the wood. This provides an immediate, secure fit with no drying time.
For fiberglass handles, use a quick-curing epoxy putty like J-B Weld KwikWood. It sets in 15 minutes and offers a permanent bond. Always wear safety glasses during any repair.
Can I use regular wood glue to fix a loose handle?
Standard wood glue is not recommended for tool handles. It lacks waterproof properties and fails under stress. Use a waterproof wood glue like Gorilla Wood Glue instead.
For the strongest bond, combine glue with a mechanical wedge. This dual approach ensures the handle stays tight even in wet conditions. Allow full curing time before use.
Why does my garden tool handle keep coming loose?
Wooden handles shrink as they lose moisture, especially in dry climates. This shrinkage creates gaps between the handle and the tool eye. Seasonal temperature changes also cause expansion and contraction.
Frequent use can also wear down the wood fibers. Regular oiling and proper storage prevent recurring looseness. Apply boiled linseed oil twice a year to maintain a snug fit.
Is it better to wedge or glue a loose tool handle?
Wedging is best for wooden handles with minor looseness. It is mechanical, reversible, and requires no drying time. Gluing with epoxy is superior for fiberglass handles or oversized eyes.
For maximum durability, combine both methods. Apply waterproof glue, insert the handle, and drive in a wedge. This hybrid approach offers both mechanical and chemical bonding.
How do I fix a loose fiberglass tool handle?
Fiberglass handles cannot be wedged because they will splinter. Instead, clean the handle end and tool eye with rubbing alcohol. Apply a two-part epoxy putty to both surfaces and insert the handle.
Align the tool head correctly and clamp it for 24 hours. For heavy-use tools, drill a pilot hole through the eye and handle, then add a sheet metal screw for reinforcement.
What tools do I need to tighten a loose hammer handle?
You will need a hammer, a hacksaw, a wooden or metal wedge, and waterproof wood glue. A vise is helpful for securing the tool during repairs. Safety glasses protect your eyes from flying debris.
For epoxy repairs, add two-part epoxy putty, rubbing alcohol, and a clamp. Having all tools ready before starting makes the process faster and reduces errors.
Can I fix a loose handle without removing the tool head?
Yes, for minor looseness you can drive a wedge directly into the existing slot. Apply wood glue to the wedge before inserting it for a stronger bond. This method works without full disassembly.
For epoxy repairs, you may need to partially separate the head. Inject epoxy into the gap using a syringe, then clamp the assembly. Allow adequate curing time before use.
How often should I inspect my garden tool handles?
Inspect handles every two to four weeks during active gardening season. Check for movement, cracks, and signs of rot. Early detection prevents dangerous failures and costly replacements.
After winter storage, perform a thorough inspection before the first use. Oil wooden handles and test all connections. Consistent maintenance keeps your tools safe and reliable all year.